

On a default WordPress theme, every blog post looks the same and you barely get a say in it. A single post template hands that control back. You design one layout in Elementor, point it at your posts, and every article on the site renders through that design with the title, date, categories, featured image, and body content dropped in for you.
This guide walks through building a single post template with the Master Addons Theme Builder, the same way it’s shown in the video. You’ll create the template, set its condition to Posts, design a two-column layout with a sidebar, and connect each element to live post data with Master Addons dynamic tags. No PHP, no theme files to edit.
What a single post template does #
WordPress uses a single template to render any individual post. The Master Addons single template builder swaps that default out for your own Elementor design. Build it once and the layout stays the same across hundreds of posts, while the content stays unique to each one.
Dynamic tags are what make it tick. Instead of typing a fixed title, you drop in a Post Title tag that prints whichever post someone is reading. Same with the published date, the categories, the featured image, and the body text. You design the frame, WordPress fills it in per post.
Before you start #
- WordPress with the Elementor page builder installed and active.
- Master Addons for Elementor installed and active. New to the plugin? Run through the installation guide first.
- The Theme Builder is a Pro feature. Check the pricing page for the current plan breakdown.
Step 1: Create a new template in the Theme Builder #
From the WordPress dashboard, head to Master Addons → Theme Builder. This screen lists every template you’ve built, grouped by type along the top: All, Header, Footer, Comment, Single, Archive, Search, and 404 Page. Click Add New Template.
A dialog opens on the General tab. Give the template a clear Template Title (here it’s “Single Post Template”), set the Template Type to Single, and leave the rest for the next step.
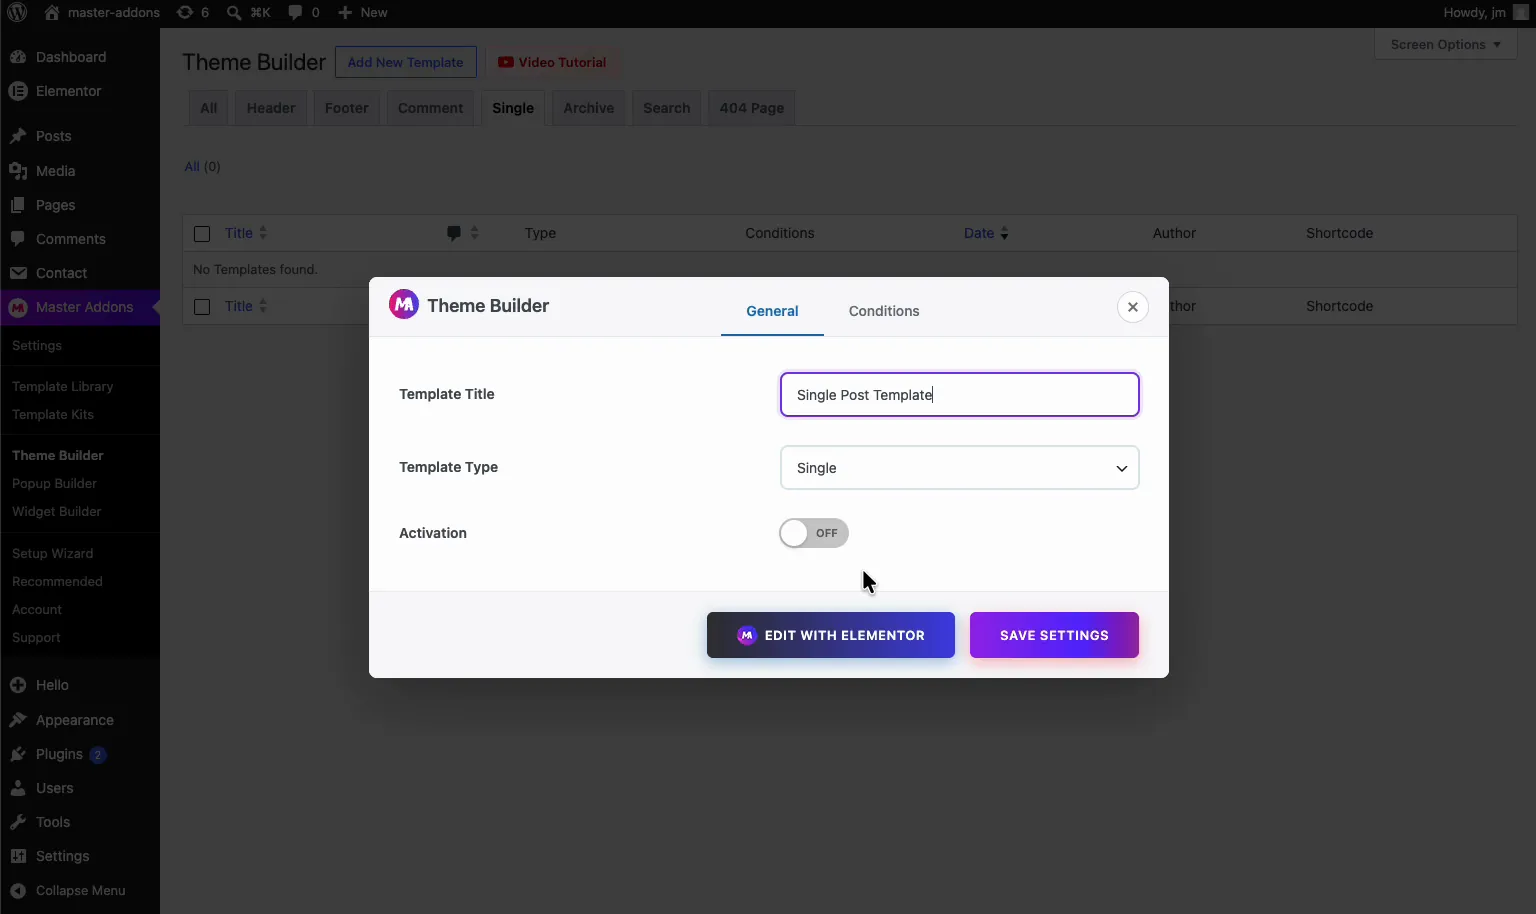
You can build a full set of templates from here, not just single posts. The docs cover the header, footer, and archive templates when you’re ready to design the rest of the site.
Step 2: Set the condition to Posts #
A dialog opens with two tabs, General and Conditions. The Conditions tab is where you tell Master Addons where this template should show up, under the heading Where Do You Want to Display Your Template?
Set the template type to Single, then build the rule: Include → Singular → Posts. That applies the template to every single post on your site. You can narrow it down later (one specific post, or a single category), but for a site-wide post layout, Posts is the rule you want.
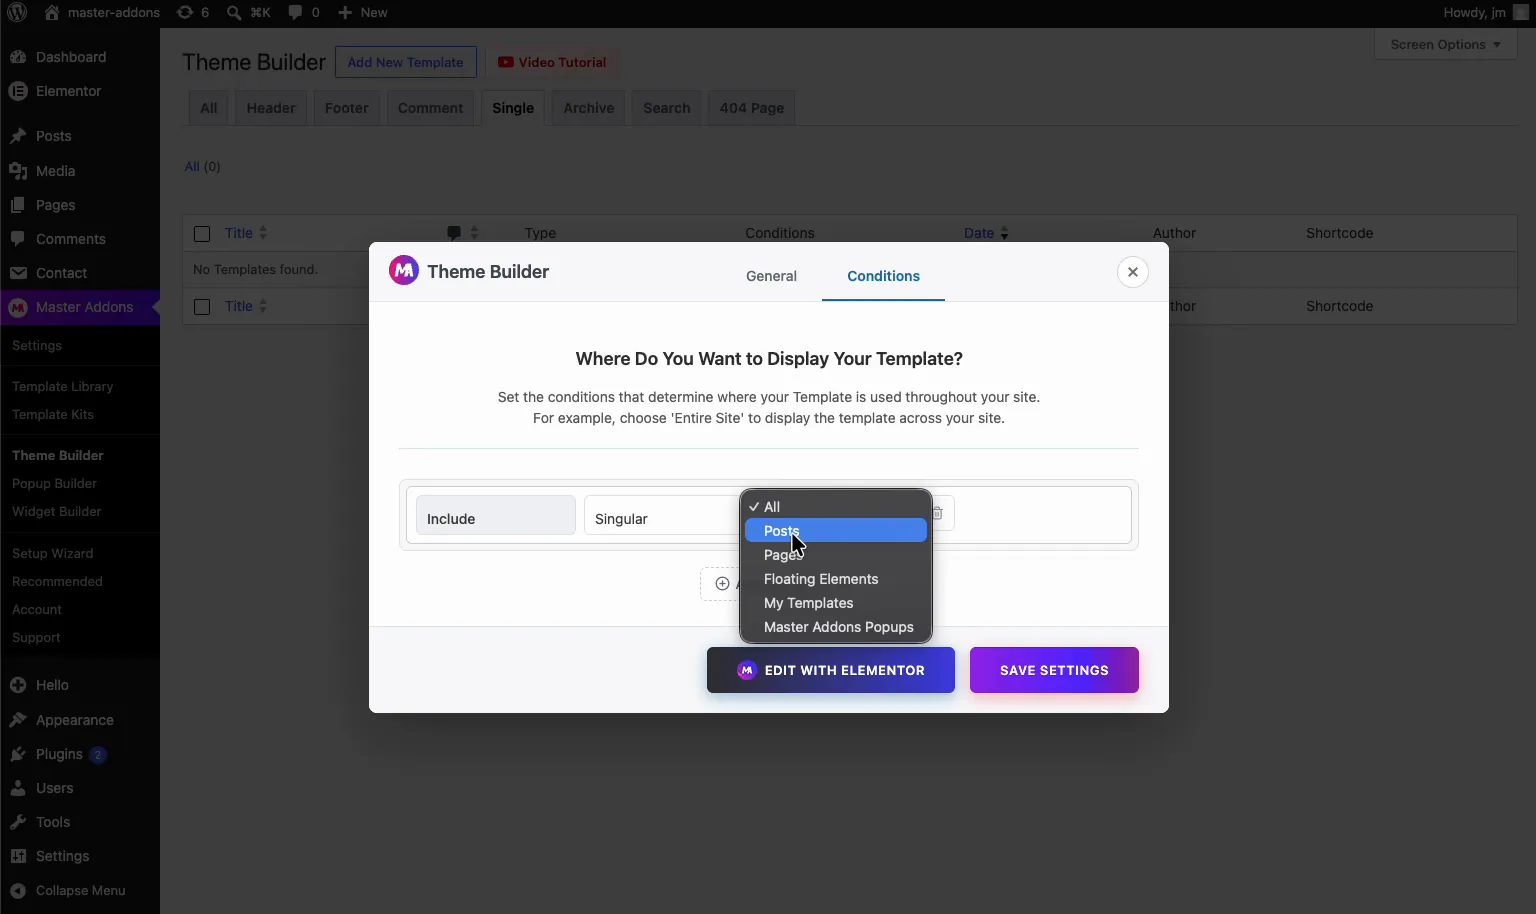
Click Save Settings to save and enable the template, then choose Edit with Elementor to open it. If you want the full breakdown of every option on this screen, the single template documentation covers it.
Step 3: Open the template in Elementor #
Master Addons loads the Elementor editor with your new template. The name, Single Post Template, sits in the top bar, so you always know you’re editing the post layout and not a regular page.
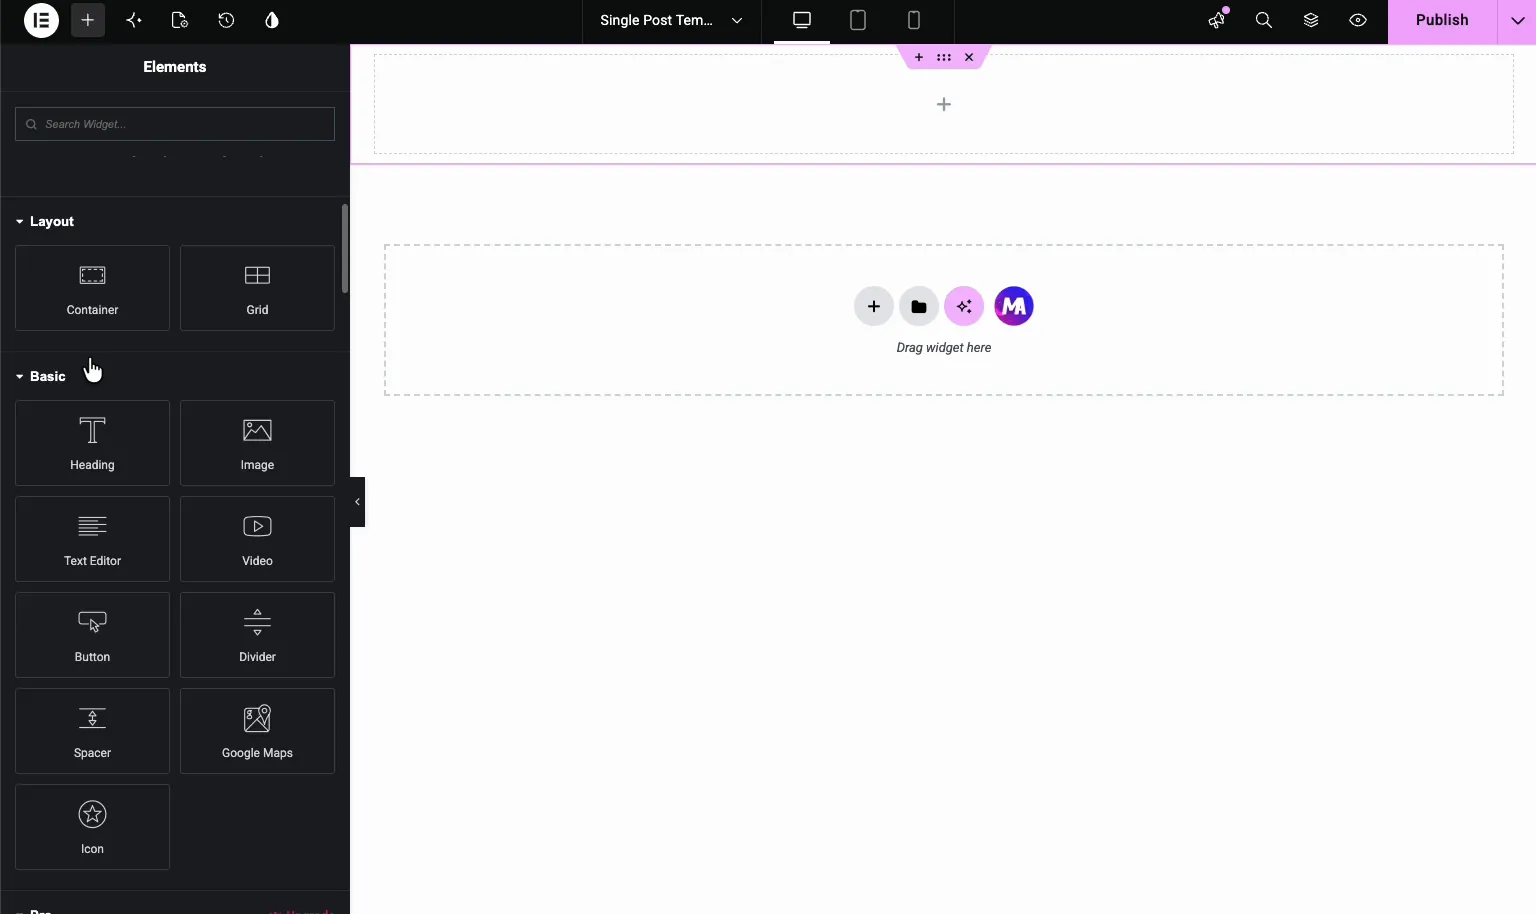
You start on a blank canvas. From here it’s plain Elementor: drag elements out of the left panel and arrange them into containers.
Step 4: Build a two-column layout with a sidebar #
Most blog posts run a content area next to a sidebar. To get that, drag a Container onto the canvas and split it into two columns, a wide one for the post body and a narrower one for the sidebar. Then drop your elements into each side.
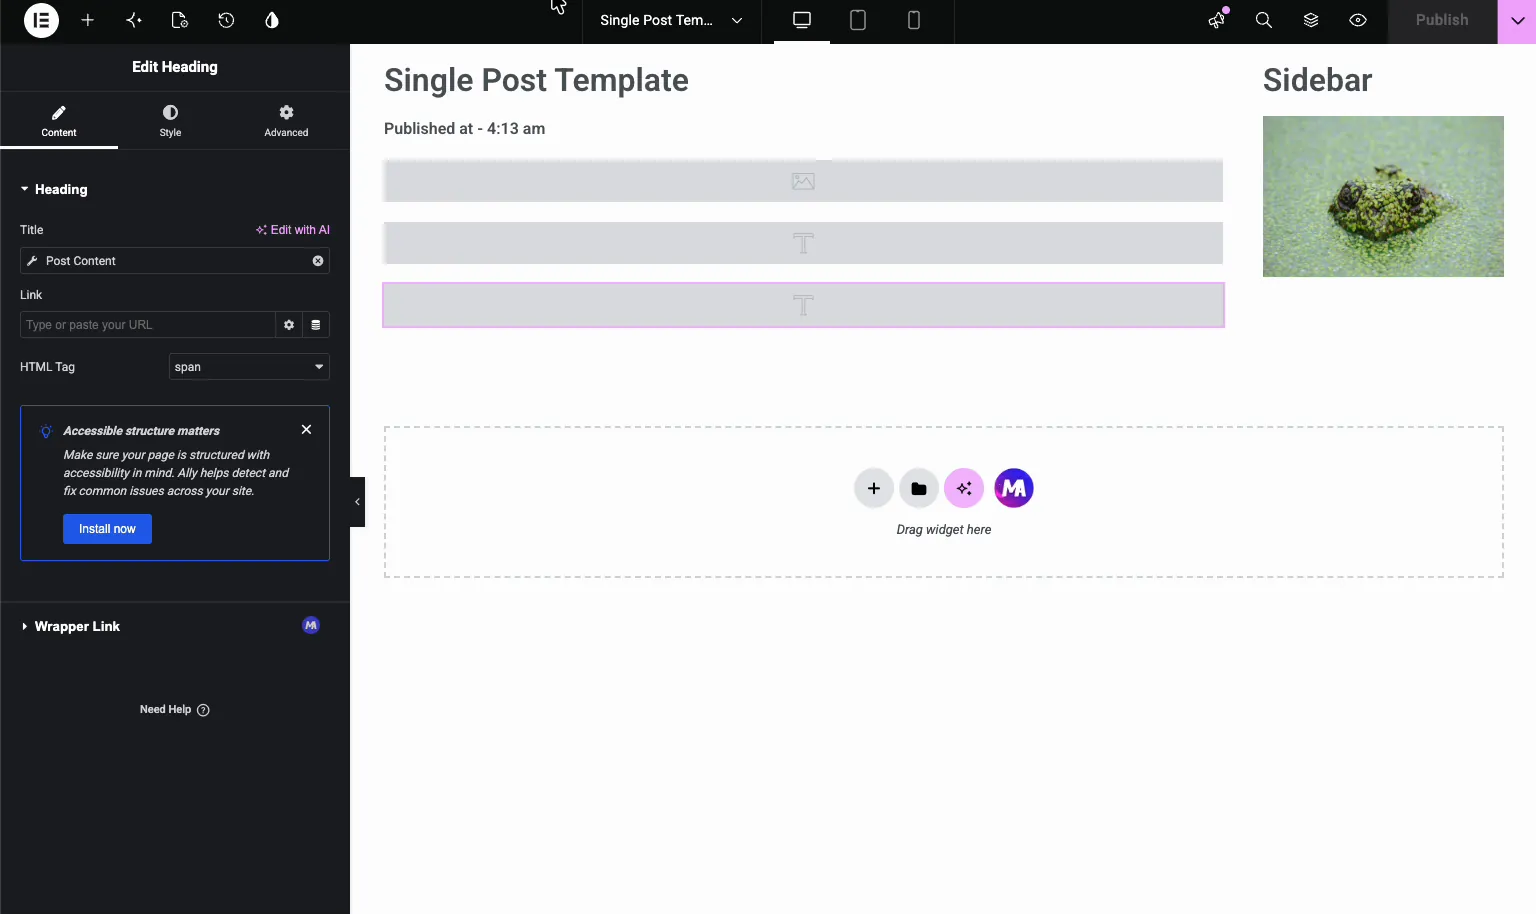
In the video, the sidebar holds a heading and an image, while the main column carries the post title, meta, and content. Use a Heading element for each text block so you can hang dynamic data off it in the next step.
Step 5: Connect elements to dynamic tags #
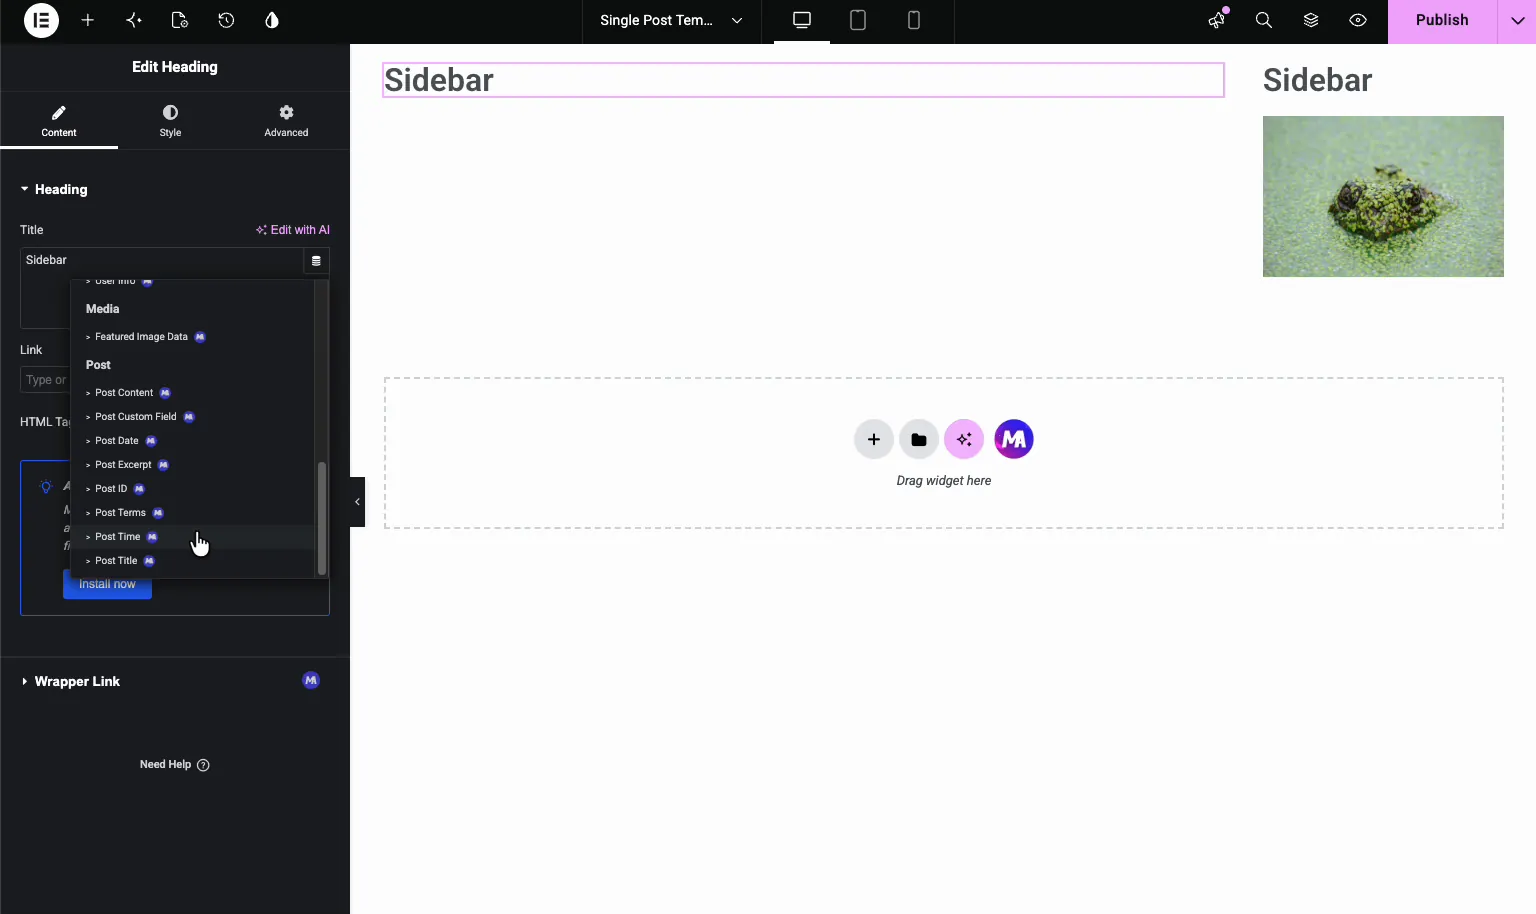
Here’s the part that makes the template work across every post. Select a Heading element, and in the Title field click the small dynamic tags icon (the database icon on the right of the field). A menu of Master Addons dynamic tags opens, grouped by source: Archive, Author, Comments, Site, Media, and Post.
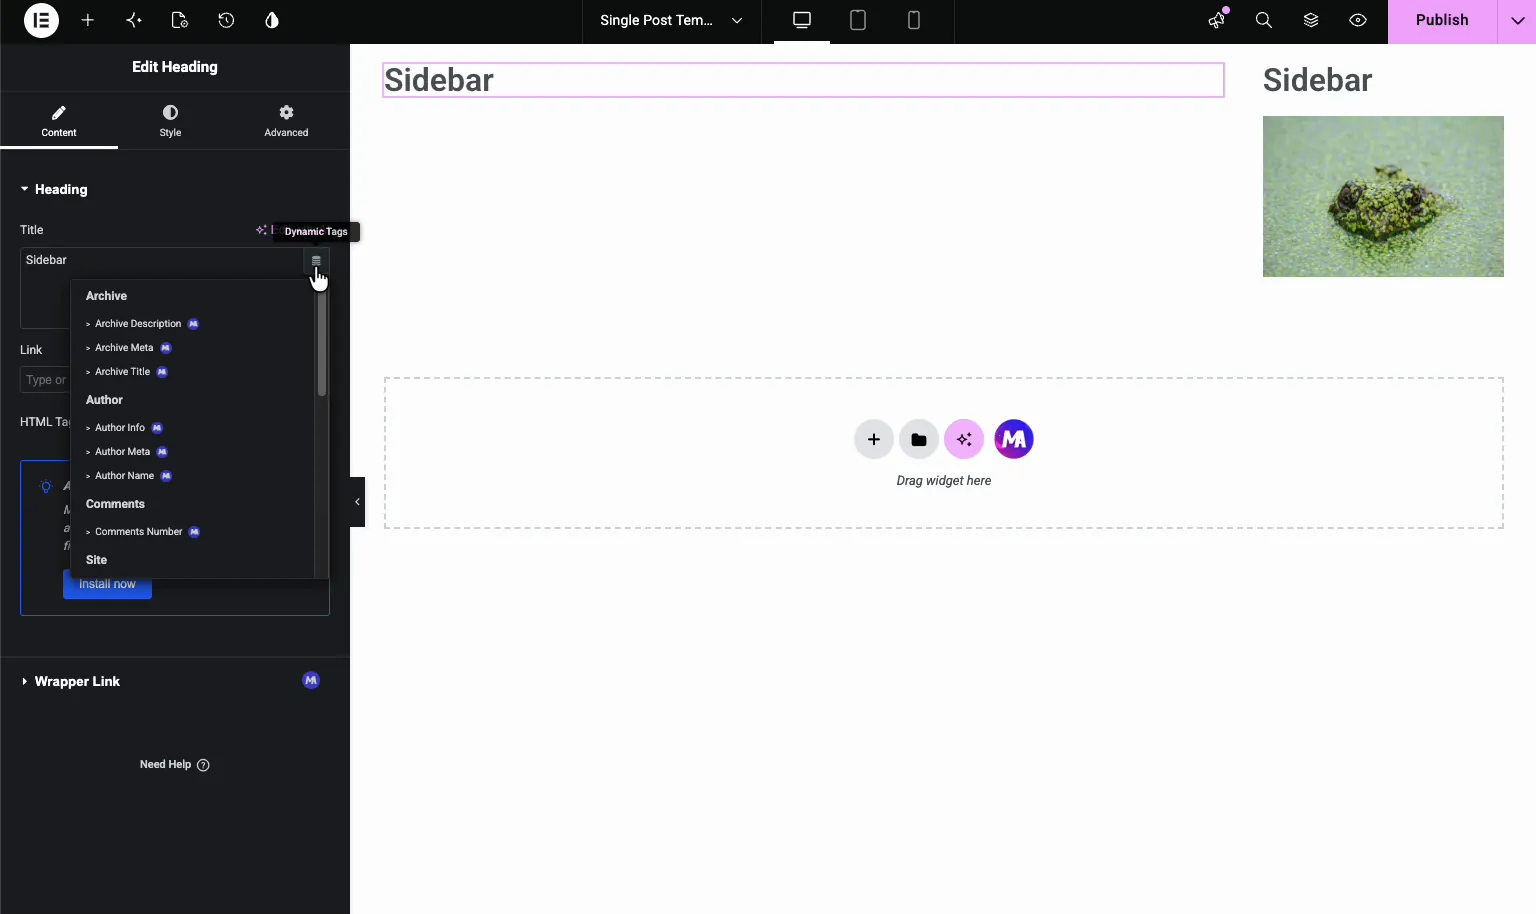
Open the Post group and you’ll find the tags that matter for a blog post:
- Post Title — prints the title of the current post.
- Post Content — outputs the full post body.
- Post Excerpt — the short summary.
- Post Date and Post Time — when the post went live.
- Post Terms — the categories or tags assigned to the post.
- Featured Image Data, Post ID, and Post Custom Field for the advanced cases.
Pick Post Title for your main heading. The element swaps the placeholder text for the live title right away. Do the same for each element: title, date, categories, and content all come from their matching tag.
Step 6: Configure each dynamic tag #
Every dynamic tag has its own settings, reached through the wrench or gear icon on the tag. This is where you shape the exact output.
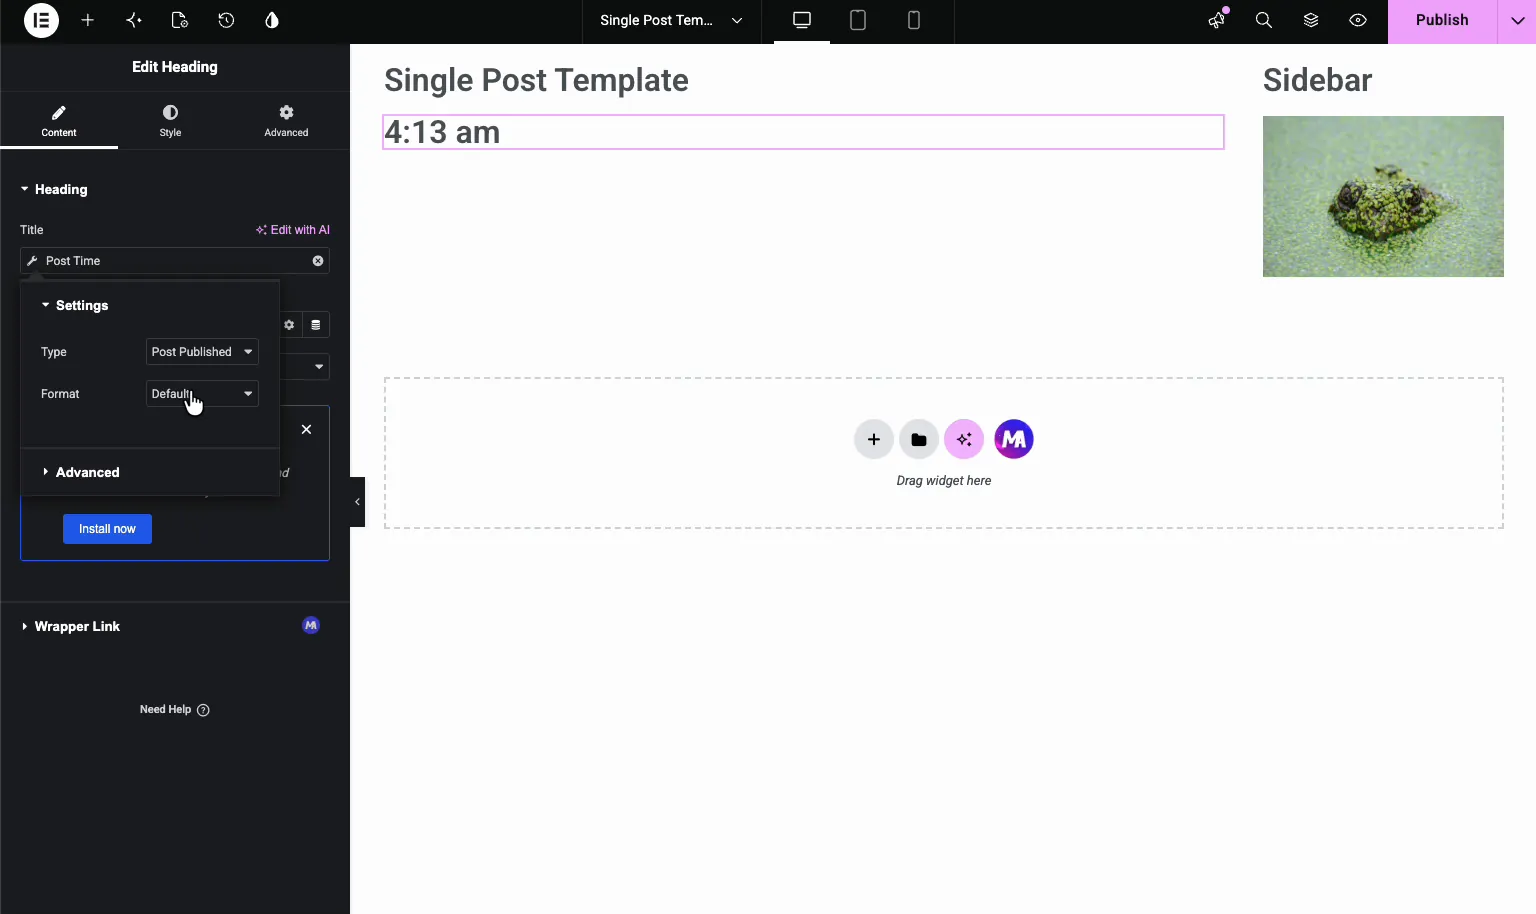
Take Post Time. Its Settings let you pick the Type (Post Published or Post Modified) and the Format of the time. The default format prints something like “4:13 am”.
Open the Advanced section of any tag and you get three more fields: Before, After, and Fallback. Type “Published at -” into Before and the output reads “Published at – 4:13 am”. Fallback is worth setting too. It fills in when a post has no value for that tag, so an empty field never leaves a hole in the layout.
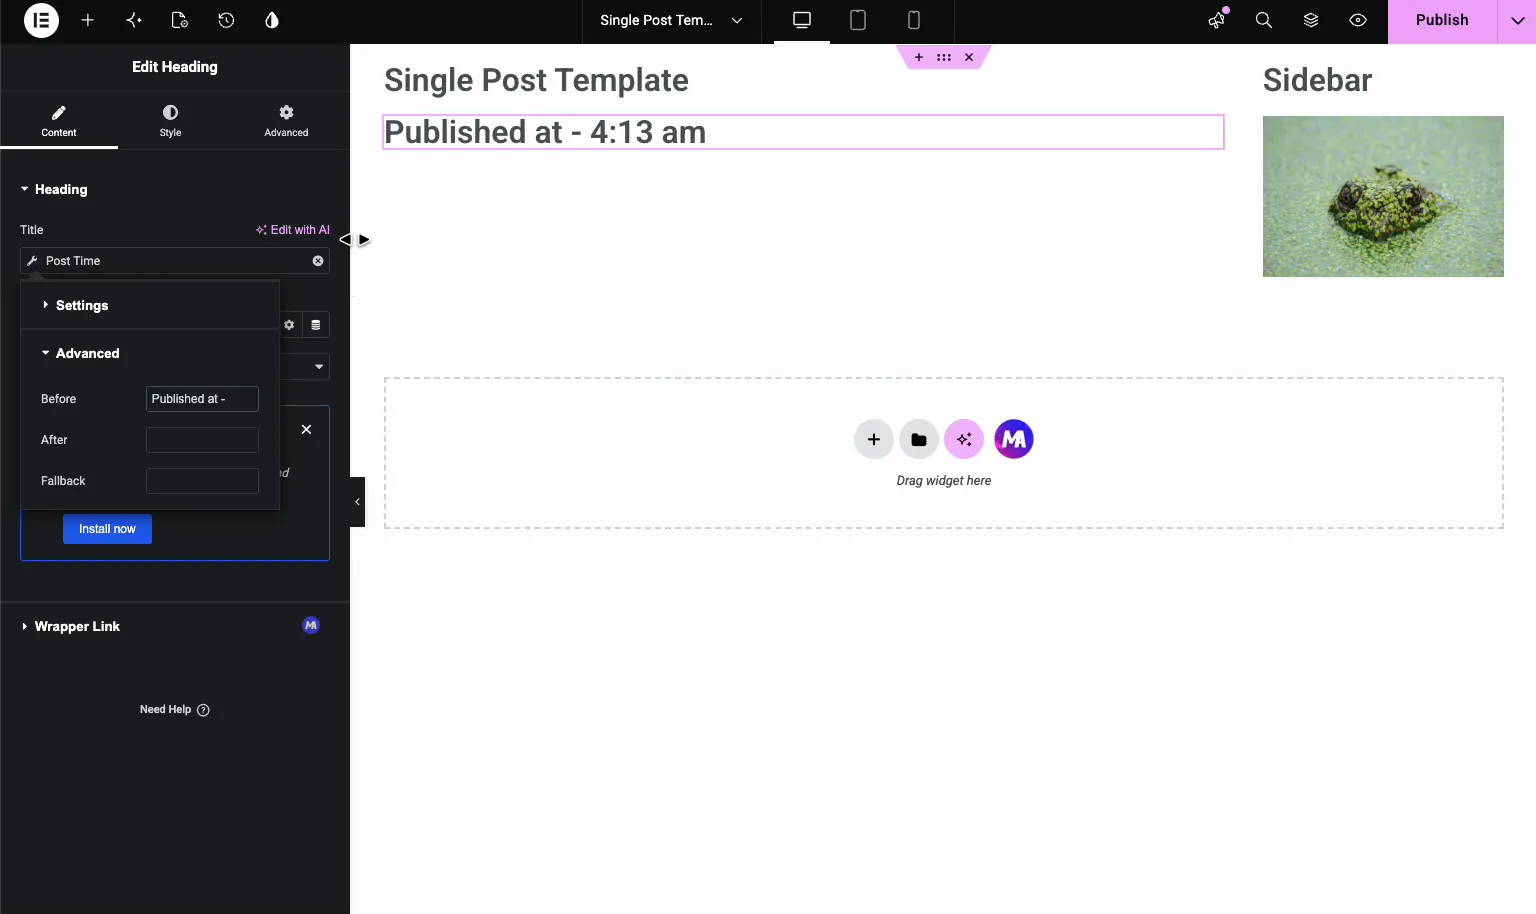
That same Before/After/Fallback pattern works on every tag. It’s how you add a label like “Posted in” before the categories without retyping it on each post.
Step 7: Add post categories with Post Terms #
For the category line, drop in another Heading and set its dynamic tag to Post Terms. In the tag settings, the Taxonomy dropdown lets you choose Categories or Tags, and the Separator field sets the character between multiple terms (a comma, a slash, whatever you prefer).
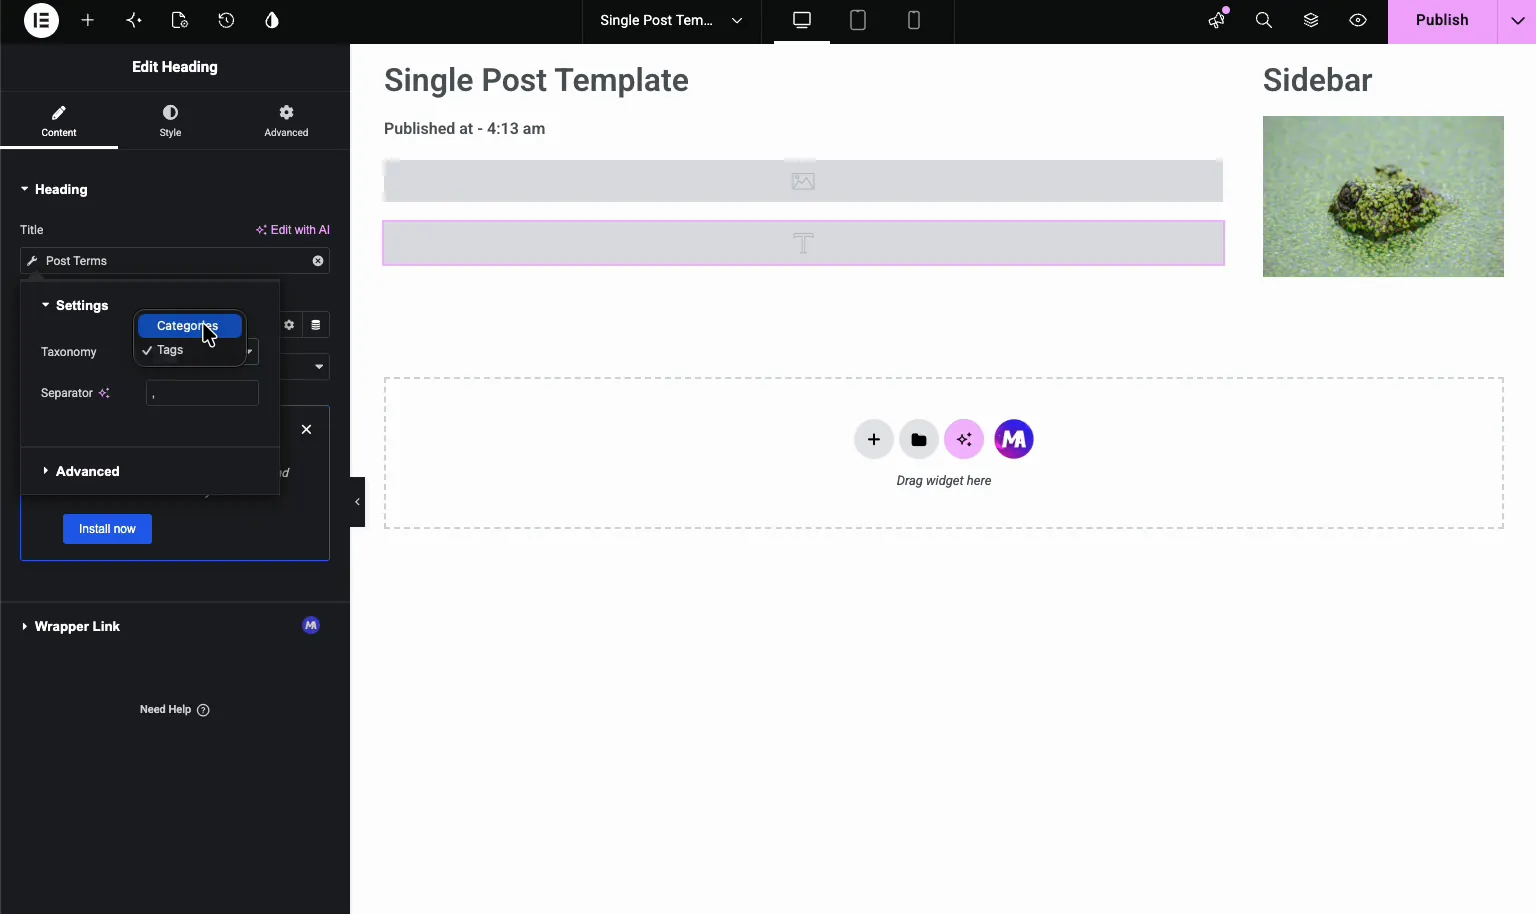
Now your post meta runs on its own. The published time and the category both update per post without you touching them again.
Step 8: Add the featured image and post content #
Finish the main column by stacking the pieces in reading order: featured image up top, then the title, the meta line (time and categories), and the Post Content block that prints the body of each article. Use an Image element bound to Featured Image Data for the top image, and a Heading or text element bound to Post Content for the body.
Step 9: Publish and preview #
Hit Publish to push the template live, then open any post on your site. It now renders through your design: your featured image, the dynamic title, the “Published at” line, the category, and the full content, all in the layout you built.
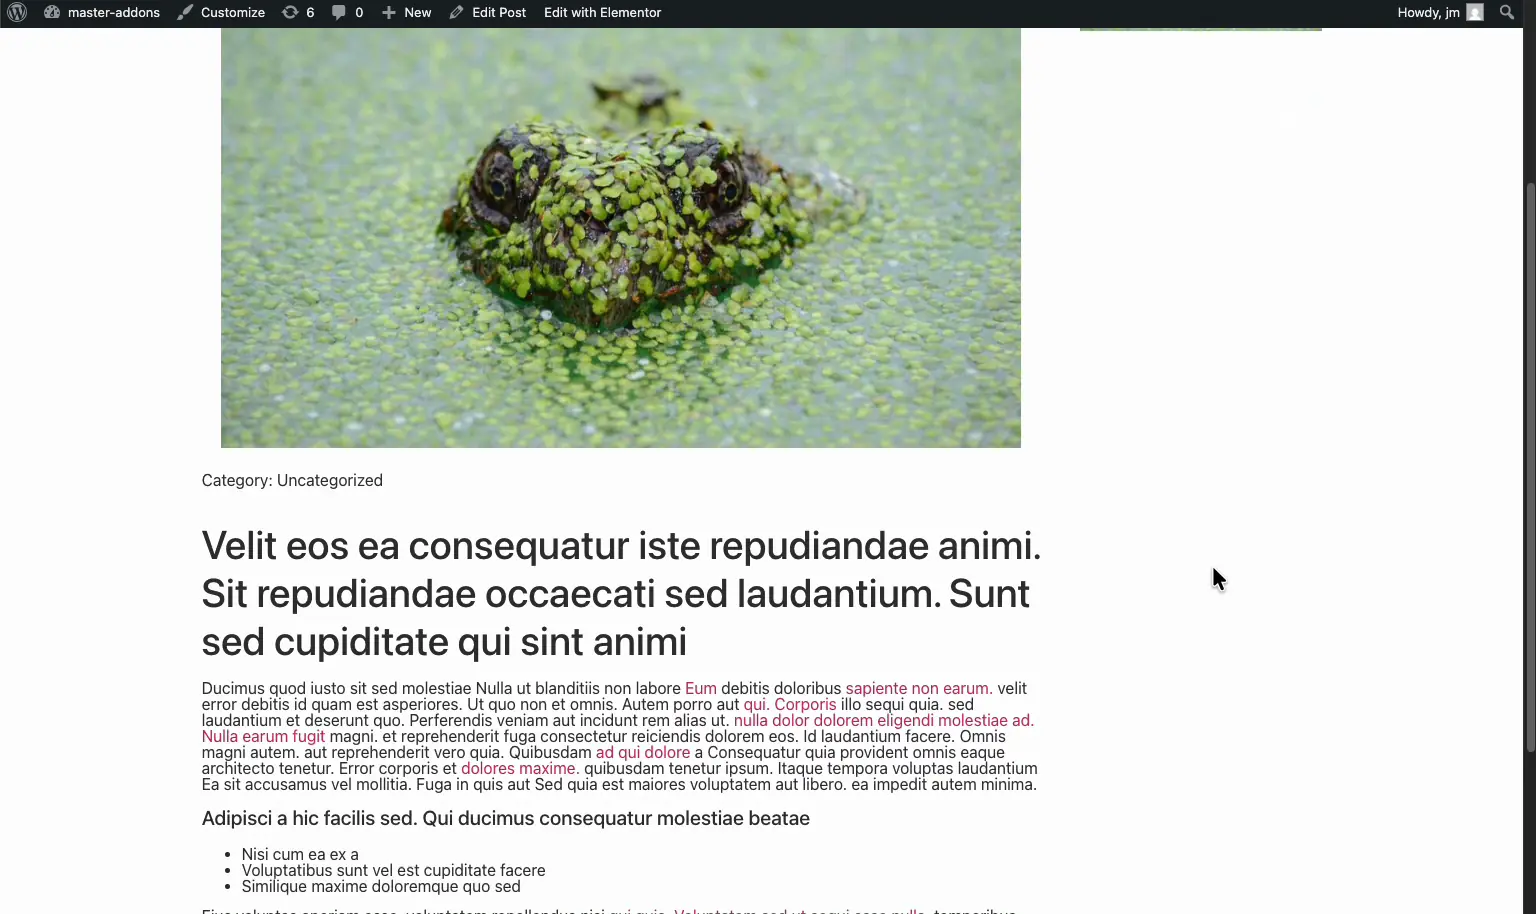
Since the data is dynamic, you never open this template again when you publish. Write the post, hit publish, and the single template formats it for you. One thing worth checking after you publish: load a couple of older posts too, not just your newest one, since a post missing a featured image or category is where a forgotten Fallback usually shows up.
Tips for a clean single post template #
- Use the right element for the data. Headings for the title and meta, an Image element for the featured image, a content block for the body.
- Set a Fallback on tags that can be empty. Posts without a category or excerpt won’t leave a gap in the layout.
- Add labels with Before/After, not by typing. “Published at -” or “Posted in” belong in the tag’s Advanced fields so they stay consistent across every post.
- Match the Posts condition to your goal. Singular → Posts covers all posts, or narrow it to one category if you want a different layout per section.
- Build the rest of the set. Pair the single template with a header and footer template for a fully designed site.
- Template not applying? The troubleshooting guide covers the common visibility fixes.
Frequently Asked Questions #
How do I create a single post template in Elementor?
Go to Master Addons → Theme Builder, click Add New Template, set the type to Single, and add the condition Include → Singular → Posts. Save and edit with Elementor, then design your layout using Master Addons dynamic tags for the title, date, and content.
What are dynamic tags in Master Addons?
Dynamic tags pull live data from the current post into your Elementor elements. Instead of typing a fixed title, you attach a Post Title tag that prints whatever post is being viewed. Master Addons offers tags for the title, content, date, terms, featured image, author, and more.
How do I add the publish date to a single post template?
Add a Heading element, click the dynamic tags icon in the Title field, and choose Post Time from the Post group. In the tag’s Advanced settings, type a label like “Published at -” into the Before field to format the output.
How do I show post categories in the template?
Use a Heading bound to the Post Terms dynamic tag. In its settings, set the Taxonomy to Categories and choose a Separator for posts with more than one category. The categories then update automatically for every post.
Is the Theme Builder free in Master Addons?
The Theme Builder is part of the Master Addons Pro feature set. See the pricing page for the current plan breakdown and which features are included at each tier.
Wrapping up #
A single post template gives every article on your site one consistent layout while keeping each post’s content its own. Build it once in the Master Addons Theme Builder, set the Posts condition, lay it out with containers, and wire it up with dynamic tags. Have a look through the rest of the Master Addons widgets and extensions to build out the full site.


