The WYSIWYG field puts WordPress’s rich text editor into a custom widget you build with the Master Addons Widget Builder. Editors get bold, italics, links, lists and the Add Media button, the same toolbar they use when writing a post. Your widget receives formatted HTML and prints it with one token. It’s the field for any text region where a plain Textarea would flatten the formatting.
WYSIWYG is one of the fields you can use in the free version’s Widget Builder. The free plugin includes a limited Widget Builder, and the full set of fields comes with Master Addons Pro.
What the WYSIWYG field does #
- Adds the rich text editor to your widget’s panel in Elementor, with Visual and Code tabs and an Add Media button.
- Saves what editors write as HTML.
- Prints it through a token such as
{{ member_bio }}, filtered the way WordPress filters post content. - Keeps the formatting: paragraphs, bold, italics, links, lists and headings all render.
- Takes a Default Value, which can include markup, so a fresh widget shows a worked example.
New to the builder? Read the Widget Builder overview first, then come back with a widget open.
Before you start #
- WordPress with Elementor installed and active.
- Master Addons for Elementor installed and active. The installation guide covers setup.
- A widget open in the Widget Builder. The example in this guide is a “Team Member” widget: Text fields for the name and role, and a WYSIWYG field named
member_biofor the biography.
How to add a WYSIWYG field #
- Go to Master Addons > Widget Builder and open your widget.
- Add a section on the Content tab, for example “Member”.
- Type
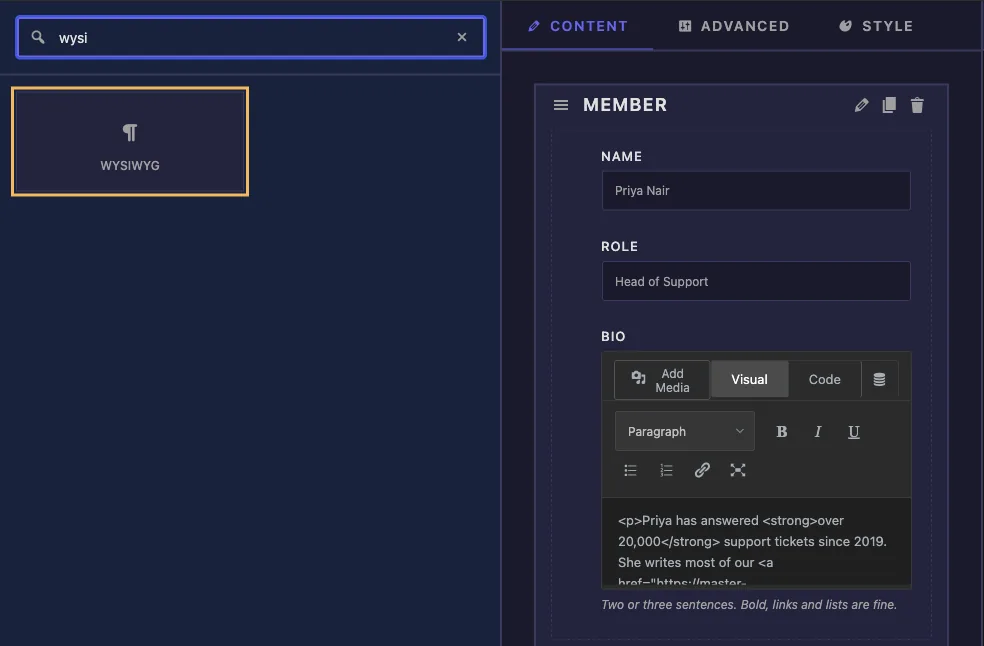
wysiin the field search box on the left. - Drag WYSIWYG into the section. Click the pencil on the field to open its settings.
WYSIWYG field options explained #
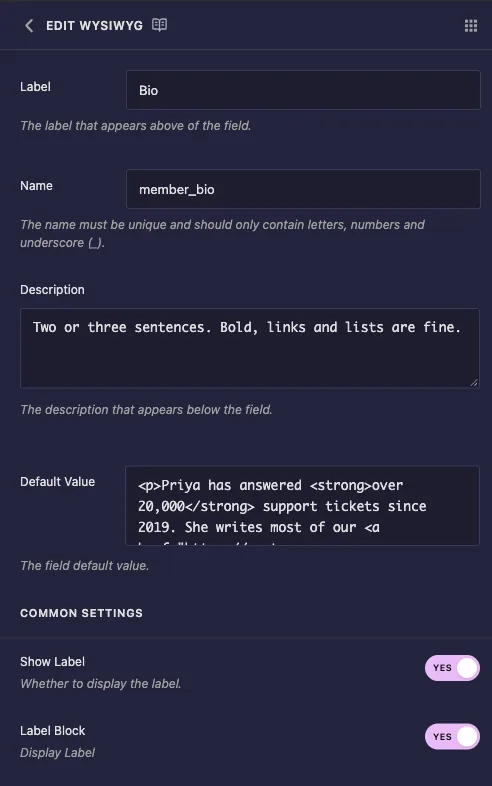
- Label: the text above the editor in Elementor, for example “Bio”. The field starts out labelled “Content”.
- Name: the field’s unique ID and the name of its token. Use letters, numbers and underscores only, for example
member_bio. - Description: a hint shown under the editor in Elementor. Use it to set expectations, such as “Two or three sentences. Bold, links and lists are fine.”
- Default Value: the starting content. This is a plain text box, so type the HTML yourself, for example a paragraph with a
strongtag and a link.
Label Block is on by default here, which is what you want: the editor needs the full width of the panel. Leave Selector empty, since a block of text isn’t a CSS value.
The rest of Common Settings behaves as on other fields, including Conditions if the region should only appear when another field is set.
In our tests the field card inside the builder showed the default value as raw HTML in its little preview editor. That’s only the builder’s own preview. Elementor renders the same default as formatted text.
Print the content in your template #
One token places the whole region. Wrap it in a container you can style, and guard it so an empty field leaves no stray wrapper:
<article class="tm">
  <p class="tm-name">{{ member_name }}</p>
  <p class="tm-role">{{ member_role }}</p>
  {% if member_bio %}
  <div class="tm-bio">{{ member_bio }}</div>
  {% endif %}
</article>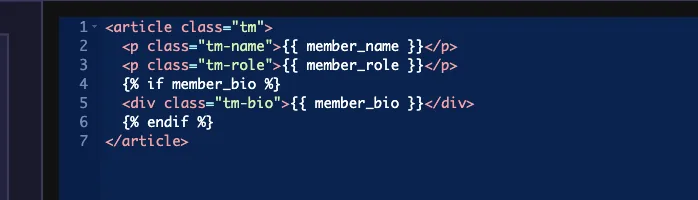
Style the region from the CSS panel by targeting the tags the editor writes:
.tm-bio p { margin: 0 0 .75em; line-height: 1.6; }
.tm-bio p:last-child { margin-bottom: 0; }
.tm-bio a { color: #4338ca; }
.tm-bio ul { margin: 0 0 .75em 1.1em; }
Don’t add raw to a WYSIWYG token. The plain token already renders the formatting, and raw only removes the safety filter.
What the filter keeps and drops #
The value goes through the same filter WordPress uses for post content. In our tests, headings, paragraphs, strong, em, lists, links and even inline style attributes came through unchanged. An iframe was removed, and a script tag was removed without running.
One detail to know before you hand the widget to a client: when a script tag was pasted through the Code tab, the tag was stripped but the JavaScript inside it stayed on the page as plain text, so a line of code showed up in the middle of the bio. Nothing warns you. Tell editors to paste text, not embeds, and check the Code tab if stray characters appear on a page.
Use the WYSIWYG control in Elementor #
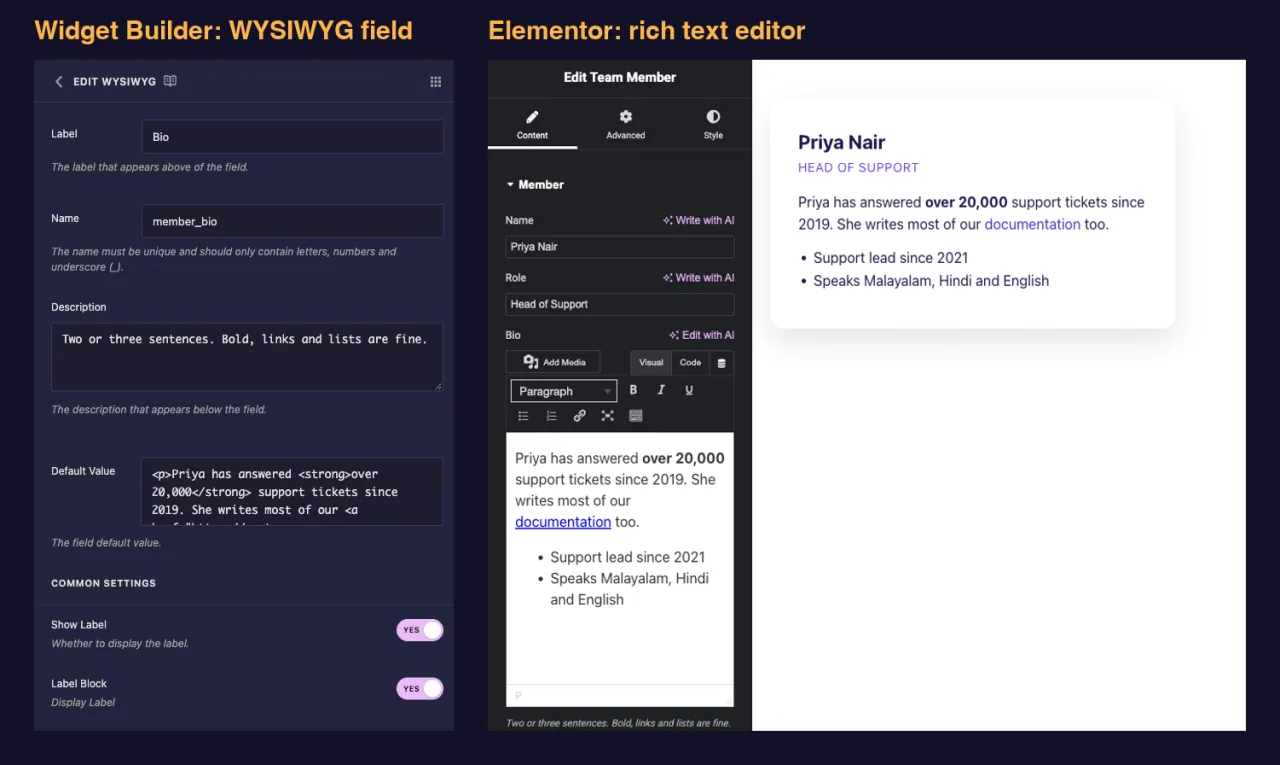
Add the widget to a page, or reload the editor if the page was already open. The field shows the full editor under your label: Add Media, the Visual and Code tabs, a paragraph format dropdown, bold, italics, underline, lists, a link button and fullscreen.
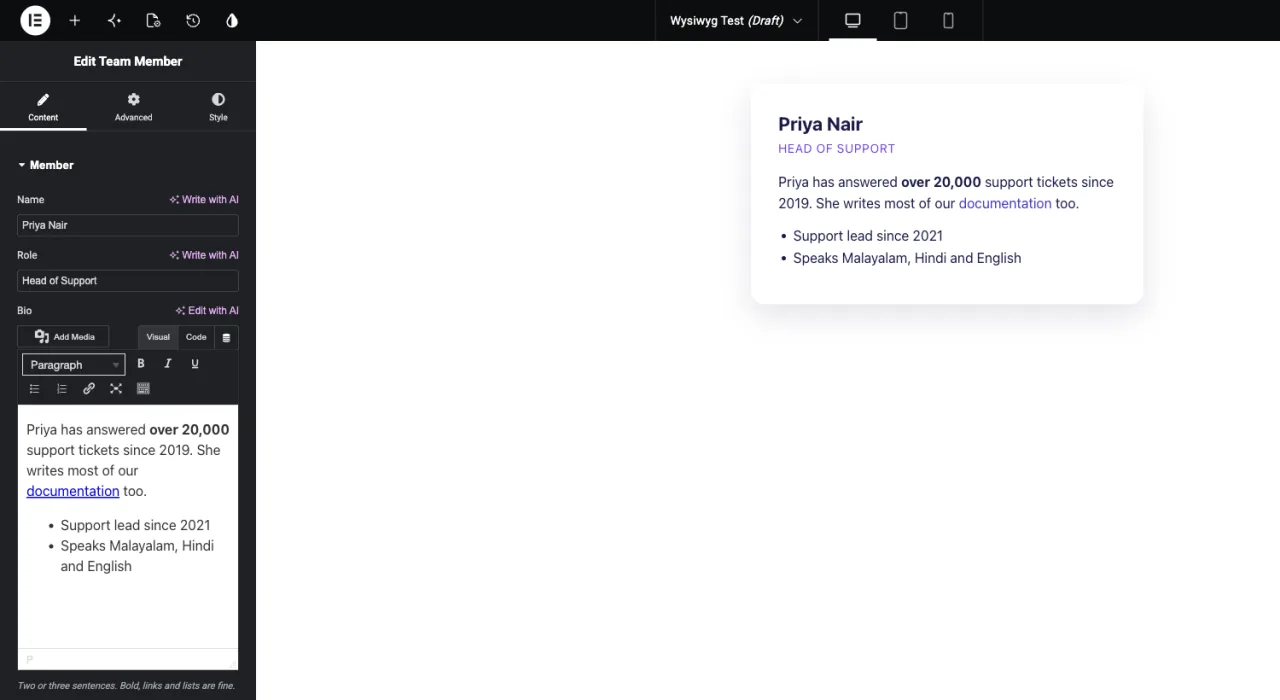
Editors write the way they do in a post. The preview updates as soon as focus leaves the editor. The Code tab shows the underlying HTML, which is handy for cleaning up pasted formatting.
Here is the finished card on the front end, with the bold phrase, the link and the list all coming from the field:

Common use cases #
- Team member biographies and author boxes.
- Feature or service descriptions that need a list or a bold phrase.
- Testimonial bodies with a quote and a line of attribution.
- Any long-form text region in a card, box or panel widget.
Tips for working with the WYSIWYG field #
- Give it a Default Value with real markup. Editors then see the kind of content the region expects, and you know the formatting renders.
- Set the length in the Description. “Two or three sentences” saves a lot of layout fixes later.
- Style the tags, not the text. Rules for
p,aandulinside your wrapper class keep the region consistent whatever editors write. - Guard the token with
{% if %}so an empty field doesn’t leave an empty wrapper on the page. - Only plain text? The Textarea field is lighter. For pasted markup or embed snippets, use the Code field.
Frequently Asked Questions #
Is the WYSIWYG field available in the free version?
Yes. WYSIWYG is one of the fields you can use in the free version’s Widget Builder. The full set of Widget Builder fields comes with Master Addons Pro.
Do I need the raw filter to keep the formatting?
No. The plain token renders paragraphs, bold, links, lists and headings. Adding raw only removes the safety filter.
Can the Default Value include HTML?
Yes. The Default Value box is a plain text box, so type the markup yourself, such as a paragraph with a strong tag and a link.
Why is a line of JavaScript showing up in my text?
A script tag was pasted through the Code tab. The tag is removed, but its contents stay behind as text. Delete that part of the content in the Code tab.
What’s the difference between WYSIWYG, Textarea and Code?
WYSIWYG gives editors a formatting toolbar and stores HTML. Textarea stores plain text. Code gives a syntax-highlighted editor for pasting markup.
Wrapping up #
Drop a WYSIWYG field into a Content section, give it a clear label, a helpful Description and a Default Value with real markup, then print the token inside an {% if %} guard and style the tags from the CSS panel. Editors get the toolbar they already know and your widget gets clean formatted HTML. For plain text use the Textarea field, for pasted snippets the Code field, and check pricing for what each plan includes.