

What is Comment Form? Your theme draws the comment section at the bottom of each post, and it often looks plain next to a page you designed in Elementor. The Comment template in the Master Addons Theme Builder replaces it. You build the template in Elementor with the MA…
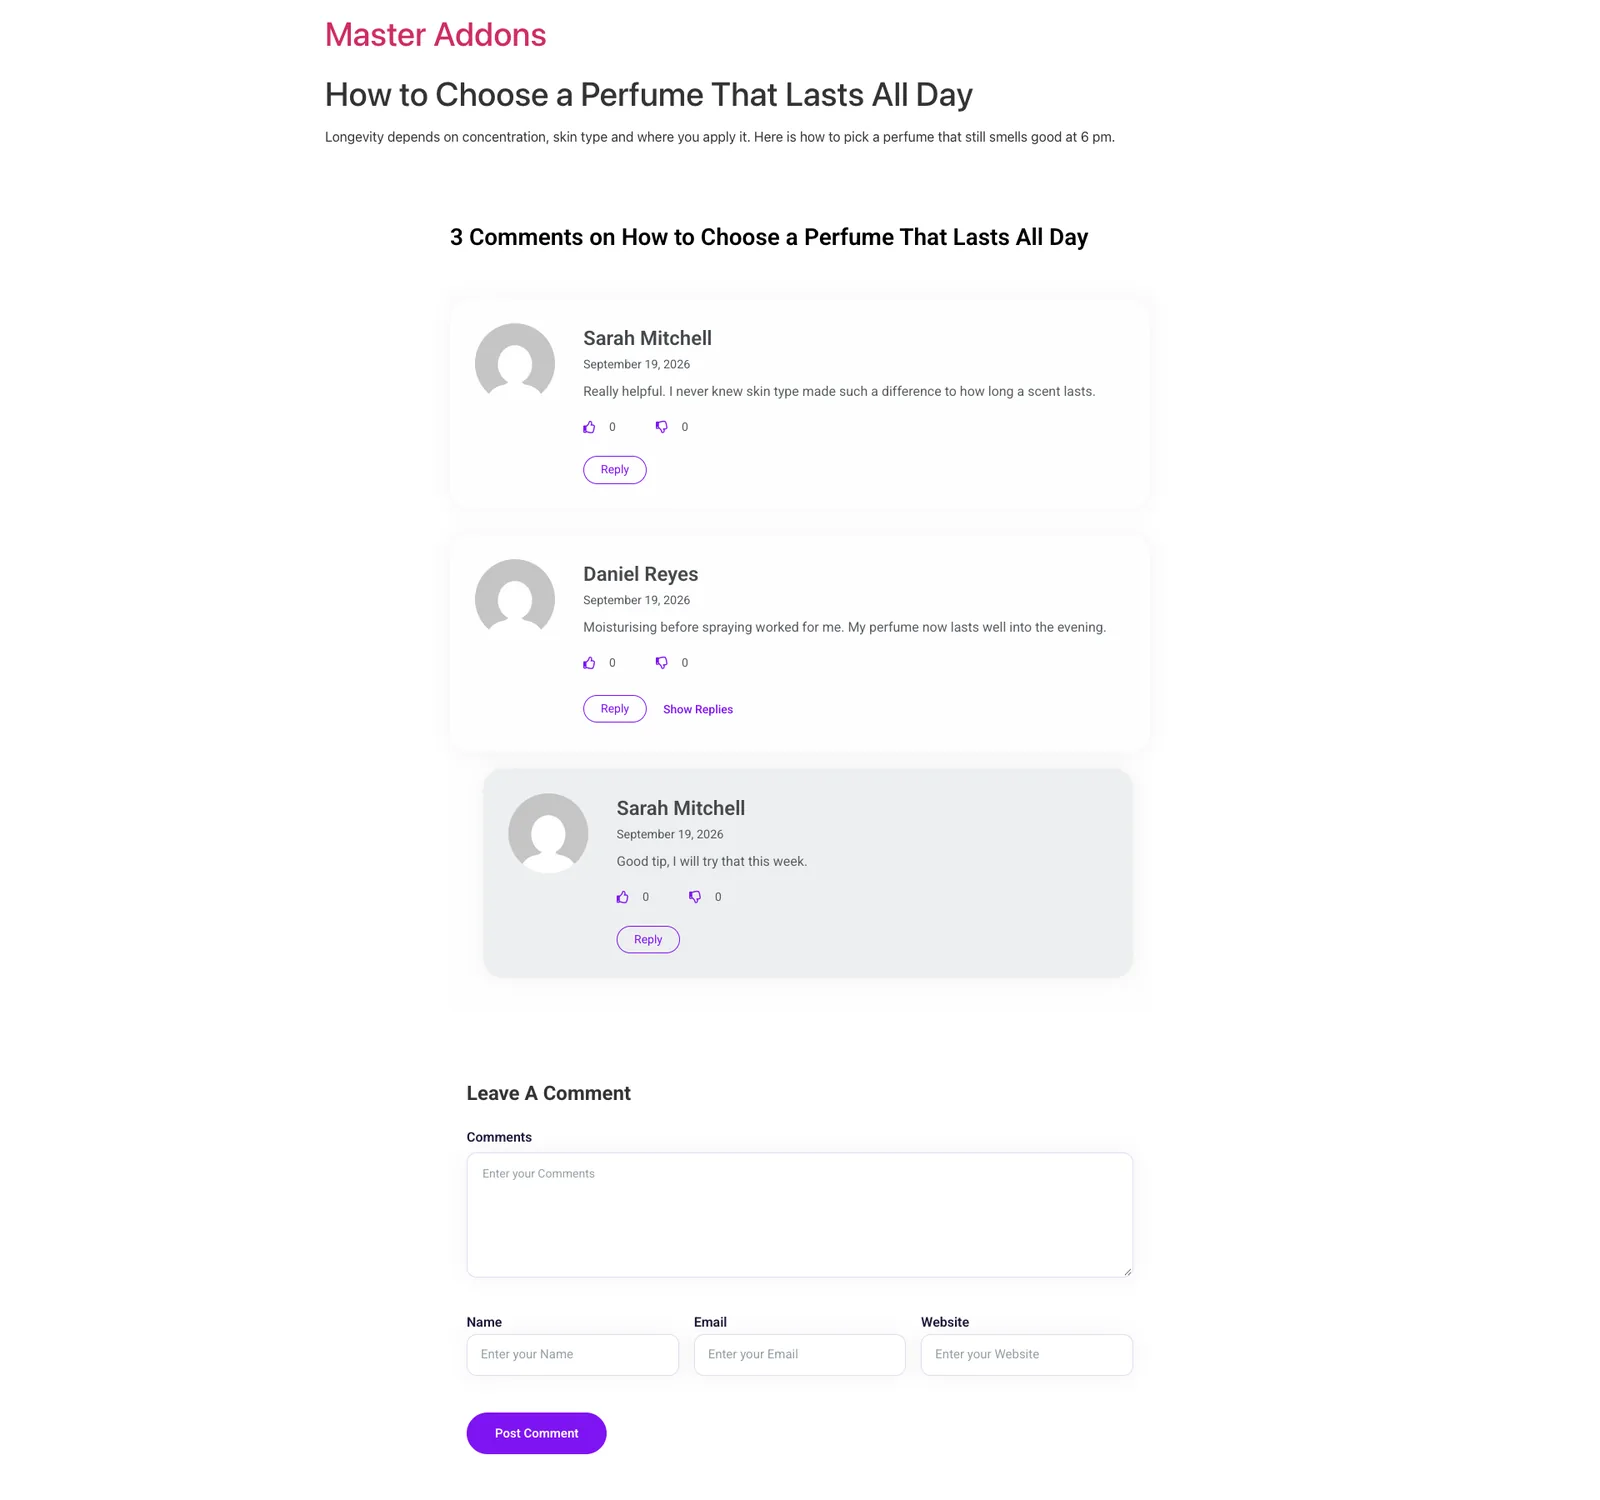
Your theme draws the comment section at the bottom of each post, and it often looks plain next to a page you designed in Elementor. The Comment template in the Master Addons Theme Builder replaces it. You build the template in Elementor with the MA Comments widget, which shows the comment list, replies, like and dislike buttons, and the Leave A Comment form, and you choose which posts or pages it appears on.
Before you start #
- Install and activate Elementor and Master Addons. The Comment template type is part of the free version, along with Header and Footer.
- Comments must be open on the posts you want to use it on. Check Settings > Discussion and the Discussion box on each post.
- If you plan to turn on reCaptcha, add your keys first under the API settings in Master Addons > Settings.
Step 1: Create a new template #
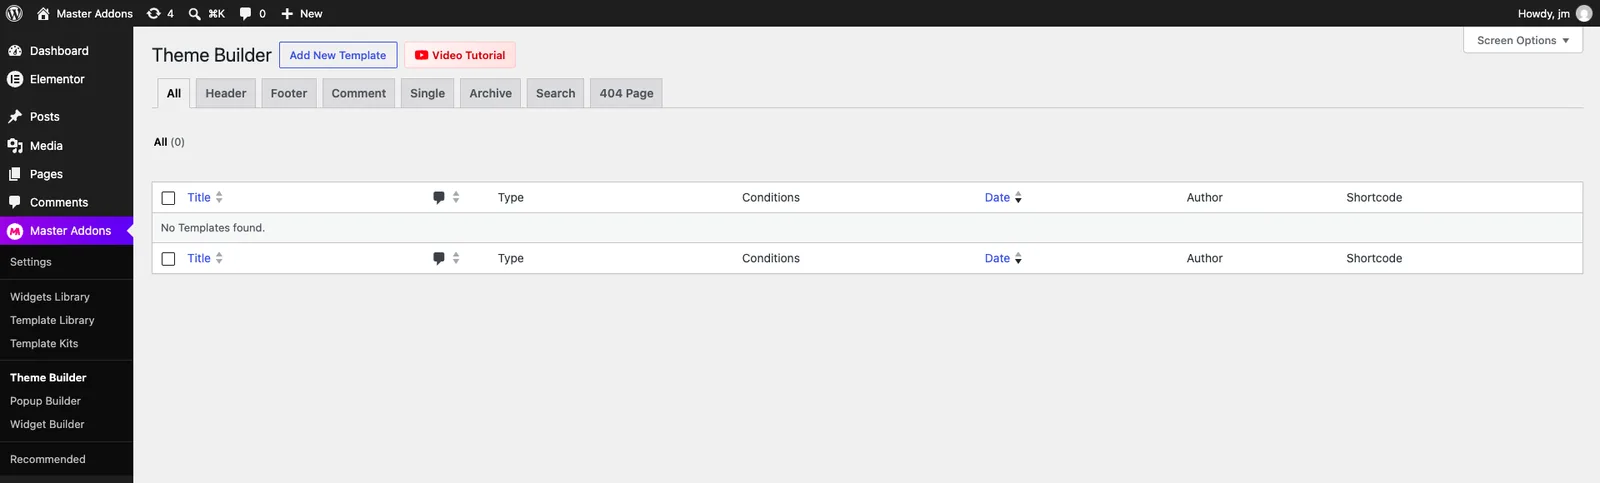
Go to Master Addons > Theme Builder and click Add New Template.
Step 2: Choose the Comment type #
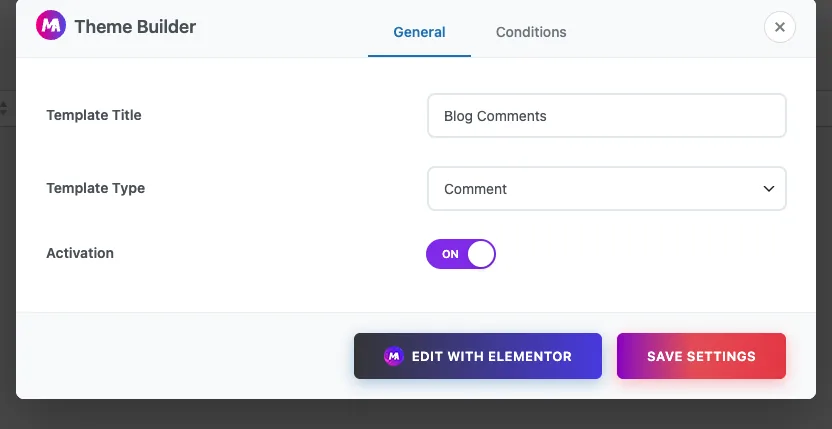
On the General tab:
- Template Title: a name for your own reference, such as “Blog Comments”.
- Template Type: choose Comment from the Theme group.
- Activation: switch it ON.
Step 3: Choose where the comment section appears #
Open the Conditions tab. A new Comment template starts with Include > Singular > All, which covers every post and page. To limit it to blog posts, change the third dropdown to Posts. You can also choose Pages or another post type.
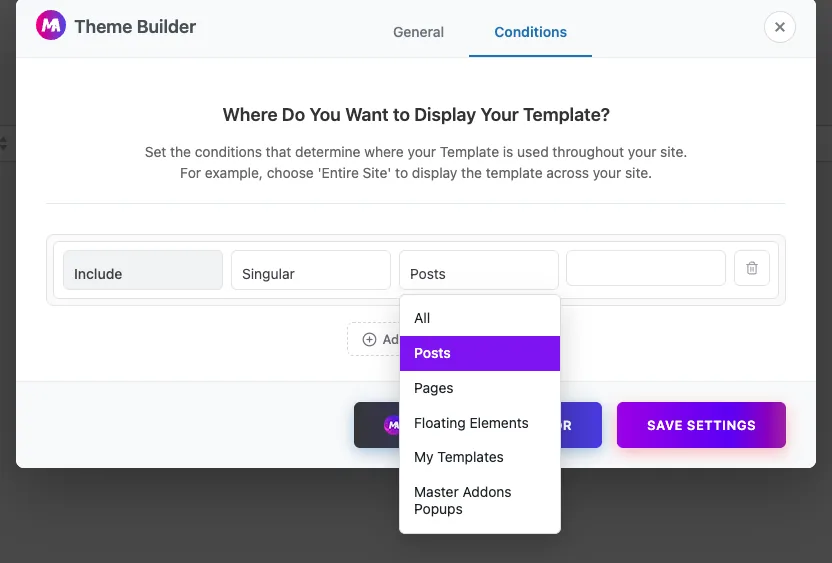
After you pick a post type, a fourth field appears where you can select individual posts. Leave it empty to cover all of them. With Master Addons Pro you can also use Add Condition, for example to add an Exclude rule for posts that should keep the default comments.
Click Save Settings, or Edit with Elementor to open the template in the editor.
Step 4: Add the MA Comments widget #
In Elementor, drag the MA Comments widget onto the page. The editor fills it with sample comments so you can see the layout while you style it. Your real comments appear on the live post.
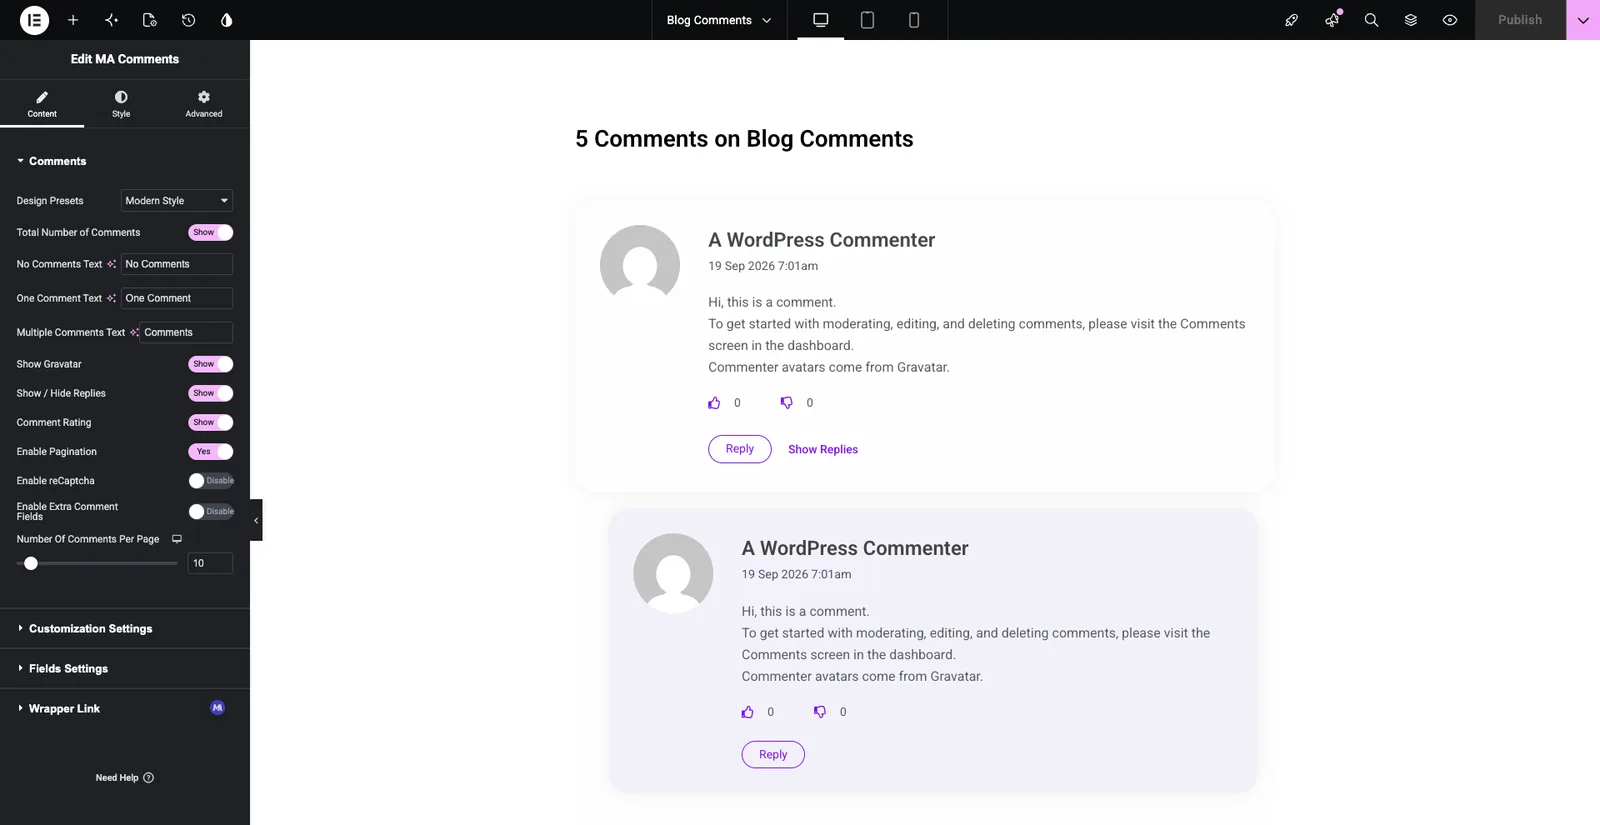
The Comments section of the Content tab holds the main switches:
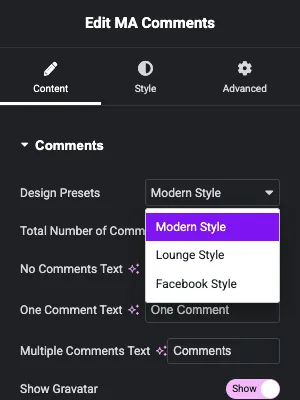
- Design Presets: the starting layout. Choose Modern Style, Lounge Style or Facebook Style, then adjust the look in the Style tab.
- Total Number of Comments: shows the count above the list. You can change the text used for zero, one and several comments.
- Show Gravatar: shows each commenter’s profile picture.
- Show / Hide Replies: shows replies under the comment they answer, with Show Replies and Hide Replies links.
- Comment Rating: adds like and dislike buttons with a counter to every comment.
- Enable Pagination and Number Of Comments Per Page: split long discussions into pages. The default is 10 comments per page.
- Enable reCaptcha: adds spam protection to the form. It needs your API keys in Master Addons settings.
- Enable Extra Comment Fields: lets you add your own fields to the form.
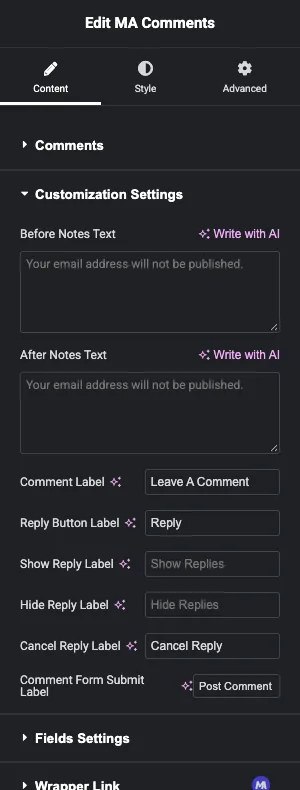
Step 5: Change the labels and form fields #
Open Customization Settings to change the wording visitors see. Here you set the Before Notes and After Notes text around the form, the Comment Label heading (Leave A Comment by default), the Reply, Show Replies, Hide Replies and Cancel Reply labels, and the text on the submit button (Post Comment by default).
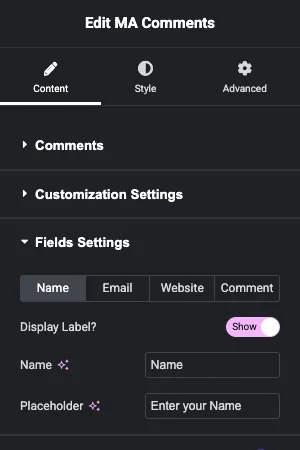
Open Fields Settings to adjust the four standard fields. Each one has its own tab: Name, Email, Website and Comment. For every field you can show or hide the label, rename it and change the placeholder. The Website tab also lets you remove the field completely, and the Comment tab can show a short notice next to the comment box.
With Enable Extra Comment Fields switched on, a new Extra Comment Fields section appears. Each extra field has a label, a field type (Text, Textarea or Checkbox), a placeholder, a Required switch and an error message. The answers are saved with the comment, and you can read them in an Extra Comment Fields box when you edit the comment under Comments in WordPress.
Step 6: Style the comment section #
The Style tab is split into Comment Box, Comment Item, Reply Settings, Comment Form, Comment Submit Button and Pagination. Use them to set colors, typography, spacing and borders for each part. Click Publish when you’re happy with it.
Step 7: Check it on a post #
Go back to Master Addons > Theme Builder and open the Comment tab. The template should show type Comment, a green Active badge and your condition, for example Include > Singular > All Posts.

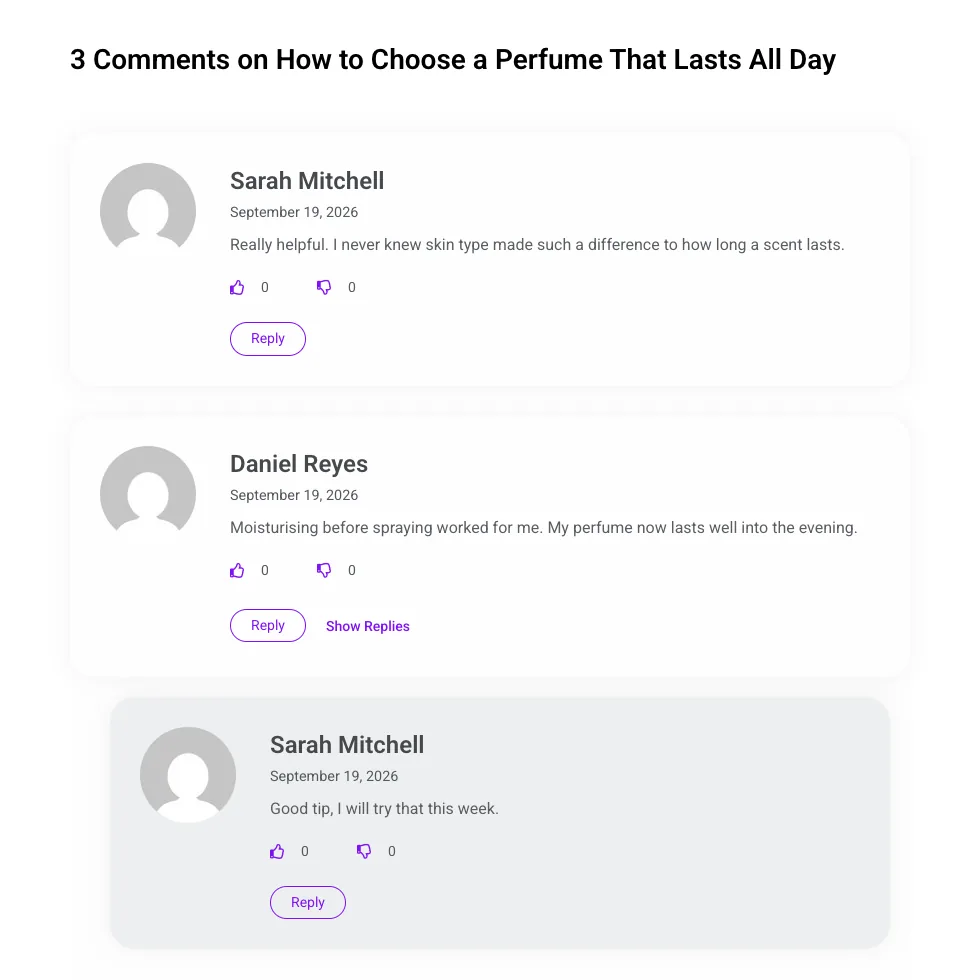
Then open a post that has comments. You should see the comment count, each comment in its own card with the like and dislike buttons, replies indented below their parent, and a Reply button on every comment.
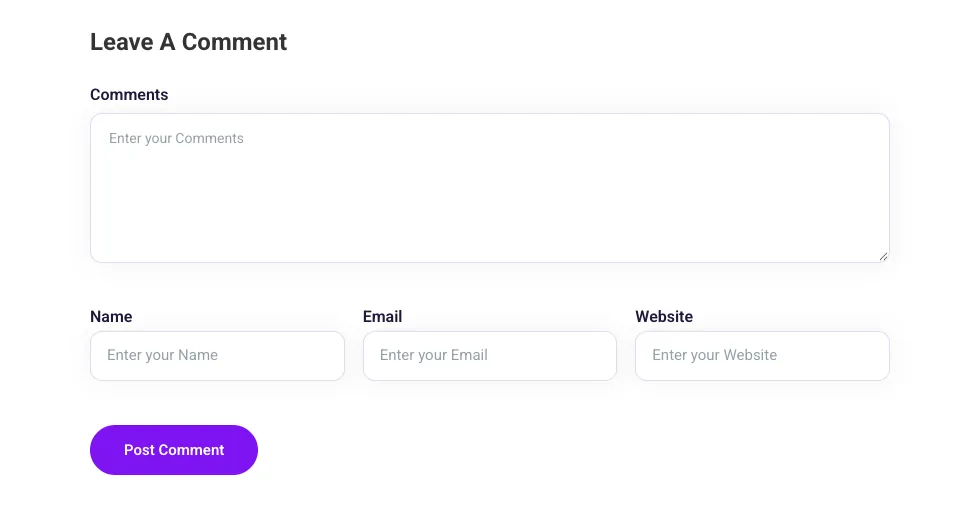
Below the list is the Leave A Comment form with the comment box and the Name, Email and Website fields. Open the post in a private window as well, because WordPress shows a shorter form to logged-in users.
Tips #
- Set the condition to Posts if your pages don’t take comments. That keeps the template off your landing pages.
- Use the Before Notes Text for a short line about moderation or privacy, for example “Your email address will not be published.”
- Keep extra fields few and mostly optional. People are less likely to comment when the form asks for a lot.
Frequently asked questions #
Is the Comment template free? #
Yes. Header, Footer and Comment are the Theme Builder template types included in the free version of Master Addons.
Why don’t I see the new comment section on my post? #
Check that comments are open on that post, that the template’s Activation is ON, and that the condition includes the post type. Then clear your page cache and reload.
Where do I find answers to extra comment fields? #
Open the comment under Comments in WordPress. The answers are listed in the Extra Comment Fields box on the edit screen.
Do I need reCaptcha keys? #
Only if you switch on Enable reCaptcha. Add the keys in the API settings of Master Addons first, then enable it in the widget.
Why does the editor show “A WordPress Commenter”? #
The editor uses sample comments so you can style the widget before any real comments exist. The live post shows its own comments.
Wrapping up #
To replace your theme’s comment section, create a Comment template under Master Addons > Theme Builder, set it to your posts, add the MA Comments widget and adjust its presets, labels and fields. For the rest of your post layout, see the Single, Header and Footer guides, or read more about the Master Addons Theme Builder.


