

An Elementor Mailchimp form is one of the quickest ways to turn a visitor into a subscriber. The Mailchimp widget in Master Addons for Elementor places a signup form from the free MC4WP: Mailchimp for WordPress plugin into your layout, and it gives you two ways to run it: show the saved MC4WP form, or write your own field markup. Below I cover both, from the Elementor panel through to the live page.
How the Elementor Mailchimp form widget works #
The widget renders a Mailchimp signup form in Elementor by displaying a form from MC4WP: Mailchimp for WordPress, a free plugin by ibericode. MC4WP holds the API key, the audience, double opt-in and the form messages. The widget adds a Form Type choice: show the saved MC4WP form, or replace its fields with your own markup. MC4WP processes the signup either way.
Before you start #
- WordPress with Elementor installed and active.
- Master Addons for Elementor installed and active. If you haven’t installed it yet, follow the installation guide.
- The Mailchimp widget enabled in the Master Addons options panel.
- The free MC4WP: Mailchimp for WordPress plugin installed and active. Without it, the widget shows a “MailChimp for WordPress is Not Activated!” notice instead of a form.
- A Mailchimp account and an API key.
Add the widget to your page #
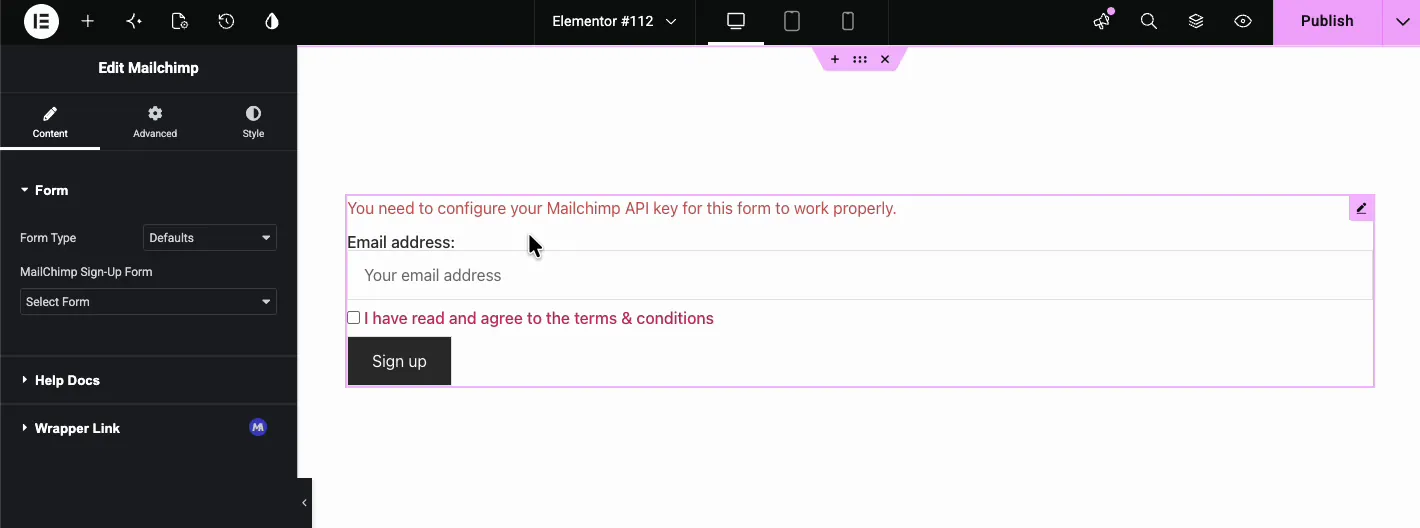
Open the Elementor editor and search the widgets panel for “Mailchimp.” Drag the Master Addons Mailchimp widget into the section where you want the form. It shows your MC4WP form, here an email field, a terms checkbox and a “Sign up” button. The red line about the Mailchimp API key comes from MC4WP. Only logged-in admins see it, and it disappears once MC4WP is connected.
Use a default Mailchimp signup form #
In the Content tab, leave Form Type on Defaults. The MailChimp Sign-Up Form dropdown lists the forms saved in MC4WP, like “opt in.” Pick the one you want and the widget renders it on the canvas with the fields you set under MC4WP > Form. The free version of MC4WP includes one form.
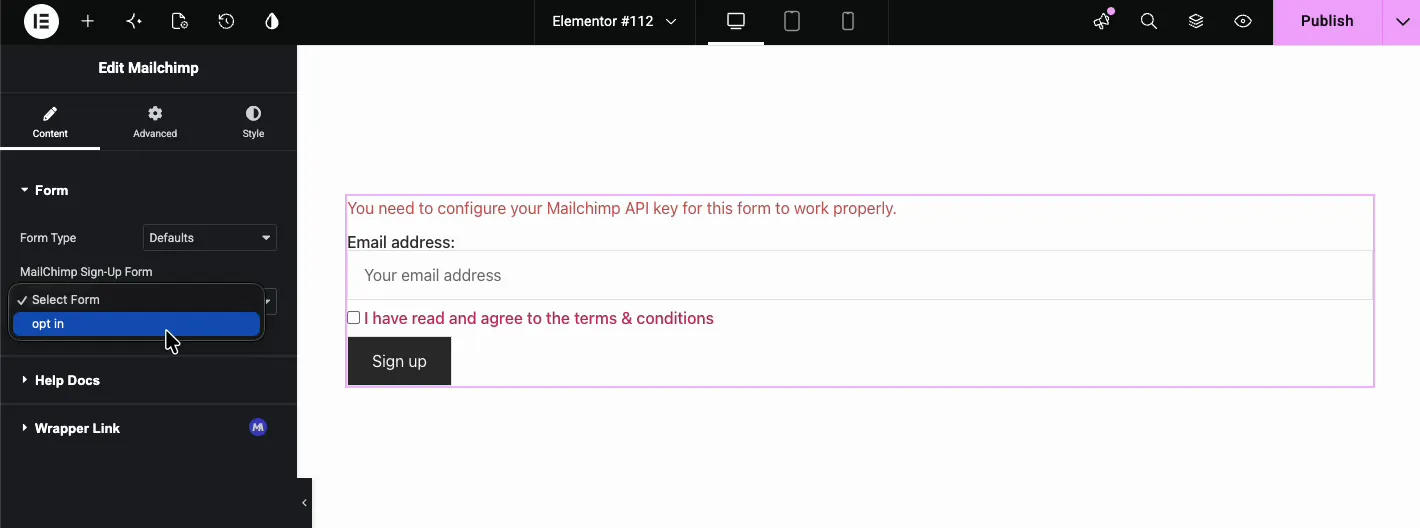
This is the fastest way to get a Mailchimp signup form in Elementor live, since MC4WP already maps the fields to your audience.
Build a custom Mailchimp form #
Set the Form Type dropdown to Custom. A Custom Form code box shows up for your own field markup, which replaces the fields of the MC4WP form. Don’t paste the embed code from Mailchimp itself, because its form tag breaks inside the MC4WP form. Reach for this when you need extra fields, custom labels, or a particular checkbox layout.
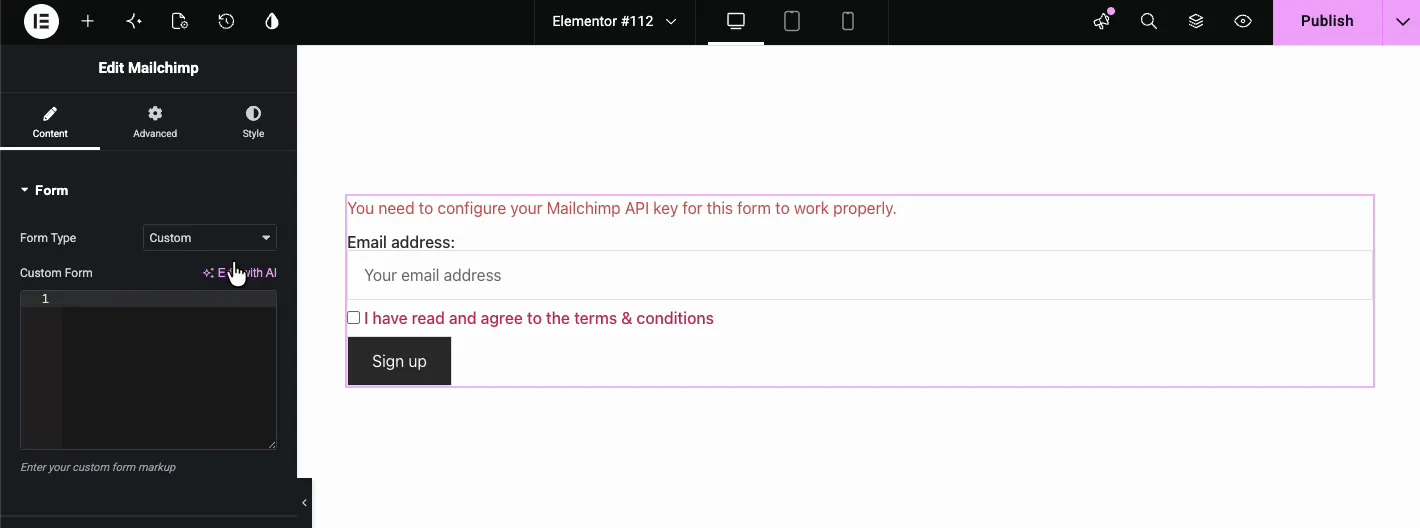
The demo markup in the video uses a simple structure you can adapt:
<p>
  <label for="email">Email address:</label>
  <input type="email" id="email" name="EMAIL" placeholder="Your email address">
</p>

<p>
  <label>
    <input type="checkbox" name="AGREE_TO_TERMS" value="1" required>
    I have read and agree to the terms & conditions
  </label>
</p>

<p>
  <input type="submit" value="Sign up">
</p>
If you’d rather write and preview the markup outside Elementor, that side-by-side code editor with the live preview comes from the free Mailchimp for WordPress (MC4WP) plugin, not Master Addons itself. Markup on the left, live preview on the right, so you can get the layout right before pasting it into the widget.
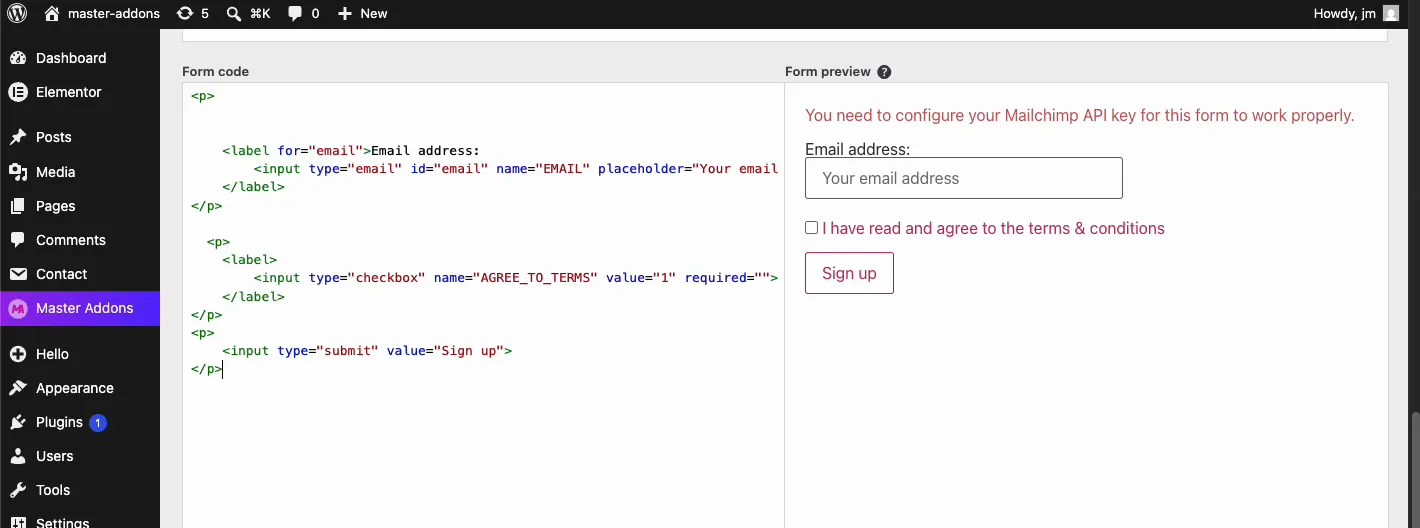
One thing that trips people up with custom markup: your name attributes have to match your Mailchimp audience merge tags. The email field in particular must use name="EMAIL", or Mailchimp won’t recognize the subscriber address and the signup silently fails.
Configure your Mailchimp API key #
The API key line clears once MC4WP is connected. In the WordPress admin, open MC4WP > Mailchimp, paste your key and save, and the status changes to Connected. Then open MC4WP > Form, tick the audience that should receive subscribers, and check the Settings tab. Double opt-in is on by default there, and you can also add subscriber tags or a redirect URL.
Generate a key from your Mailchimp account settings. Keep it private, and never paste it into the custom form markup itself, since that markup is visible to anyone who views the page source.
Style the form #
The widget has no Style tab. Master Addons loads a small stylesheet that gives the email field and button a 50px height, a dark button and colored success and error boxes. MC4WP can add its own look from the Appearance tab of the form, either Basic styles or a Light, Dark, Red, Green or Blue theme. Use the Elementor Advanced tab for spacing and background. For field or button colors, add CSS with the Custom CSS extension and target .jltma-mailchimp so the Elementor email signup form matches the rest of your design.
The result on the live page #
On the front end, the form shows the email field, terms checkbox, and submit button exactly as you set them. With MC4WP connected, each signup goes to the audience ticked in the MC4WP form, after the subscriber confirms by email if double opt-in is on.

Common use cases #
- Blog newsletters: drop a simple email field into a blog’s footer or sidebar.
- Lead magnets: pair the form with a download button so visitors subscribe before they get the guide.
- Product launch pages: collect early-access emails on a landing page.
- Event registrations: use custom markup to add name, company, or consent checkboxes.
- Footer subscriptions: embed a compact Mailchimp widget for Elementor in the site footer.
For more form options, see the Contact Form 7 widget. For an announcement bar to sit alongside a signup form, try the News Ticker widget.
Video Tutorial #
Prefer to watch? This walkthrough sets up the Mailchimp widget end to end, from picking a form type to the signup form on the live page:
Frequently Asked Questions #
Can I add a Mailchimp form in Elementor without coding?
Yes. Set Form Type to Defaults and pick your MC4WP form from the dropdown. The widget renders the fields you set up in MC4WP.
How do I create a custom Mailchimp form in Elementor?
Set Form Type to Custom and paste your HTML markup into the Custom Form textarea. Make sure the email input uses name=”EMAIL” and that MC4WP is connected to your Mailchimp account.
Why does the widget say I need to configure a Mailchimp API key?
That line comes from MC4WP. Paste your Mailchimp API key in the MC4WP Mailchimp settings in the WordPress admin and save. If the widget says MailChimp for WordPress is Not Activated, install and activate the MC4WP plugin first.
Can I add extra fields like name or phone to the form?
Yes, but only in Custom mode. Add standard HTML input fields with name attributes that match your Mailchimp audience merge tags, such as FNAME for first name.
Is the Mailchimp widget available in the free version of Master Addons?
Yes. The Mailchimp widget is free in Master Addons, and MC4WP is free too. The Mailchimp widget page compares it with the Elementor Pro Form.
Wrapping up #
The Master Addons Mailchimp widget is a direct way to add an Elementor Mailchimp form to any page. Go with a default form for speed, or switch to Custom mode when you want full control over the markup and fields. Either way, subscribers reach your Mailchimp audience once MC4WP is connected. Browse the full set of Master Addons widgets and extensions for more tools to grow your list.


