

Sometimes a page needs a gate. Members-only pricing, an age-gated product video, a client portal, a coupon hidden behind a password. The Restrict Content widget in Master Addons Pro puts that gate inside any Elementor section. You can restrict content in Elementor by user role, password, age, or a simple math captcha, and the prompt can show inline or as a popup.
Below I go through each restriction type and the settings you’ll actually touch, so you can pick the right gate for what you’re protecting.
What the Restrict Content widget does #
The widget wraps whatever content you want to protect. A visitor sees either that content or a prompt, depending on the rule you set. There are four restriction types:
- User Based: show or hide the content based on the visitor’s WordPress user role.
- Password Based: ask the visitor to enter a password you set.
- Age Restriction: require the visitor to confirm they meet a minimum age.
- Math Captcha: ask the visitor to solve a simple math problem.
You also decide how the prompt shows up. On Page drops the restriction box right where the widget sits. Popup opens it in a modal overlay.
Before you start #
- WordPress with Elementor installed and active.
- Master Addons for Elementor installed and active. If you haven’t installed it yet, follow the installation guide.
- A Master Addons Pro license, with the Restrict Content widget enabled in the Master Addons options panel.
- Optional: a saved Elementor template, if you want to load one as the restricted content or the warning message.
Add the widget to your page #
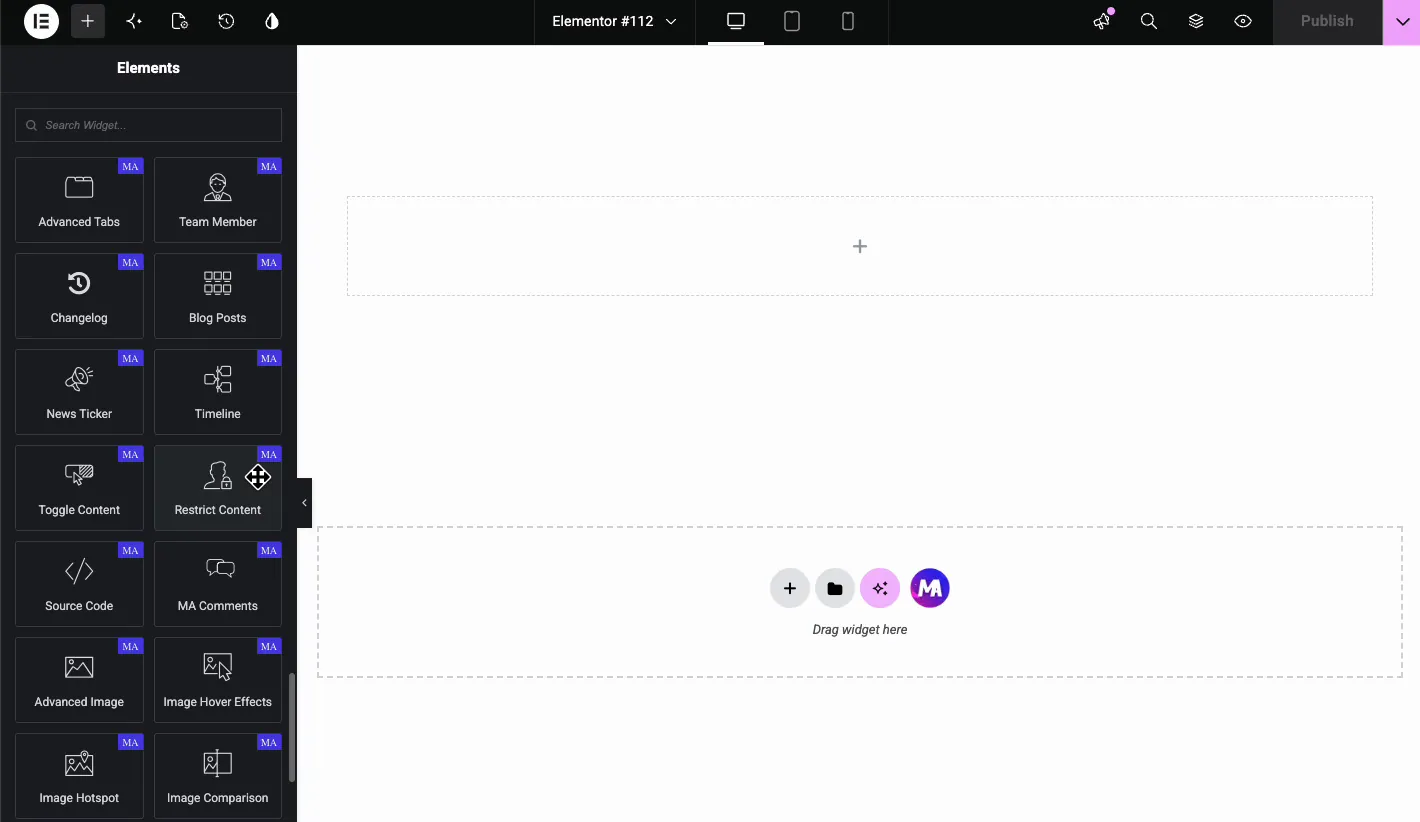
Open the Elementor editor and search the widgets panel for “Restrict Content.” Drag the Master Addons Restrict Content widget into the section where you want the gate. It loads with some default text and the Content tab already open.
Restrict content by user role #
Reach for the User Based option when only certain WordPress users should see the content. In the Content tab, set the second Restrict Type dropdown to User Based. A Select User Roles field shows up. Pick one or more WordPress user roles, like Administrator, Editor, Subscriber, or Customer.
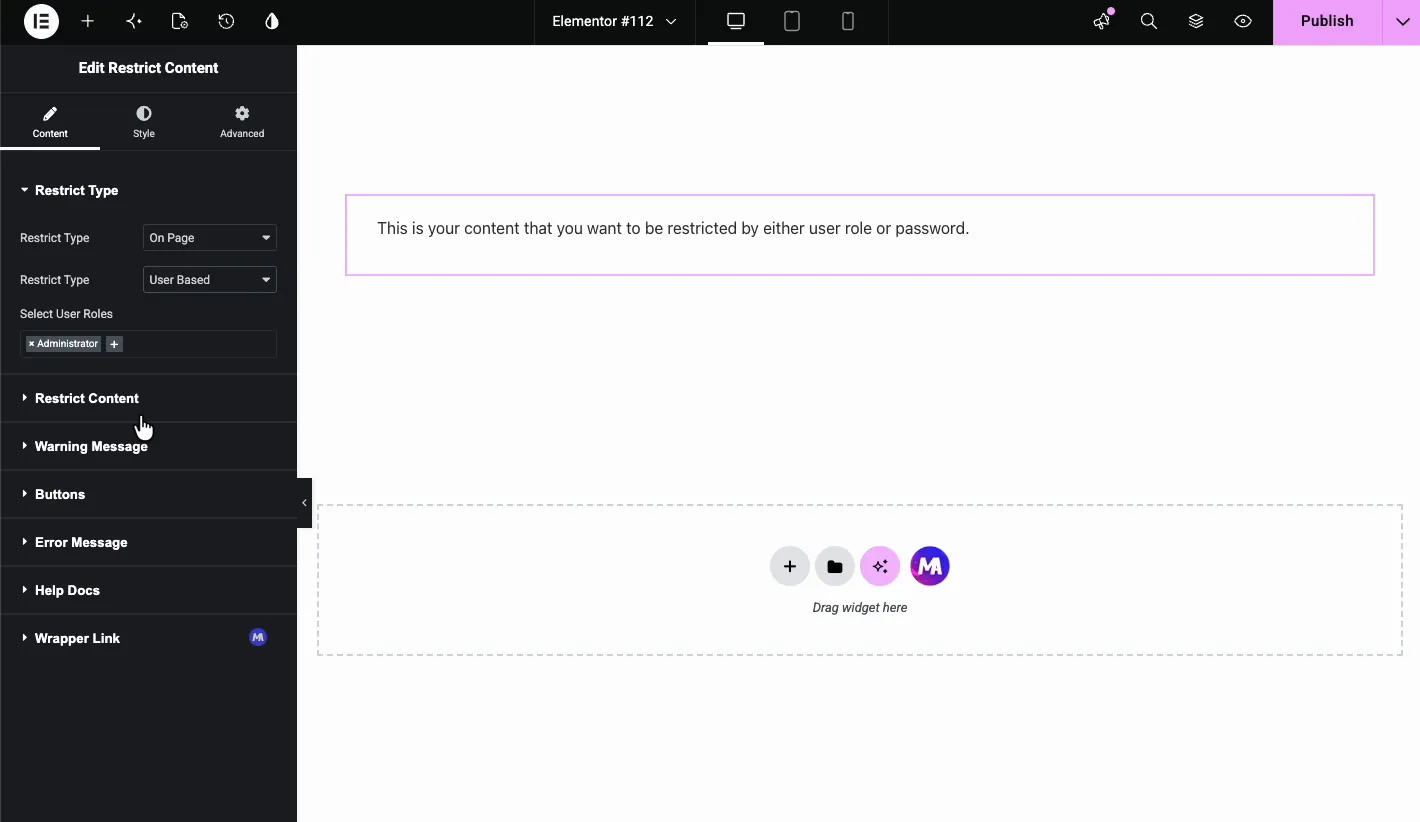
Anyone not logged in with one of the selected roles gets the warning message instead of the protected content. One thing to keep in mind: logged-out visitors have no role at all, so they’ll always hit the warning here. This mode works well for membership areas, client portals, or staff-only downloads. Use it with the On Page layout, which is the only combination that keeps the content off the page for visitors without the role. If you need finer visibility rules, pair it with the Display Conditions extension.
Password protect an Elementor section #
Set the second Restrict Type dropdown to Password Based, then type the password into the Set Password field. On the front end, visitors get a password field and a Submit button, and the protected content only appears once they enter the right password.
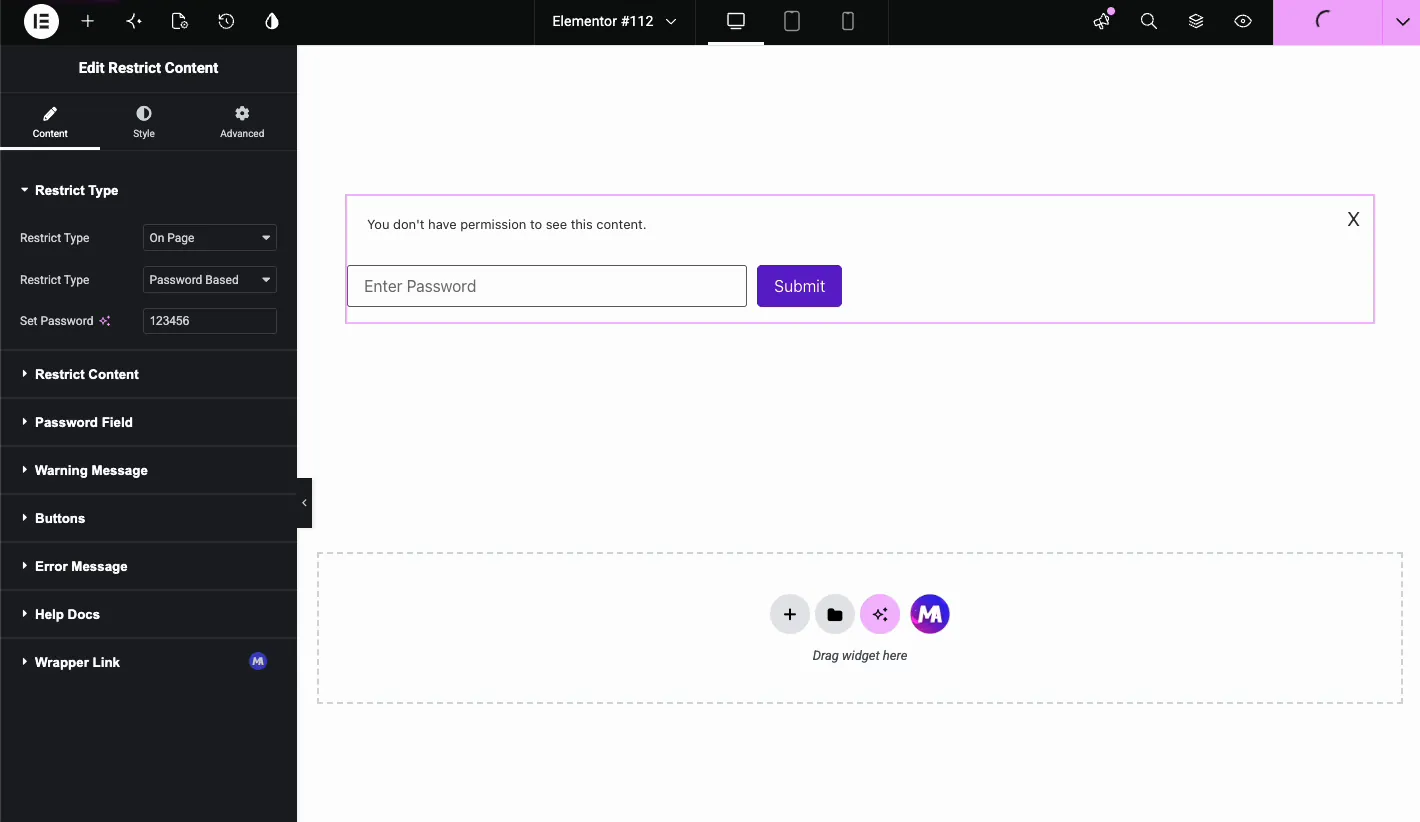
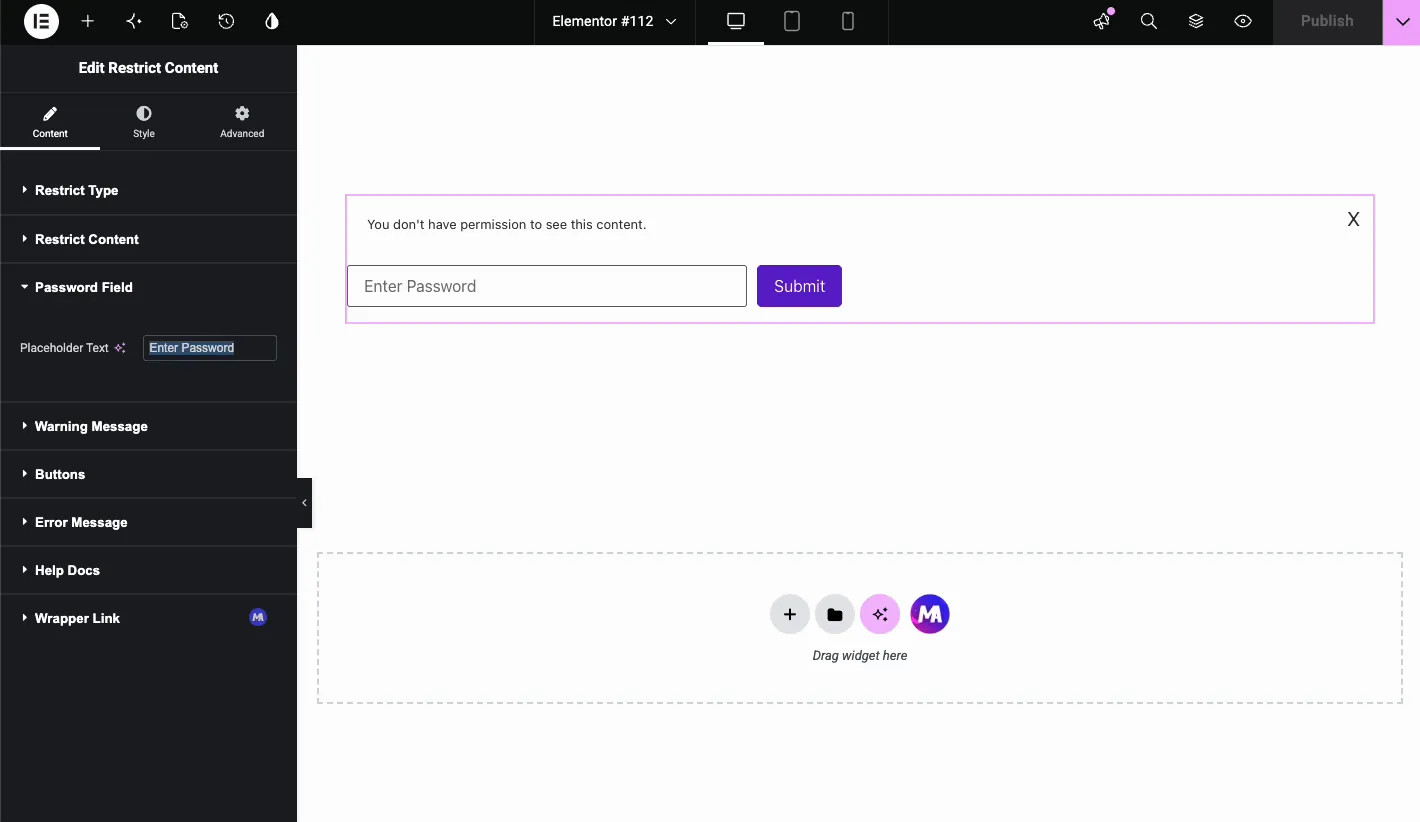
You can rewrite the placeholder text in the Password Field section. The demo uses “Enter Password,” but “Type Password” or “Client Access Code” work just as well. Worth remembering: this is a single shared password, and both the password and the content are in the page source, so treat it as a light gate for teasers rather than protection for private material.
Add age verification in Elementor #
Set the second Restrict Type dropdown to Age Restriction and enter a Minimum Age, say 18 or 21. Then choose the Age Restrict Type:
- Select Birthday: visitors pick their birth date from day, month, and year fields.
- Enter Age, Checkbox or Submit Confirm: visitors type their age, tick a confirmation box, or click a confirm button.
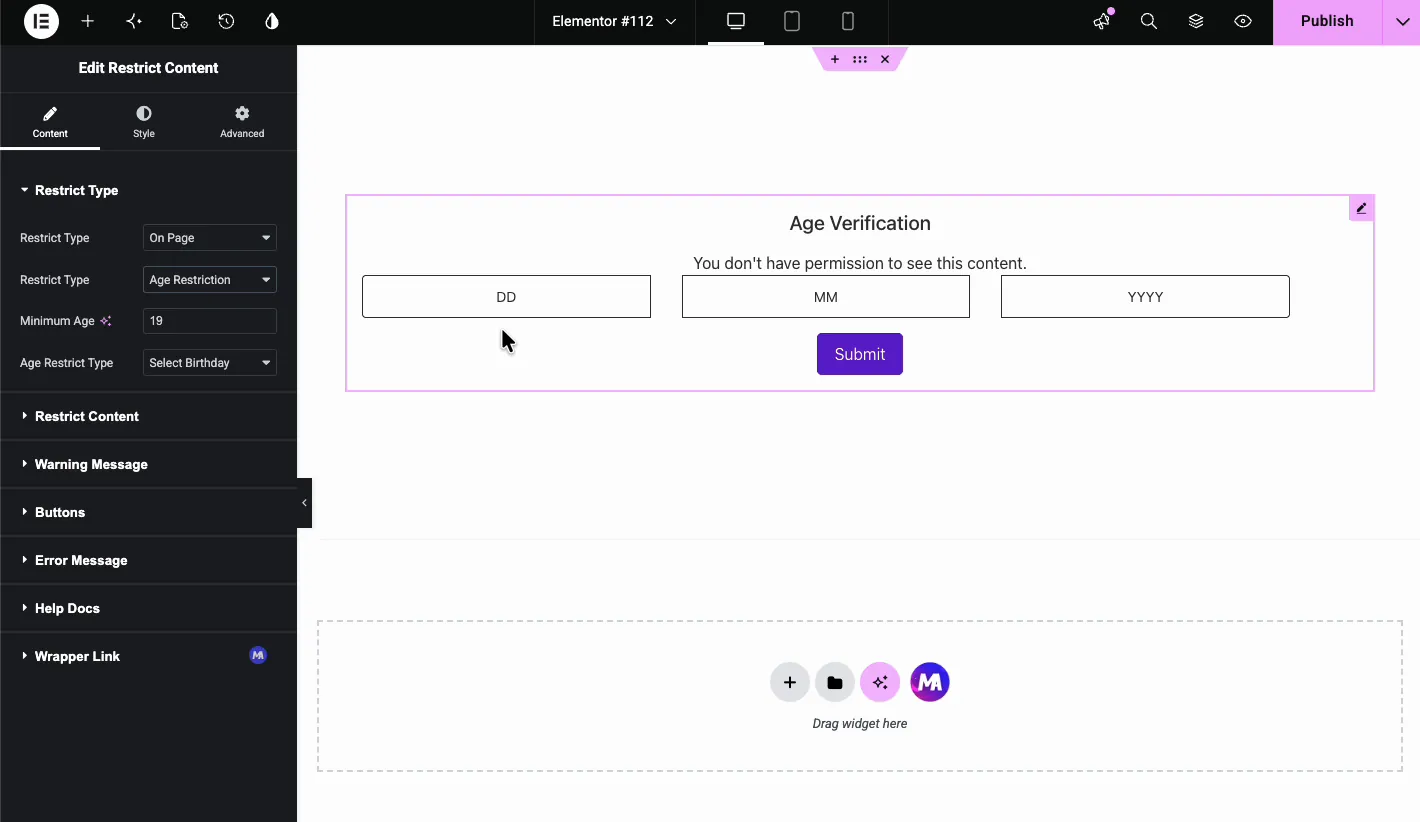
The birthday option fits alcohol, vaping or adult-content sites as an age notice. A checkbox or confirm button is quicker when a simple acknowledgement is enough. If you want a full-screen age-verification popup instead, see the Age Verification for Elementor guide.
Use math captcha to restrict content #
Set the second Restrict Type dropdown to Math Captcha, then pick the Math Type: Add, Subtract, or Multiply. The widget spits out a random problem like “11 x 13 =” and the visitor has to solve it.
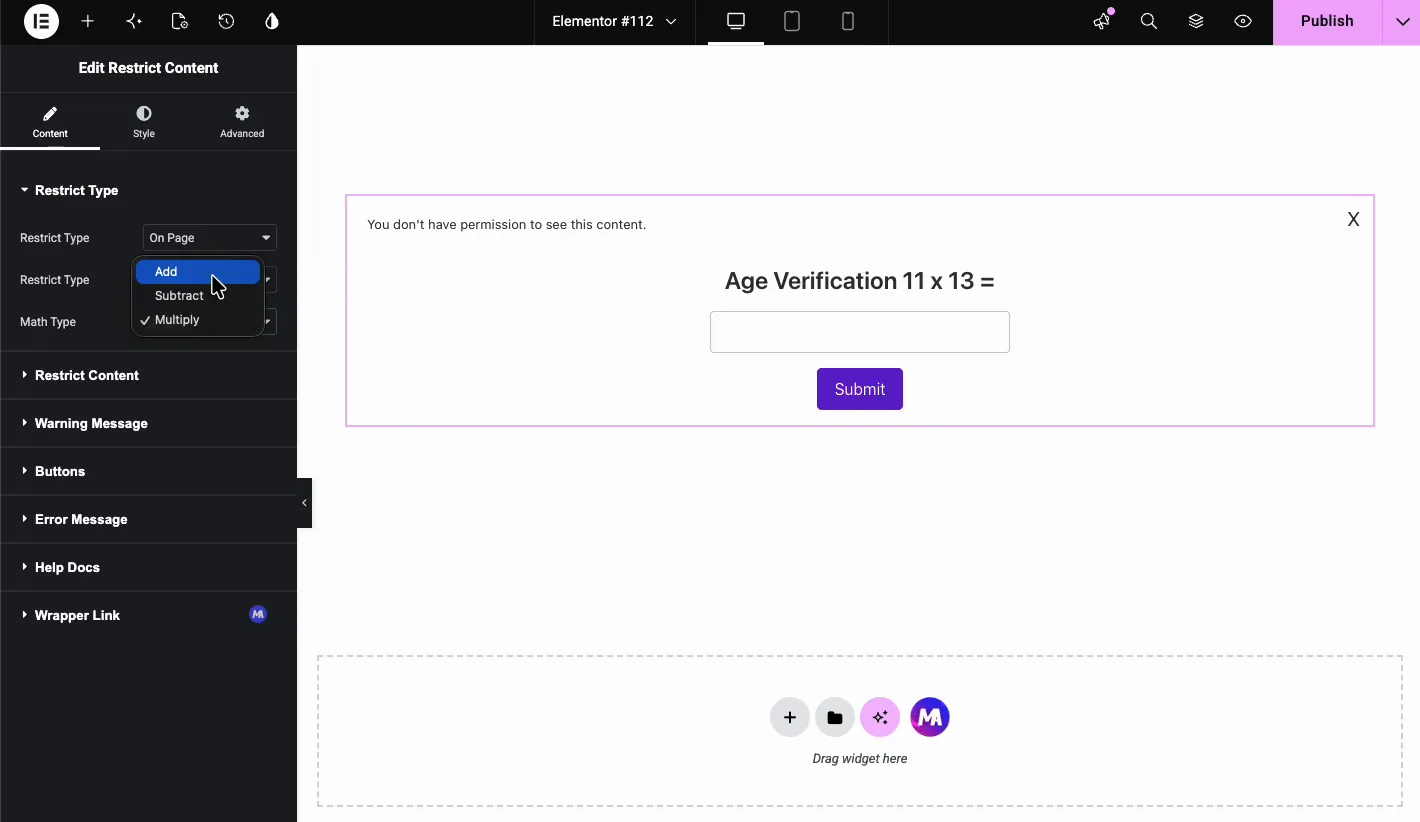
It’s a low-friction way to add a playful gate to a contest or giveaway page. Switch the math type now and then so the challenge doesn’t get predictable.
Choose what to protect #
The Restrict Content section is where you set the actual content behind the gate. Open it and set Select Source to one of two options:
- Custom Content: type or paste content straight into the WYSIWYG editor. The demo uses the text, “This is your content that you want to be restricted by either user role or password.”
- Elementor Template: load a saved section, widget or page template, like a pricing table, contact form, or video.
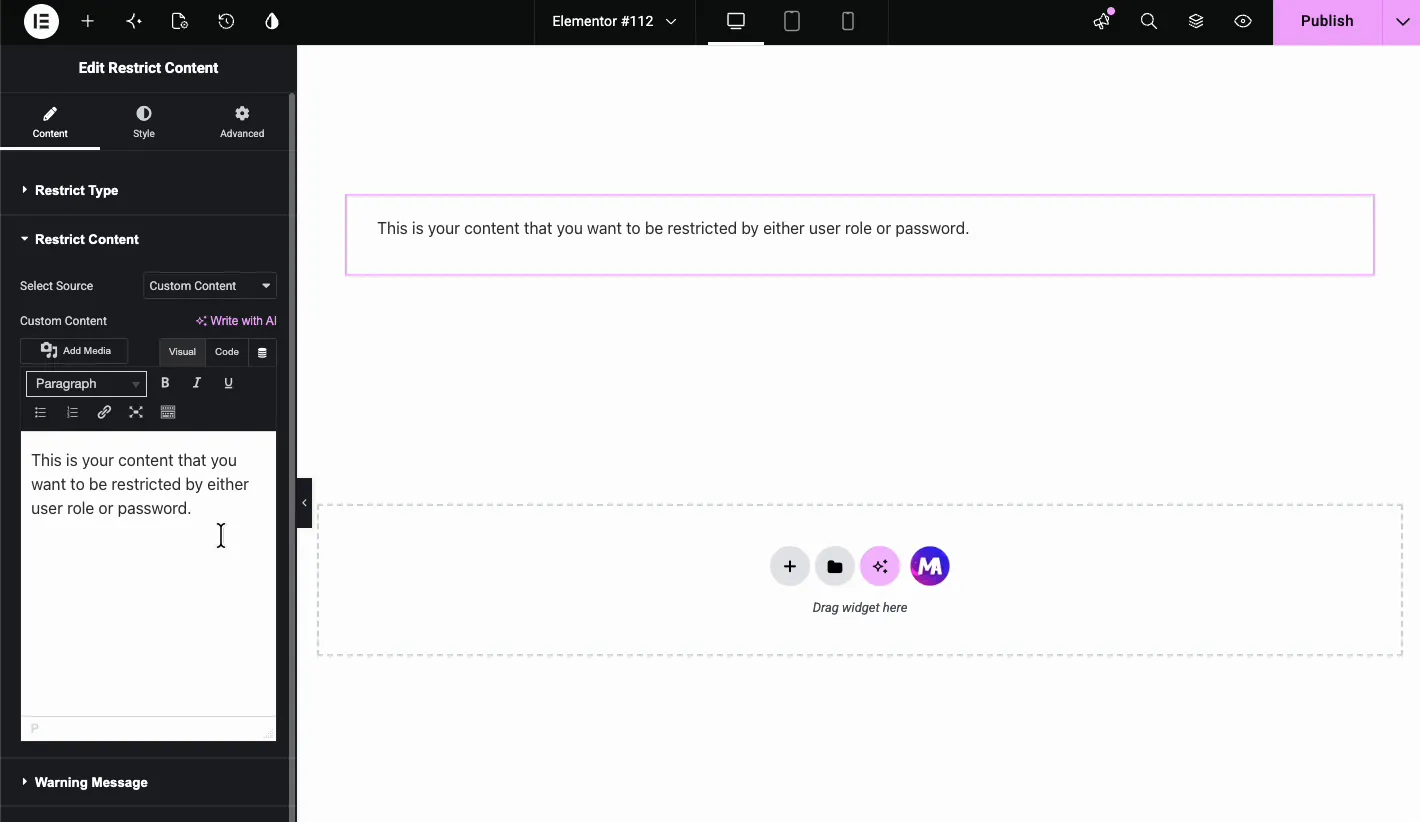
Saved sections earn their keep when the protected content is anything more than plain text. Design it once as a template, then drop it inside the Restrict Content widget wherever you need it.
Set the warning message #
When a visitor fails the rule, the widget shows a warning. You handle this in the Warning Message section. Set Message Type to:
- Custom Message: write your own title and body text.
- Elementor Template: load a saved template for a designed look.
- None: hide the warning entirely.
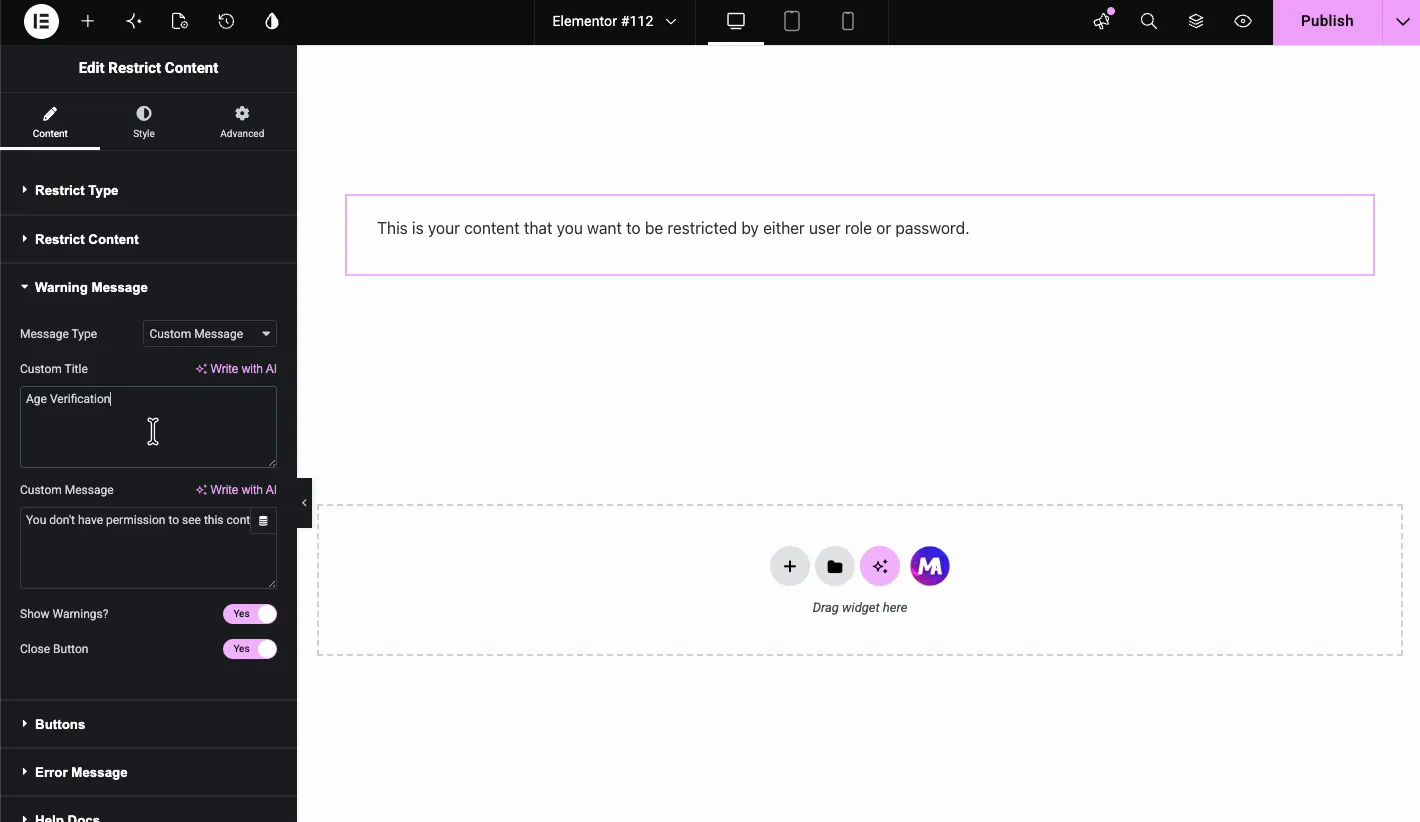
The demo uses “Age Verification” as the title and “You don’t have permission to see this content.” as the message. You can also flip Show Warnings? and Close Button on or off. The close button matters most in popup mode, since it gives visitors a way to dismiss the prompt if they’d rather not proceed.
On-page vs popup display #
The first Restrict Type dropdown controls where the prompt lands. Pick On Page to embed the restriction box right in the page layout. Pick Popup to open it in a centered modal.
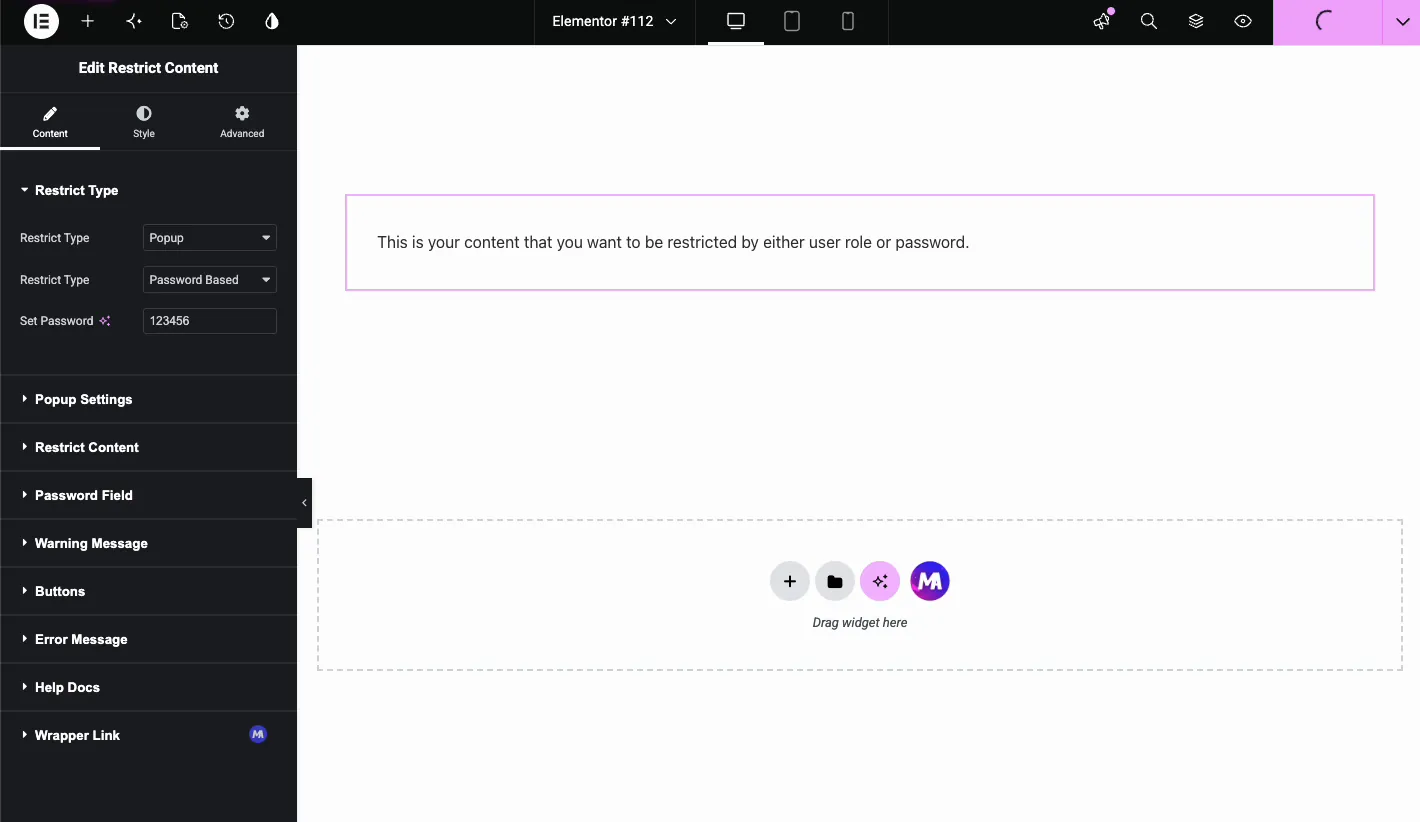
On Page mode fits when the protected content is one piece of a normal section, like a members-only download box. Popup mode fits when you want to gate the whole page, like a full-screen age check before anyone sees the site.
Style the widget #
The Style tab is broken into sections that line up with the parts of the widget:
- Restrict Content: color, background, margin, padding, and typography for the protected content area.
- Message Contents: title color, description color, warning message background, padding, and margin.
- Submit Button: button colors, typography, and spacing.
- Error Message: text color and typography for failed attempts.
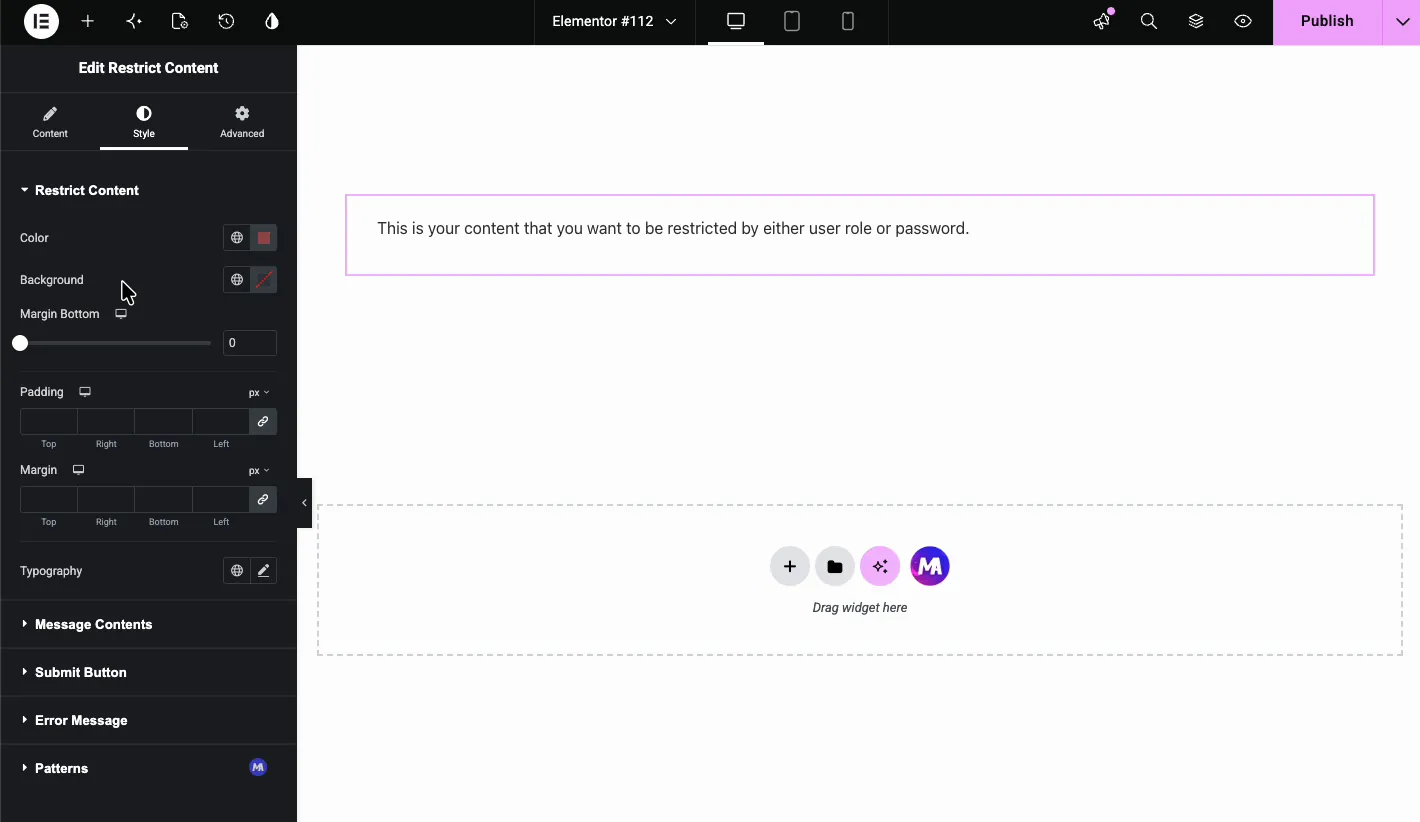
Use these to make the restriction prompt match the rest of your site. When the warning box uses your own colors and type, it reads as part of the page instead of a bolt-on.
The result on the live page #
Once the visitor passes the rule, the protected content shows up. In the demo, the plain text content appears on the front end the moment the correct input goes in.

Anyone who doesn’t meet a User Based rule never receives it. The password, age and captcha gates only hide the content in the browser, so keep them for material that is fine to be public.
Common use cases #
- Membership areas: restrict downloads or pricing tables to logged-in subscribers with User Based mode.
- Client portals: give each client a WordPress account and role, then use User Based mode.
- Age-gated products: use Age Restriction for alcohol, adult, or pharmaceutical content.
- Contest entries: use Math Captcha to add a light gate to a giveaway.
- Private course previews: show a lesson teaser to everyone and unlock the full video for enrolled students.
If you only need visitors to switch between two versions of a section, look at the Toggle Content widget instead. It swaps content on click and does not restrict anyone.
On Page Version for Restrict Content #
Popup Version for Restrict Content #
Frequently Asked Questions #
Can I restrict an Elementor section by user role?
Yes. Set the Restrict Content widget’s second Restrict Type dropdown to User Based, then select the WordPress roles that should see the content. Visitors without those roles get the warning message instead.
How do I password protect an Elementor section?
Drag the Restrict Content widget into the section, set the restriction type to Password Based, and enter a password in the Set Password field. Visitors have to enter that password before the content appears. The password and content are still in the page source, so use User Based mode for anything private.
Does the widget support age verification?
Yes. Set the restriction type to Age Restriction, enter a minimum age, and choose Select Birthday, Enter Age, Checkbox or Submit Confirm as the verification method.
What is the difference between On Page and Popup modes?
On Page embeds the restriction prompt inside the page layout where the widget sits. Popup opens the prompt as a modal overlay. Popup works well for full-page age notices, and On Page with User Based is the choice for role-only content.
Can I use a saved Elementor template as the protected content?
Yes. In the Restrict Content section, set Select Source to Elementor Template and choose a saved section, widget or page. You can use a saved template for the warning message too.
Wrapping up #
The Restrict Content widget gives you a few different ways to gate content in Elementor without extra plugins. User role protection, a password, age verification, a math captcha, it handles all of them inside the Elementor interface you already know. Browse the full set of Master Addons widgets and extensions to see what else is there, and check the pricing page for Pro features.


