

Shops, restaurants, clinics, and studios all get the same question: when are you open? The free Business Hours widget in Master Addons for Elementor answers it with a clean opening hours table, one row per day, with open and close times and a Closed label for days off.
You set each day’s hours, mark the closed days, pick a design preset, then style the rows and colors to match your site. Some presets even pair the table with an image and a booking button. This guide covers every setting in the widget.
What the Business Hours widget does #
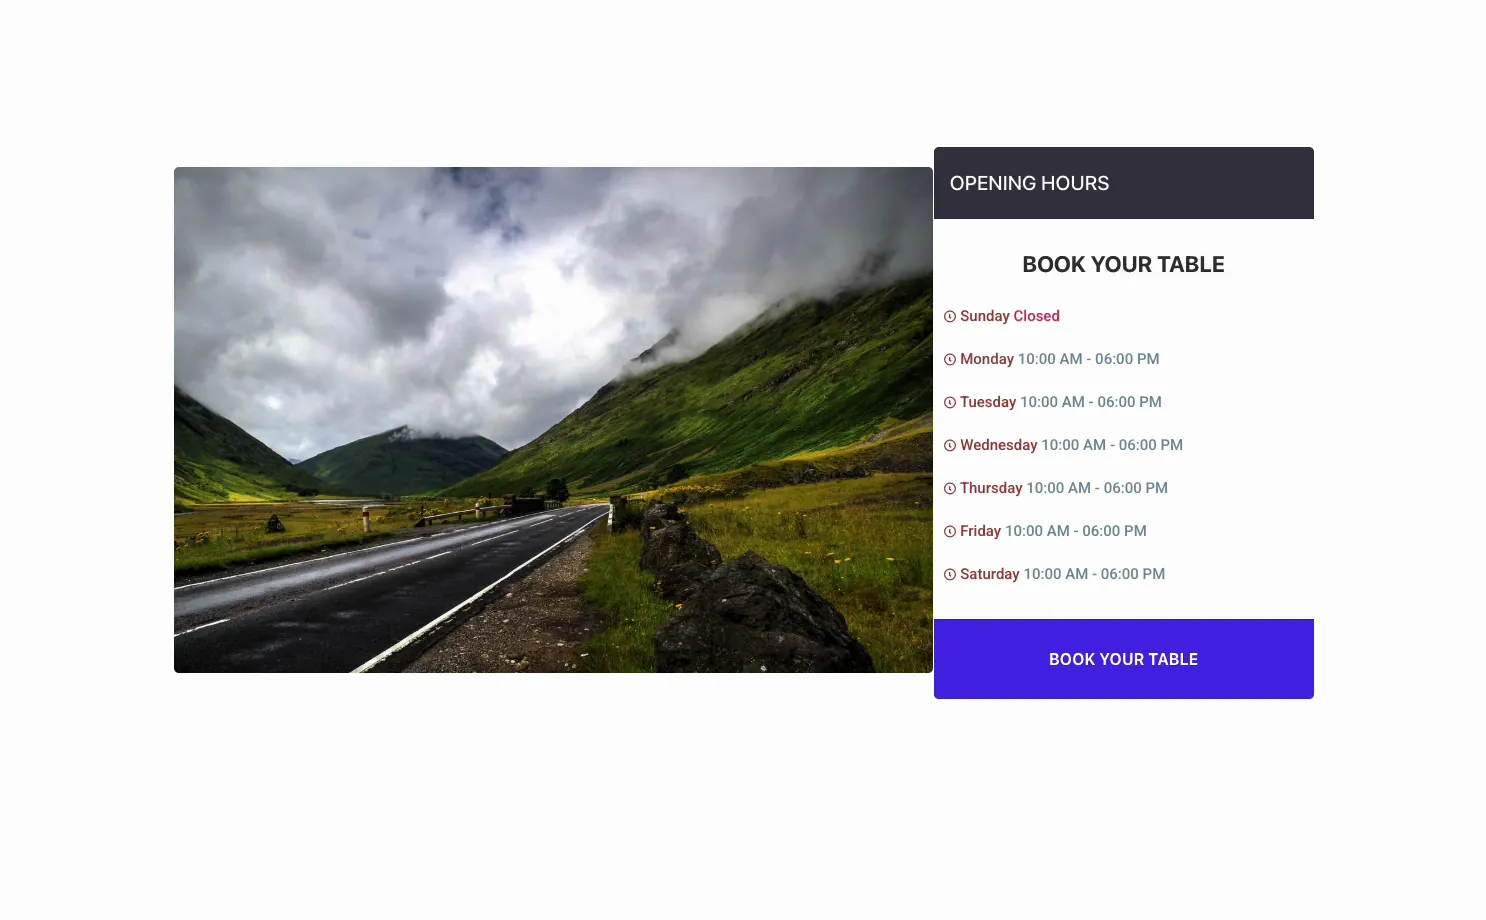
The widget lists the seven days of the week with each day’s opening and closing time, and marks any day as Closed. A Design Preset dropdown changes the whole look, from a plain table to a card with a heading, day icons, an image, and a call to action button.
It has three tabs. Content holds the preset, the per-day hours, and the toggles for titles and icons. Style controls the row colors, day and hours text, and the button. Advanced carries the usual Elementor spacing and visibility options.
Before you start #
- WordPress with Elementor installed and active.
- Master Addons for Elementor installed and active. New to the plugin? See the installation guide.
- Your opening and closing times for each day, and which days you are closed.
How to add the Business Hours widget #
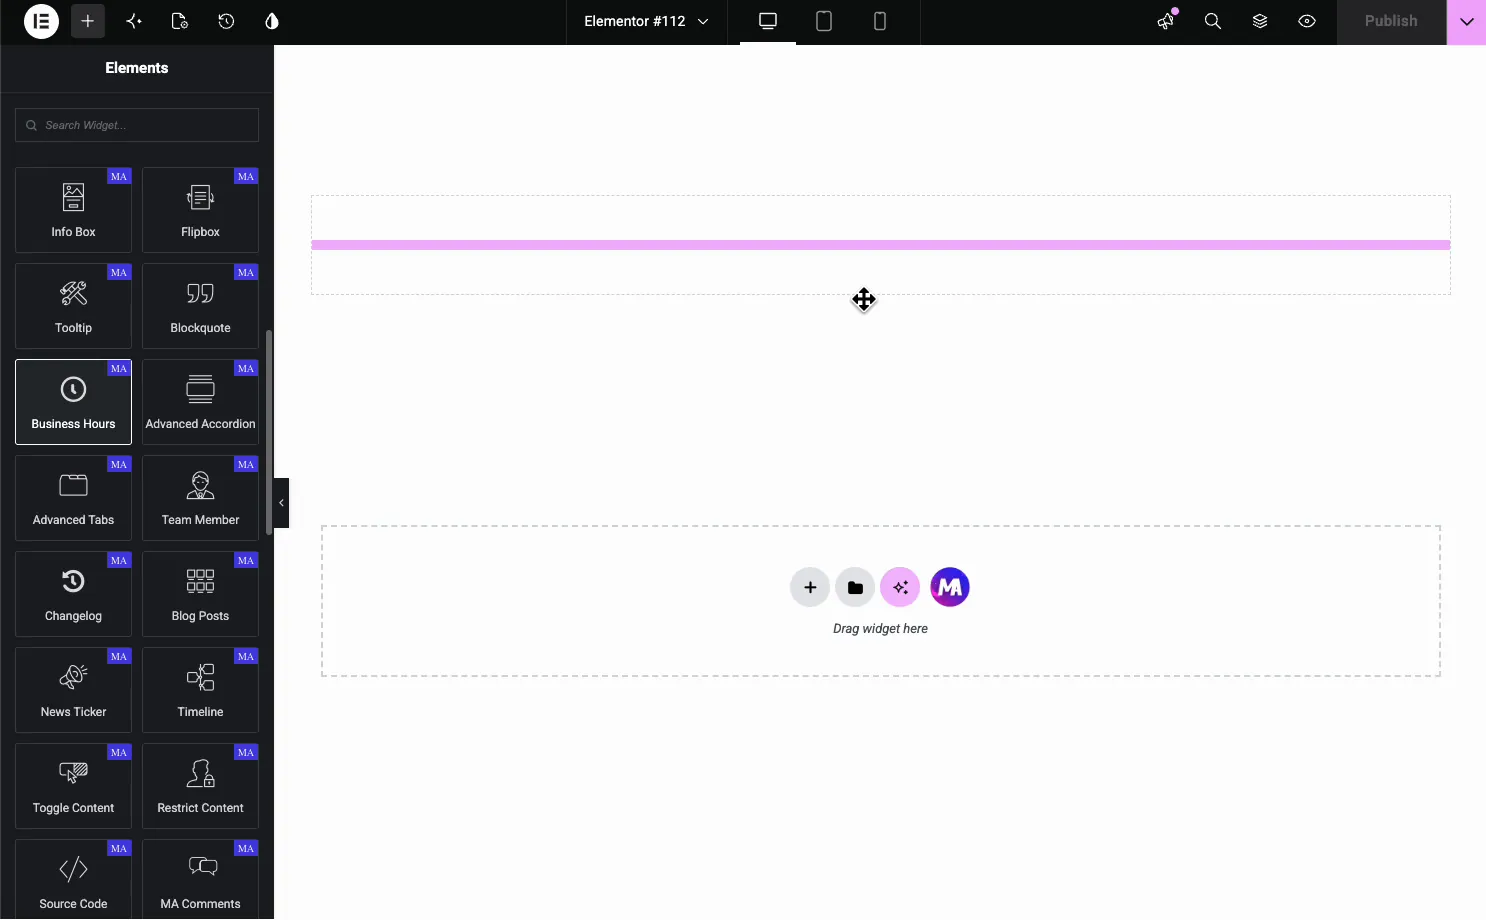
In the Elementor editor, open the Elements panel and search for Business Hours, or scroll to the Master Addons section (the widgets carry a purple MA badge). Drag it onto your page and it loads with all seven days ready to edit.
Set up the hours #
Open the Content tab. The MA Business Hours section holds the preset picker, a few display toggles, and the list of days.
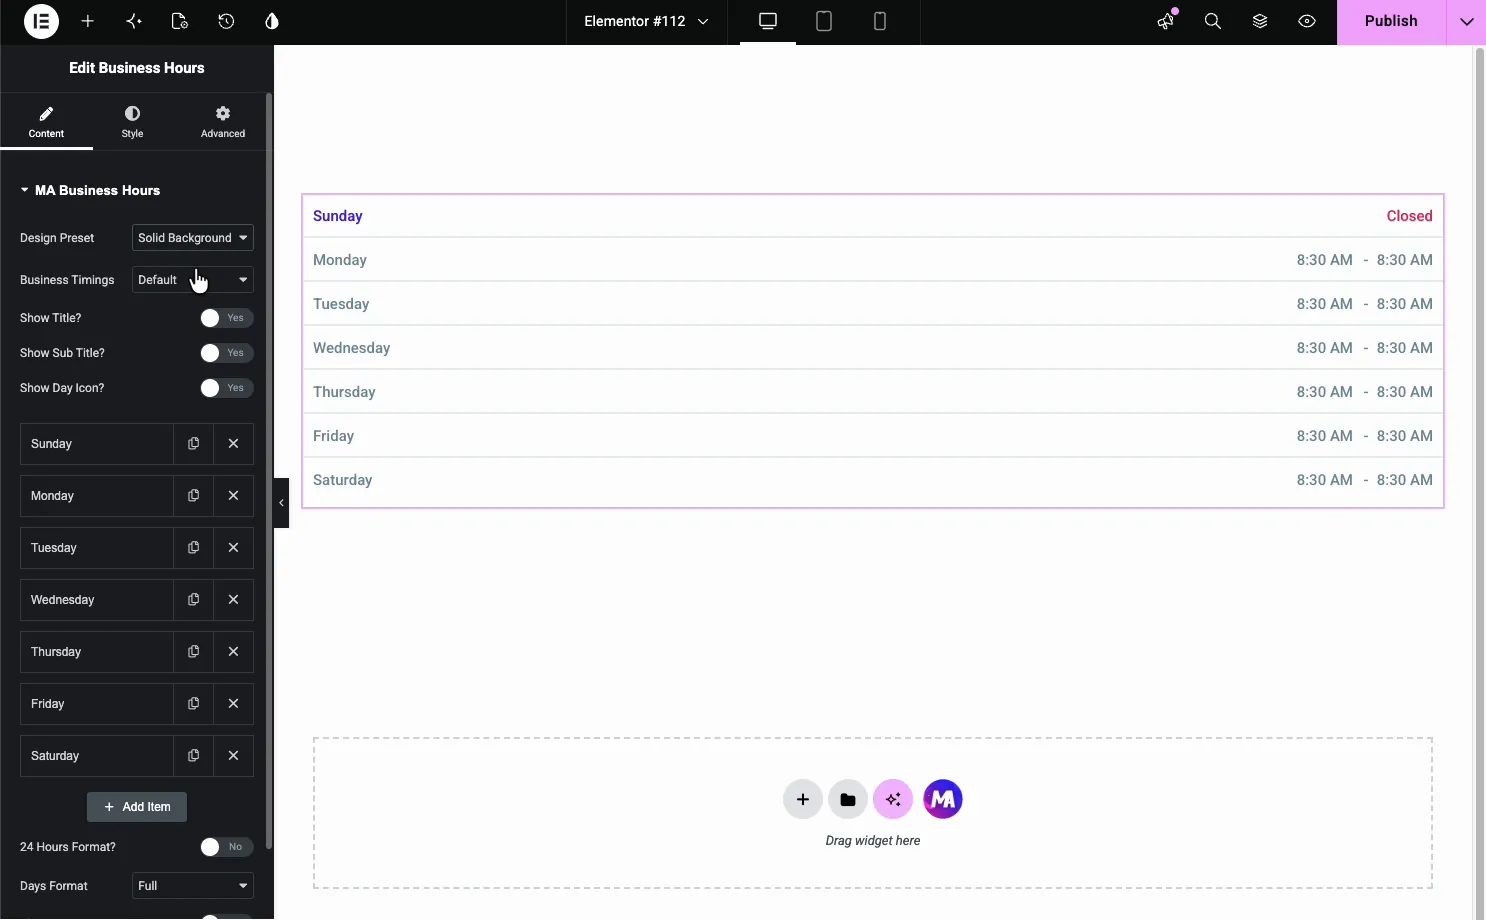
- Design Preset: the overall layout (covered below).
- Business Timings: Default uses day and time dropdowns in 30 minute steps. Custom Table lets you type any day label and time text, which suits grouped days, lunch breaks, or “Open 24 hours”.
- Show Title, Sub Title, Day Icon: toggle the heading and a small icon per day.
- Day repeater: one item per day, Sunday through Saturday.
- 24 Hours Format and Days Format: switch time format and full or short day names.
Click a day to open its settings, where you set the times and mark it open or closed.
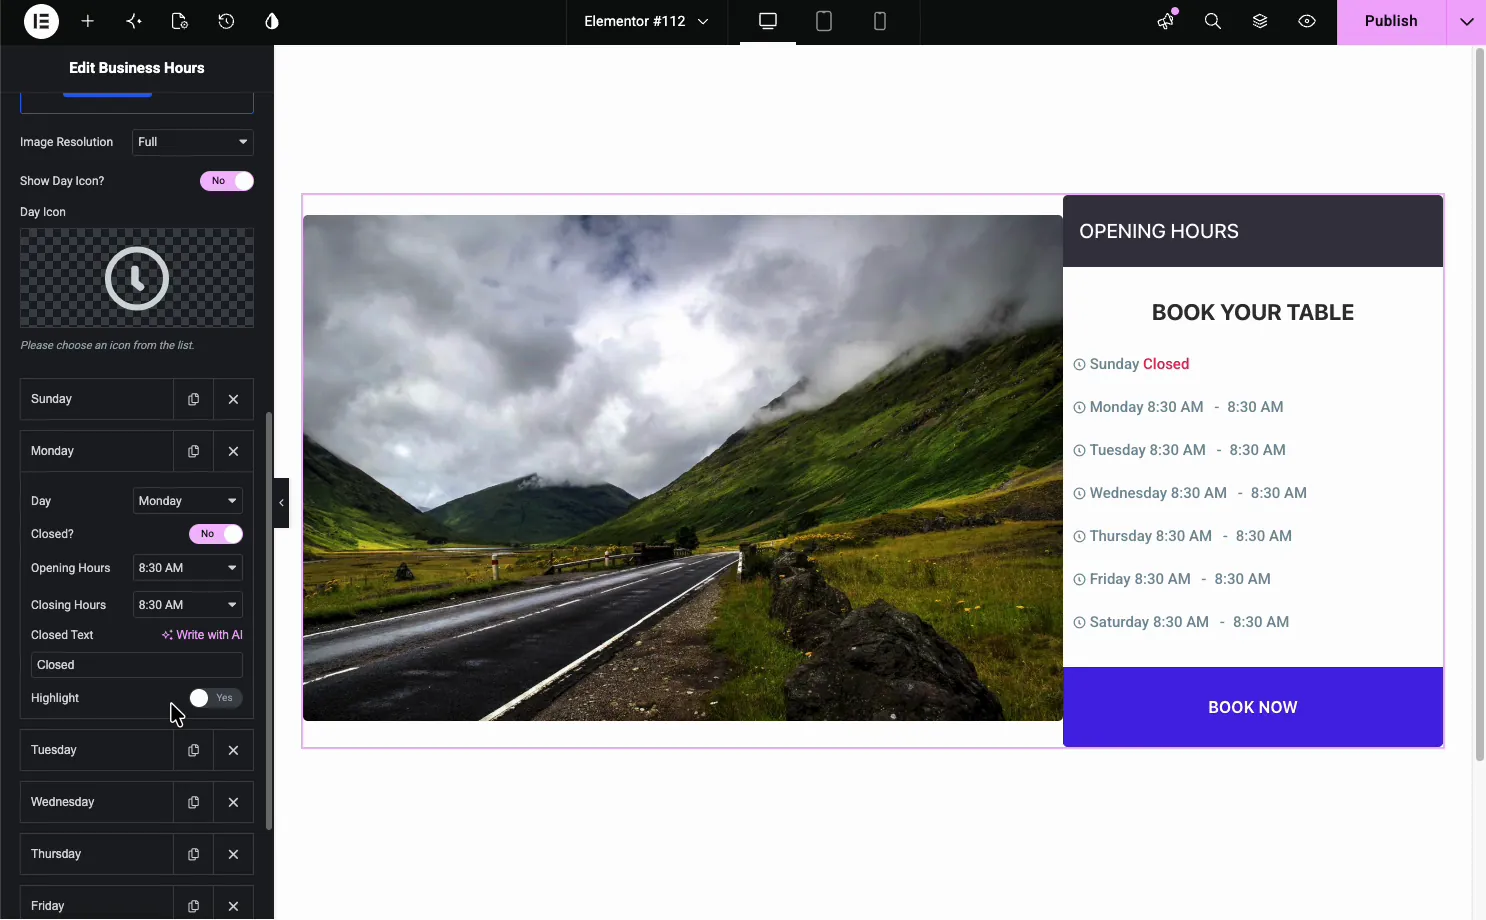
- Closed?: mark the day closed, which shows your Closed text instead of times.
- Opening Hours and Closing Hours: the times for that day.
- Closed Text: the label for closed days, like Closed or By Appointment.
- Highlight: emphasize a day with its own text and background color. It is a manual setting and does not follow the current date.
Pick a design preset #
The Design Preset changes the whole layout. The plain preset is a simple table, while Short Details and the two Booking Reservation presets can pair the hours with an image, and any preset can add a button with Show Button?, a good fit for restaurants and salons.
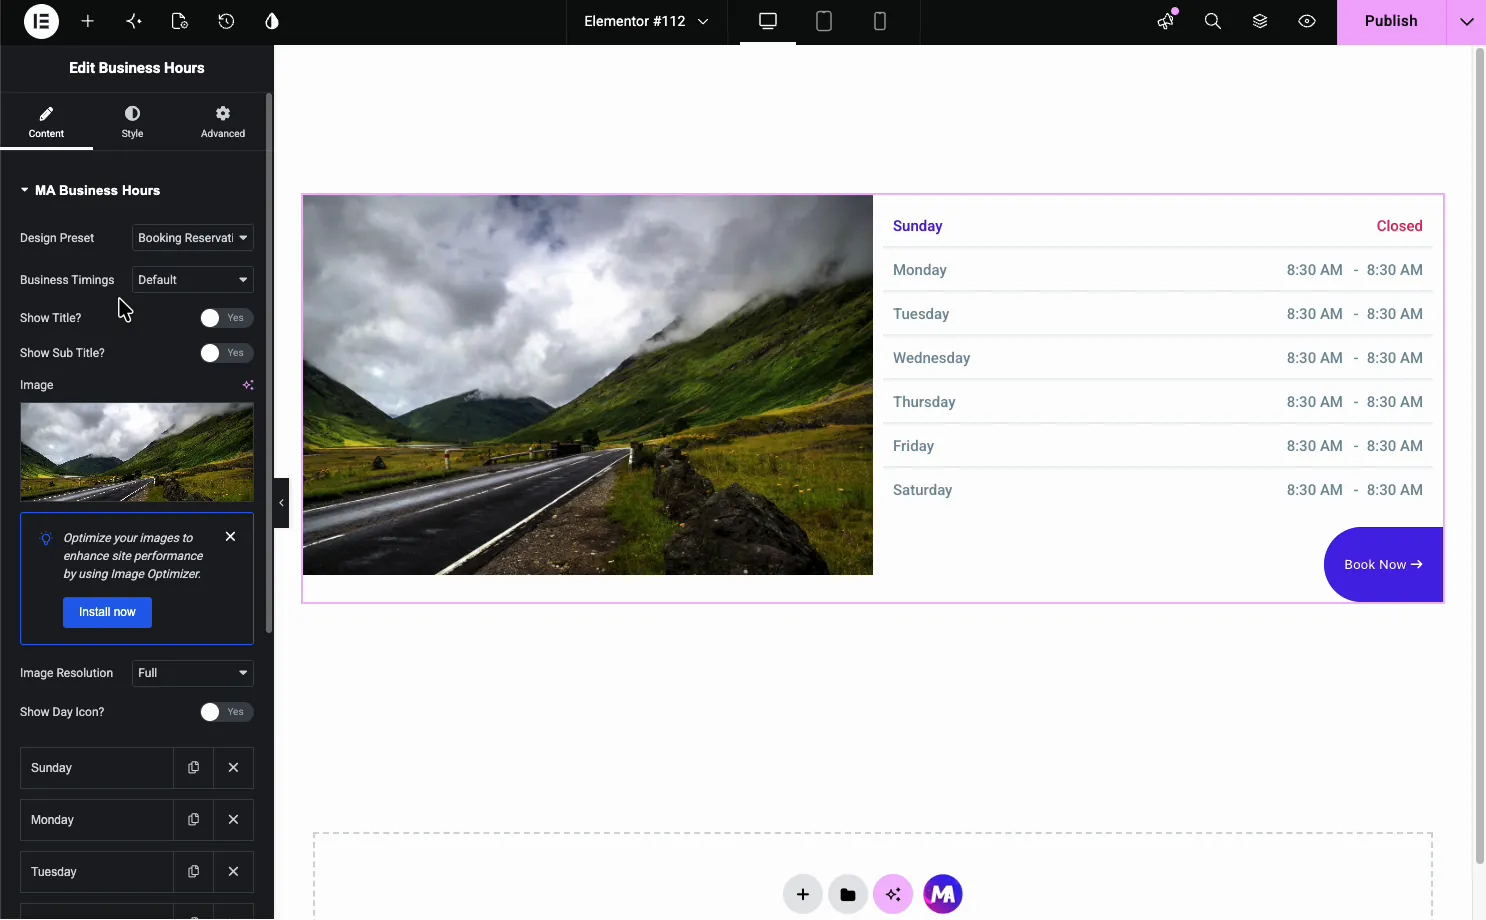
Other presets add a dark heading bar, day icons, and a full-width button, so the same hours can read as a plain list or a booking card.
Style the rows #
Open the Style tab and the Rows Style section to control each day row. This is where the table gets its color and spacing.
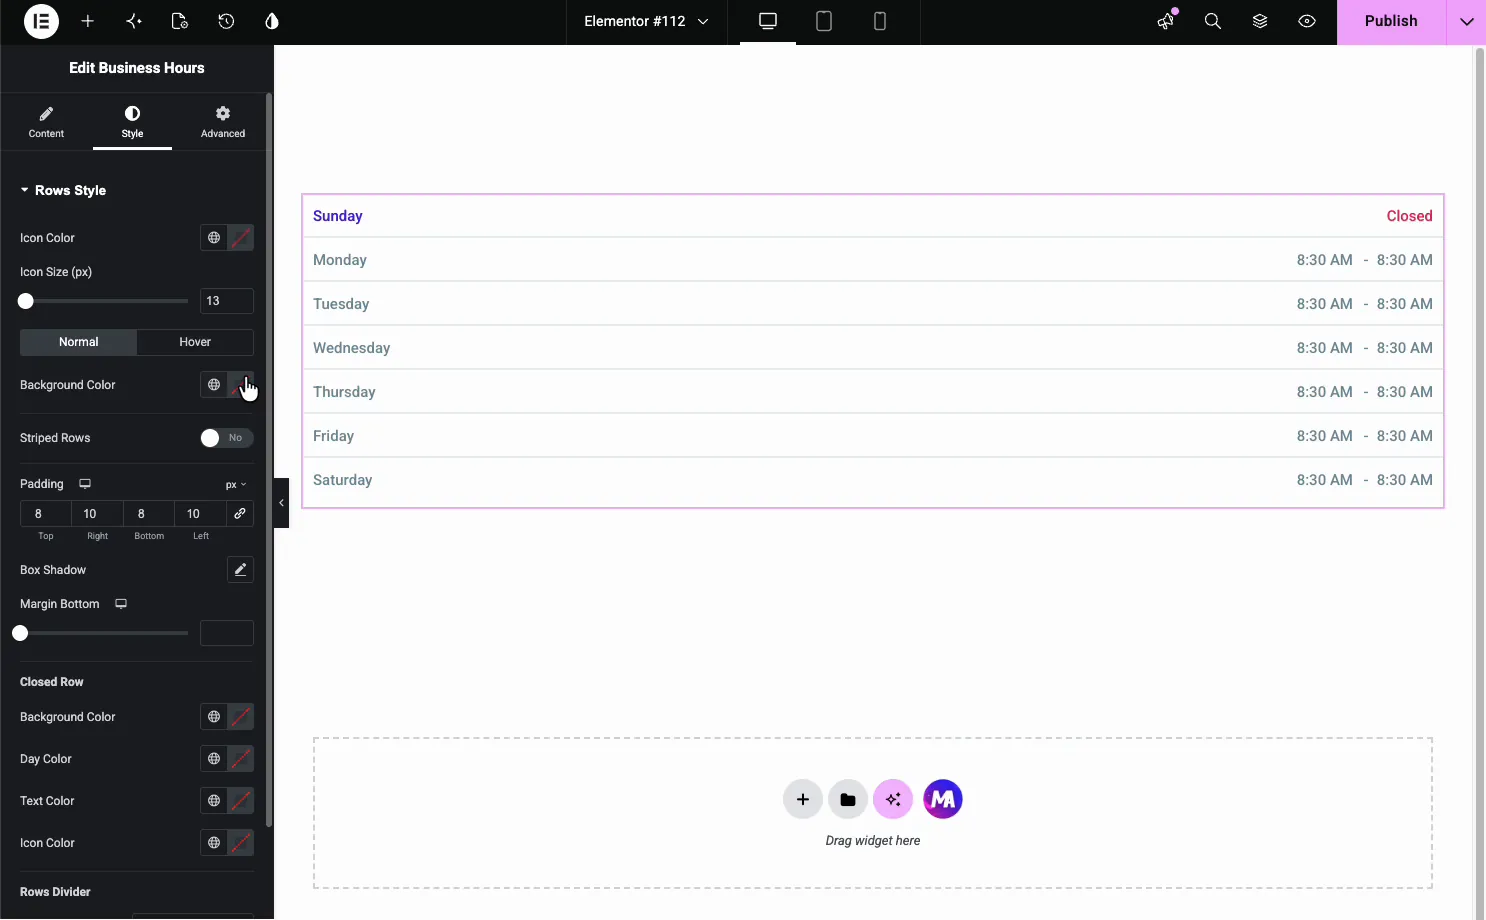
- Background Color and Striped Rows: a flat color or alternating row stripes.
- Icon Color and Icon Size: the day icons, with Normal and Hover states.
- Closed Row: a separate background, day, text, and icon color for closed days.
- Padding, Box Shadow, Rows Divider: spacing and the line between rows.
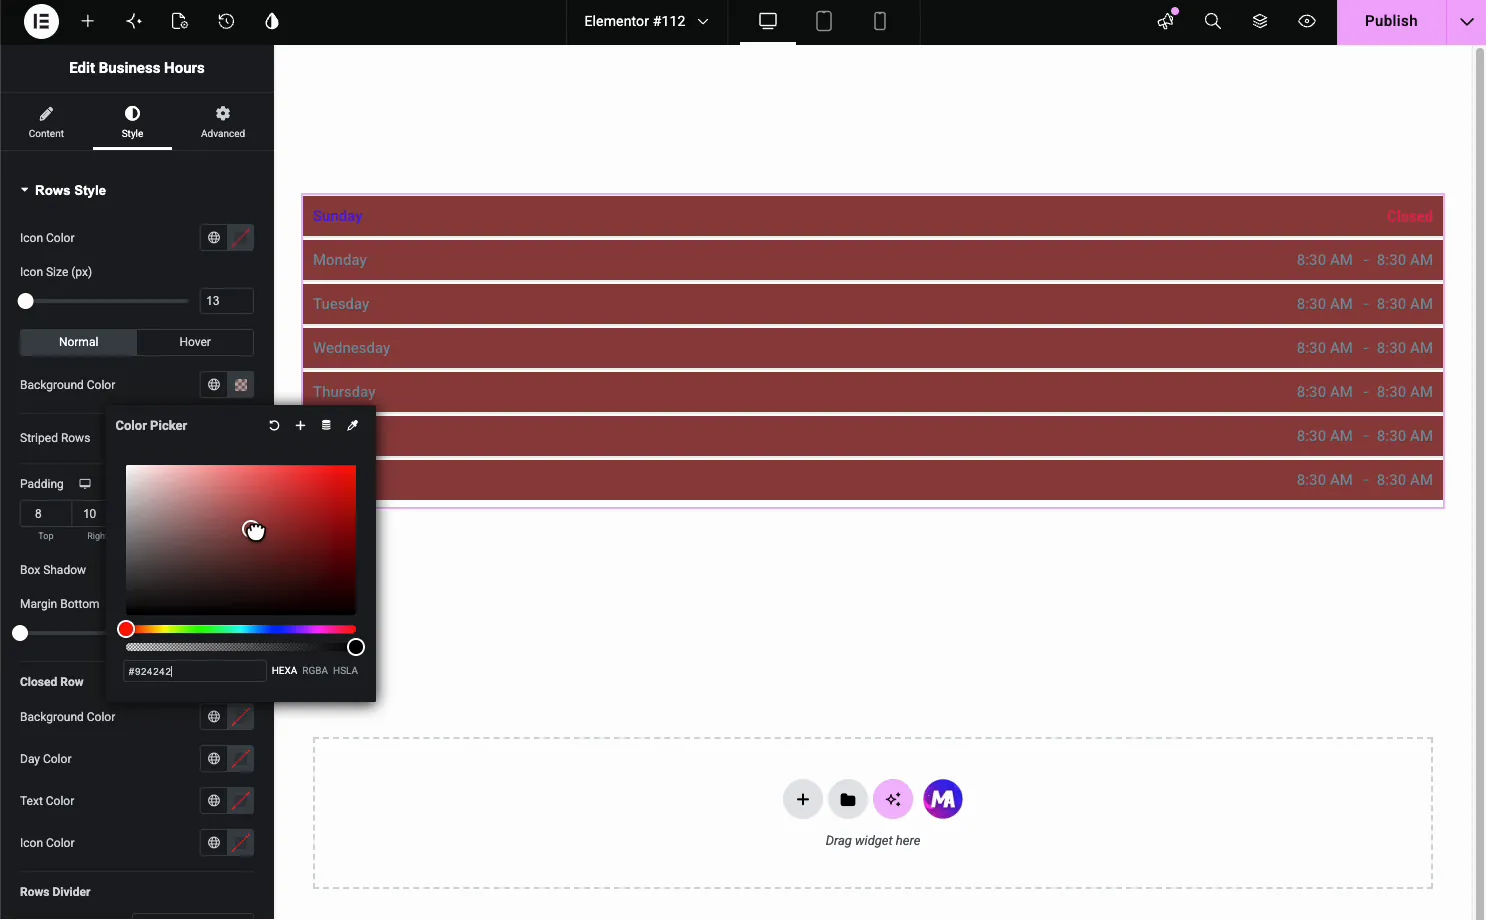
Set a row background and the whole table takes the color, so it sits on any section:
Style the day and hours text #
The Business Hours section in the Style tab handles the text. Day sets the color and typography of the day name, and Hours does the same for the times, plus the icon color. Each has Normal and Hover states.
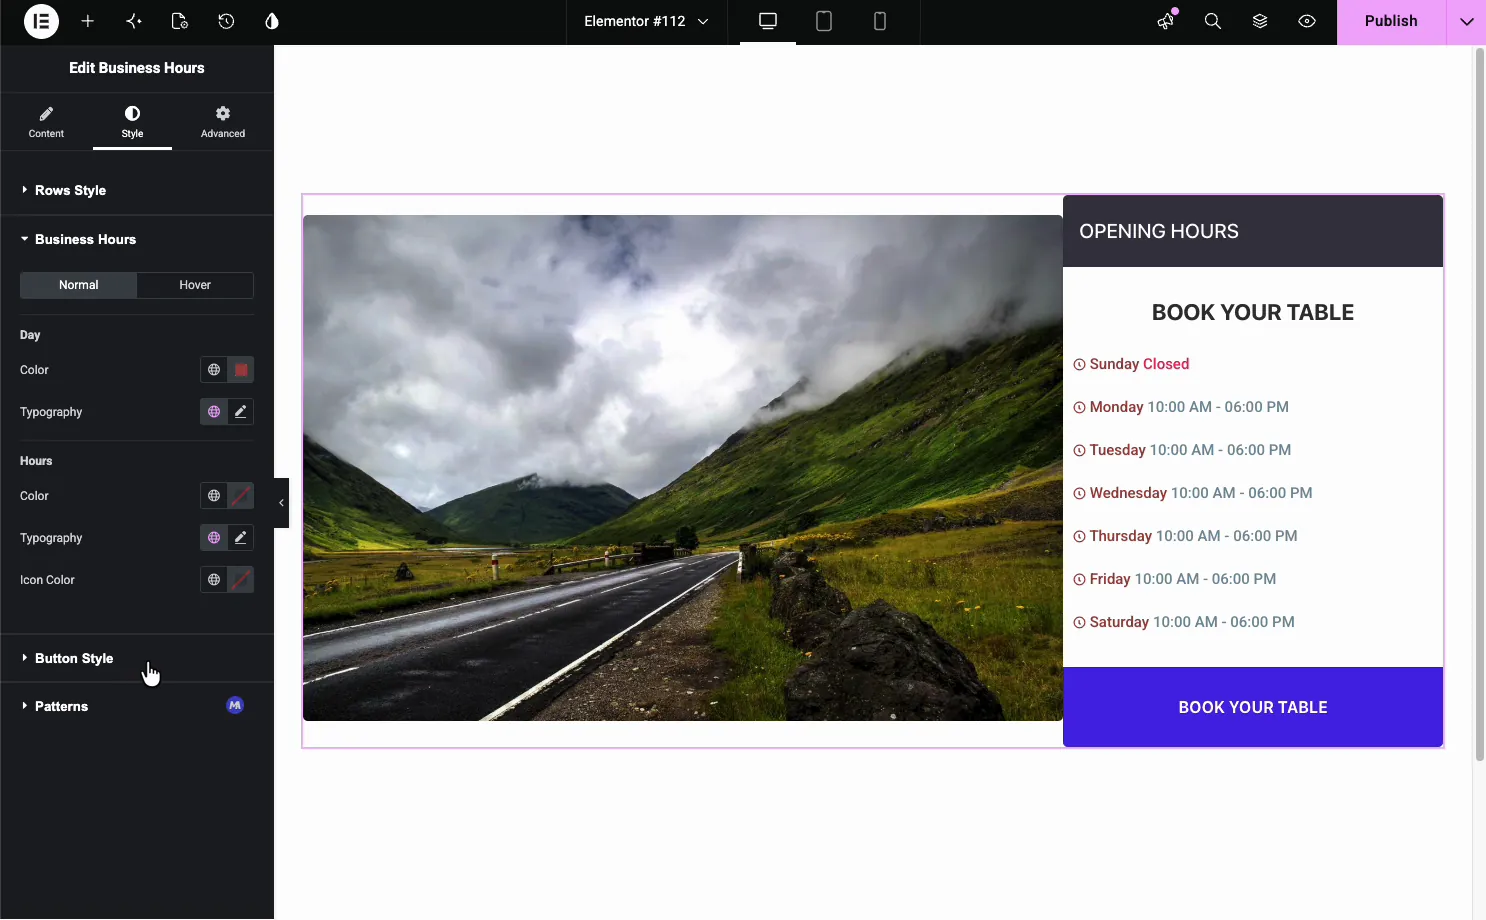
There is a separate Button Style section for the booking button on the presets that include one.
Common use cases #
- Restaurants and cafes pairing hours with a Book a Table button.
- Retail stores showing weekday and weekend hours.
- Clinics and salons marking closed days and appointment-only slots.
- Gyms and studios listing class or access hours.
- Contact pages putting opening times next to a map or form.
Tips for working with the Business Hours widget #
- Highlight special days. The Highlight toggle draws the eye to a holiday or late opening. Update it by hand, since it does not move with the date.
- Set closed days clearly. The Closed toggle and Closed Row styling make days off obvious.
- Match the preset to the business. Booking Reservation suits restaurants; the plain table fits a contact page.
- Keep times consistent. Pick 12 or 24 hour format and use it across every day.
- Use striped rows for long lists. Alternating colors make seven rows easier to scan.
Watch the video tutorial #
Prefer to follow along on screen? The video tutorial below explains how the Business Hours element works, walking through the preset, per-day hours, and styling in the Elementor editor.
Frequently Asked Questions #
What is the Business Hours widget in Master Addons?
It is an Elementor widget that shows your opening hours as a table, one row per day, with open and close times and a Closed label for days off. It includes design presets, day icons, and a booking button, all set from the Elementor panel with no code.
How do I mark a day as closed?
Click the day in the Content tab and turn on the Closed toggle. The row then shows your Closed Text (like Closed or By Appointment) instead of times. You can style closed rows separately with the Closed Row options in the Style tab.
Can I add a booking button to the business hours?
Yes. Turn on Show Button? in the Content tab and set the Button Text, Link URL and alignment. The Booking Reservation presets pair the hours with an image and the button. The button and image presets have their own Button Style section in the Style tab, so you can label and color the button.
Can I switch to 24 hour time format?
Yes. The Content tab has a 24 Hours Format toggle. Turn it on to show times like 18:00 instead of 6:00 PM. The Days Format option nearby switches between full day names and short ones like Mon or Sun.
Can I highlight the current day?
Not automatically. Each day has a manual Highlight toggle that emphasizes that row, but it does not change with the date and the widget has no open now status. For a live note, the Pro Display Conditions extension can show a heading only on certain days and times. You control the look through the row and text styling in the Style tab.
Wrapping up #
The Business Hours widget turns your opening times into a clean, styled table: set each day’s hours, mark the closed days, pick a preset like Booking Reservation, then color the rows and button to match. For related widgets, see the Info Box widget and the Call to Action widget, browse the full Master Addons widgets and extensions, and see the Business Hours widget page for demos and more examples.


