The Gallery field lets editors pick a whole set of images at once for a custom widget built with the Master Addons Widget Builder. Your template loops over the set and prints one item per image, so the widget grows or shrinks with the number of photos. Use it for photo grids, portfolio walls, logo rows and image sliders.
Gallery is a Pro field. The free plugin includes a limited Widget Builder, and the full set of fields comes with Master Addons Pro.

What the Gallery field does #
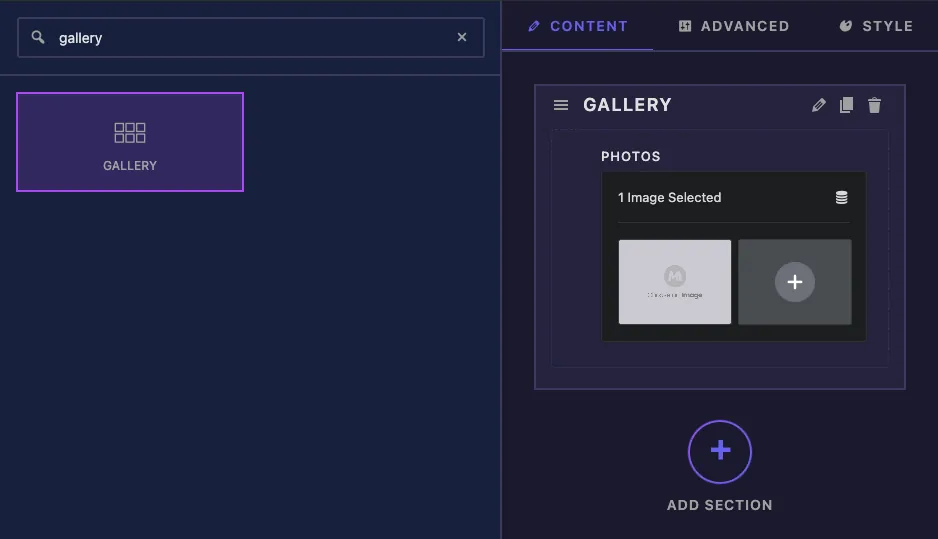
- It adds a gallery box to your widget’s panel in Elementor. Editors choose several images from the Media Library in one go.
- The images are stored as a list, in the order the editor arranged them. Each image has an
idand aurl. - Your template prints the list with a
{% for %}loop. - Layout is up to your CSS. The loop prints the items and a grid or flex container arranges them.
If you haven’t built a widget yet, read the Widget Builder overview first.
Before you start #
- WordPress with Elementor installed and active.
- Master Addons for Elementor and Master Addons Pro, both active. The installation guide covers setup.
- Some images in your Media Library.
- A widget open in the Widget Builder. The example in this guide is a “Photo Grid” widget with a Gallery field named
photos.
How to add a Gallery field #
- Go to Master Addons > Widget Builder and open your widget.
- On the Content tab, add a section, for example “Gallery”.
- Type
galleryin the field search box on the left. - Drag Gallery into the section. Its settings open in the left sidebar.
Gallery field options explained #
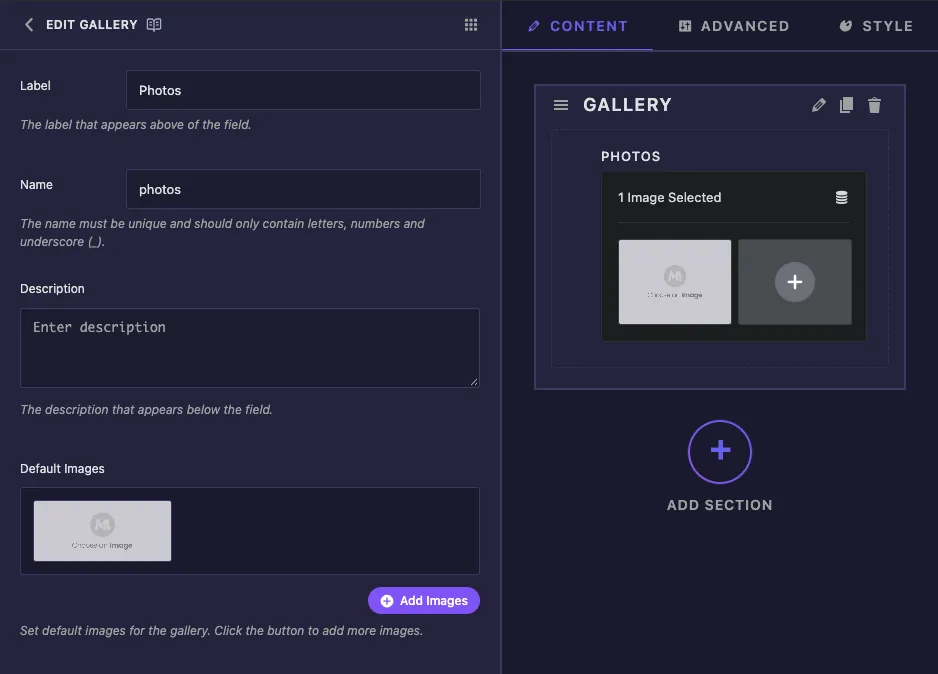
- Label is the text above the gallery box in Elementor, for example “Photos”.
- Name is the field’s unique ID and the list you loop over, for example
photos. Letters, numbers and underscores only. - Description appears under the control in Elementor.
- Default Images has an Add Images button that adds a placeholder slot. Hover over a slot for a cross to remove it and a pencil to choose a real image for that slot.
In our tests, the images set under Default Images were not passed to Elementor. A new copy of the widget started with a single placeholder instead, which the loop read as two empty items. The template below skips those, so plan for editors to add their own images after dropping the widget on a page.
The common settings further down work as they do on other fields.
Loop over the images in your template #
A gallery is a list, so {{ photos }} on its own prints nothing useful. Loop over it and print each image inside the loop:
{% if photos %}
<div class="photo-grid">
  {% for img in photos %}
    {% if img.url %}
      <figure class="photo-cell">
        <img src="{{ img.url }}" alt="">
      </figure>
    {% endif %}
  {% endfor %}
</div>
{% endif %}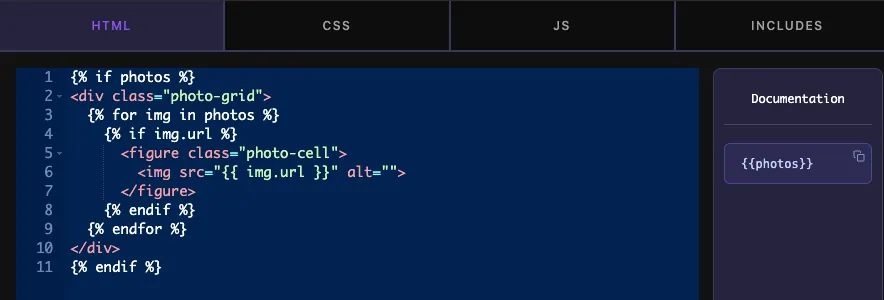
photosis the field’s Name.imgis a name you choose for the current image in the loop.{{ img.url }}is the image file URL and{{ img.id }}is its Media Library ID.- The outer
{% if photos %}skips the whole grid when the gallery is empty. - The inner
{% if img.url %}skips any item without a URL, such as the placeholder a new widget starts with.
Arrange the items in the CSS tab. This grid makes three equal columns and crops every photo to the same shape:
.photo-grid { display: grid; grid-template-columns: repeat(3, 1fr); gap: 12px; }
.photo-cell { margin: 0; overflow: hidden; border-radius: 12px; aspect-ratio: 4 / 3; }
.photo-cell img { width: 100%; height: 100%; object-fit: cover; display: block; }
Click Save Settings when you’re done.
Use the Gallery control in Elementor #
Add the widget to a page, or reload the editor if the page was already open. The gallery box shows how many images are selected and a thumbnail of each one. The trash icon clears the whole set.
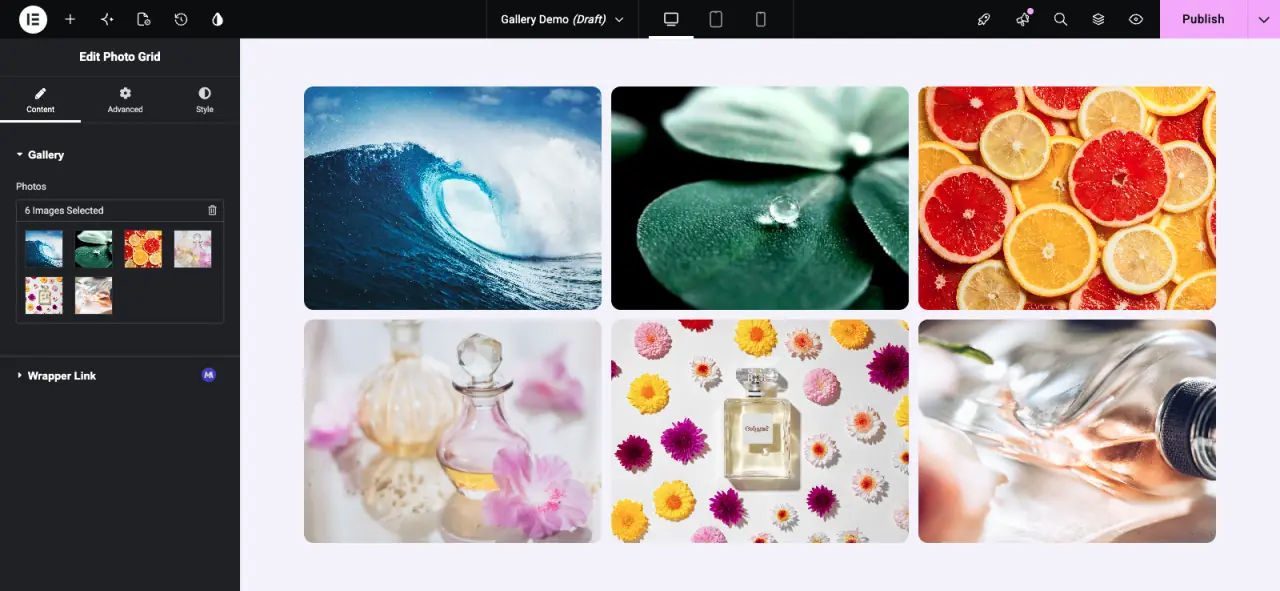
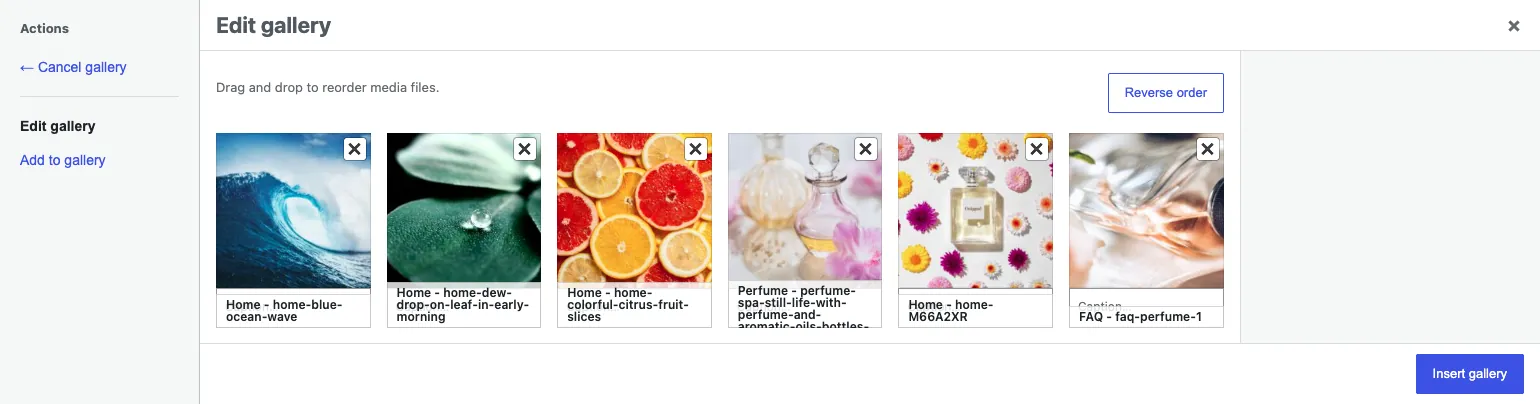
Click the thumbnails to open the WordPress gallery window. Drag images to change their order, click Reverse order to flip it, use Add to gallery to pick more images, and click the cross on an image to remove it. Click Insert gallery to save the set. The grid updates in the same order.
Common use cases #
- Photo and portfolio grids.
- Logo walls for clients or partners.
- Image sliders, with the loop printing one slide per image.
- Before-and-after or product image sets inside a card.
Tips for working with the Gallery field #
- Always wrap the markup in
{% if img.url %}inside the loop, so a new widget doesn’t show empty image boxes. - Use
aspect-ratioandobject-fit: coverso photos of different sizes line up. - Let CSS decide the columns. A grid wraps any number of images without template changes.
- Add an
altattribute. The loop gives you the image ID if you need to print a caption or alt text from another field. - For one image, use the Media field. For images that each need their own text or link, use the Repeater field.
Frequently Asked Questions #
Is the Gallery field free?
No. Gallery is one of the Pro fields in the Widget Builder, so Master Addons Pro has to be active before you can add it to a widget.
Why does {{ photos }} print nothing?
A gallery holds a list of images, so the token on its own has nothing useful to print. Loop over it with {% for img in photos %} and print {{ img.url }} inside the loop.
Why does a new widget show empty image boxes?
In our tests a new widget started with a placeholder item that the loop read as two entries without a URL. Add {% if img.url %} inside the loop so those are skipped, then add real images in Elementor.
Do my Default Images show up in Elementor?
Not in our tests. The images set under Default Images in the builder weren’t used, so editors need to add images in Elementor.
Can editors change the order of the images?
Yes. Clicking the thumbnails in Elementor opens the WordPress gallery window, where images can be dragged into a new order or reversed. The loop follows that order.
Wrapping up #
Add the Gallery field, loop over it with {% for %}, skip empty items with {% if img.url %}, and let a CSS grid handle the layout. Editors then add, remove and reorder images from Elementor. See the Twig syntax guide for more on loops and checks, and pricing for what each plan includes.