

Not every element belongs in front of every visitor. A “Sign up” banner is noise for logged-in members, a weekend promo has no business showing on Tuesday, and a sidebar card might only make sense on blog posts. The Display Conditions extension in Master Addons Pro handles all of it with rules on a widget or legacy section that decide when it renders and when it stays hidden.
You build the rules right on the widget’s Advanced tab, combine them with AND or OR logic, and the element shows only when the rules pass. No code is needed. It is a display tool, so use Restrict Content or a membership plugin for anything private.
What the Display Conditions extension does #
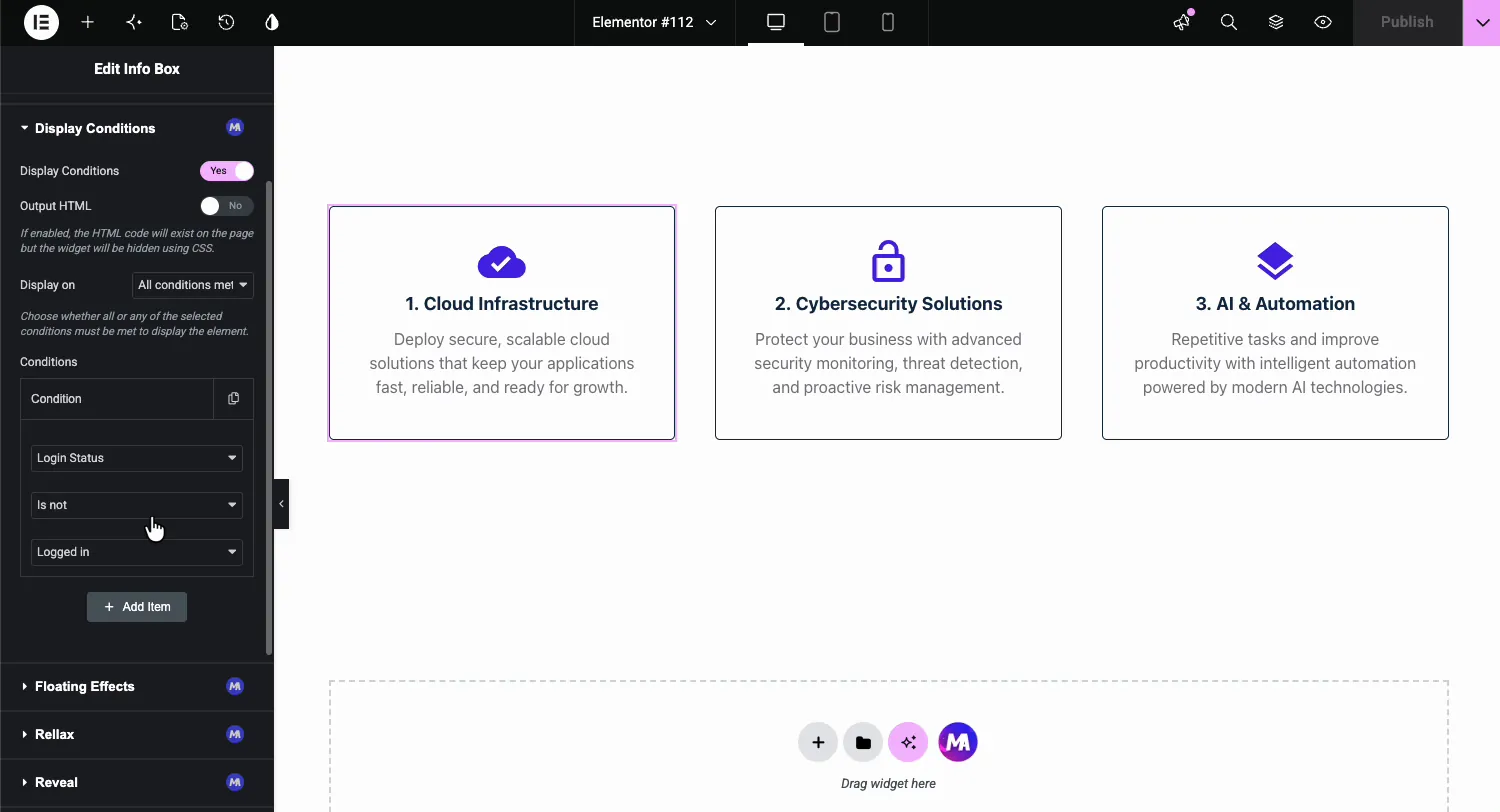
Once enabled, every Elementor widget and legacy section gets a Display Conditions section under the Advanced tab. Flip it on, add one or more conditions, and the element renders only when they are met. Each condition is a three-part rule: what to check, an Is / Is not operator, and the value. Flexbox containers do not get the section, so add rules to the widgets inside a container.
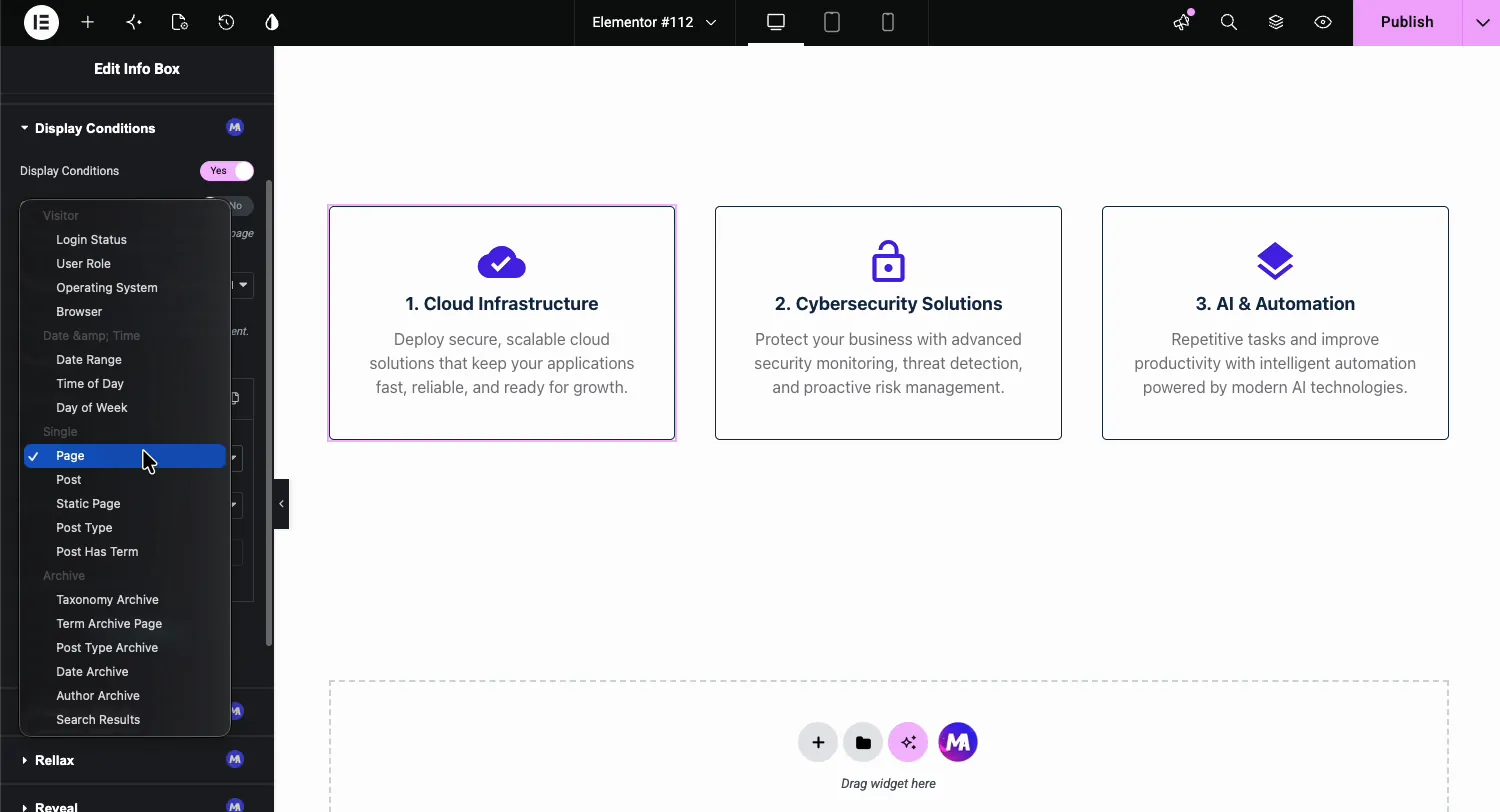
The condition types cover four groups:
- Visitor: Login Status, User Role, Operating System, and Browser.
- Date & Time: Date Range, Time of Day, and Day of Week.
- Single: Page, Post, Static Page, Post Type, and Post Has Term.
- Archive: Taxonomy Archive, Term Archive Page, Post Type Archive, Date Archive, Author Archive, and Search Results.
Before you start #
- WordPress with Elementor installed and active.
- Master Addons for Elementor installed and active. New to the plugin? Follow the installation guide first.
- An active Master Addons Pro license. Display Conditions is a Pro extension and does nothing in the free plugin.
How to enable the Display Conditions extension #
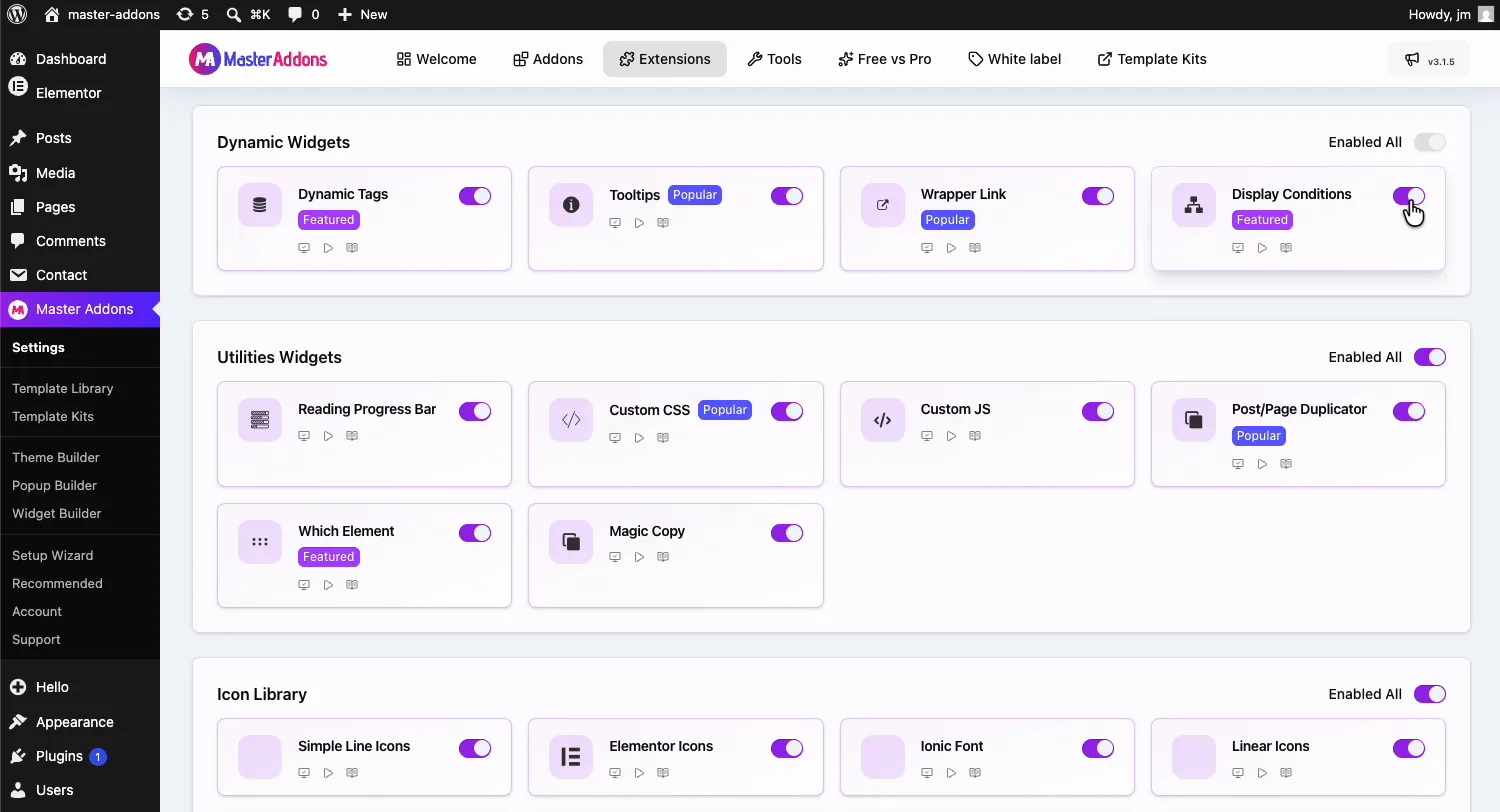
From your WordPress dashboard, go to Master Addons and open the Extensions tab. Display Conditions sits in the Dynamic Widgets group with a Featured badge, next to Wrapper Link and Dynamic Tags. Click its toggle so it turns purple, then hit Save Changes and wait for the green “Settings saved successfully” notice.
Add conditions to an element #
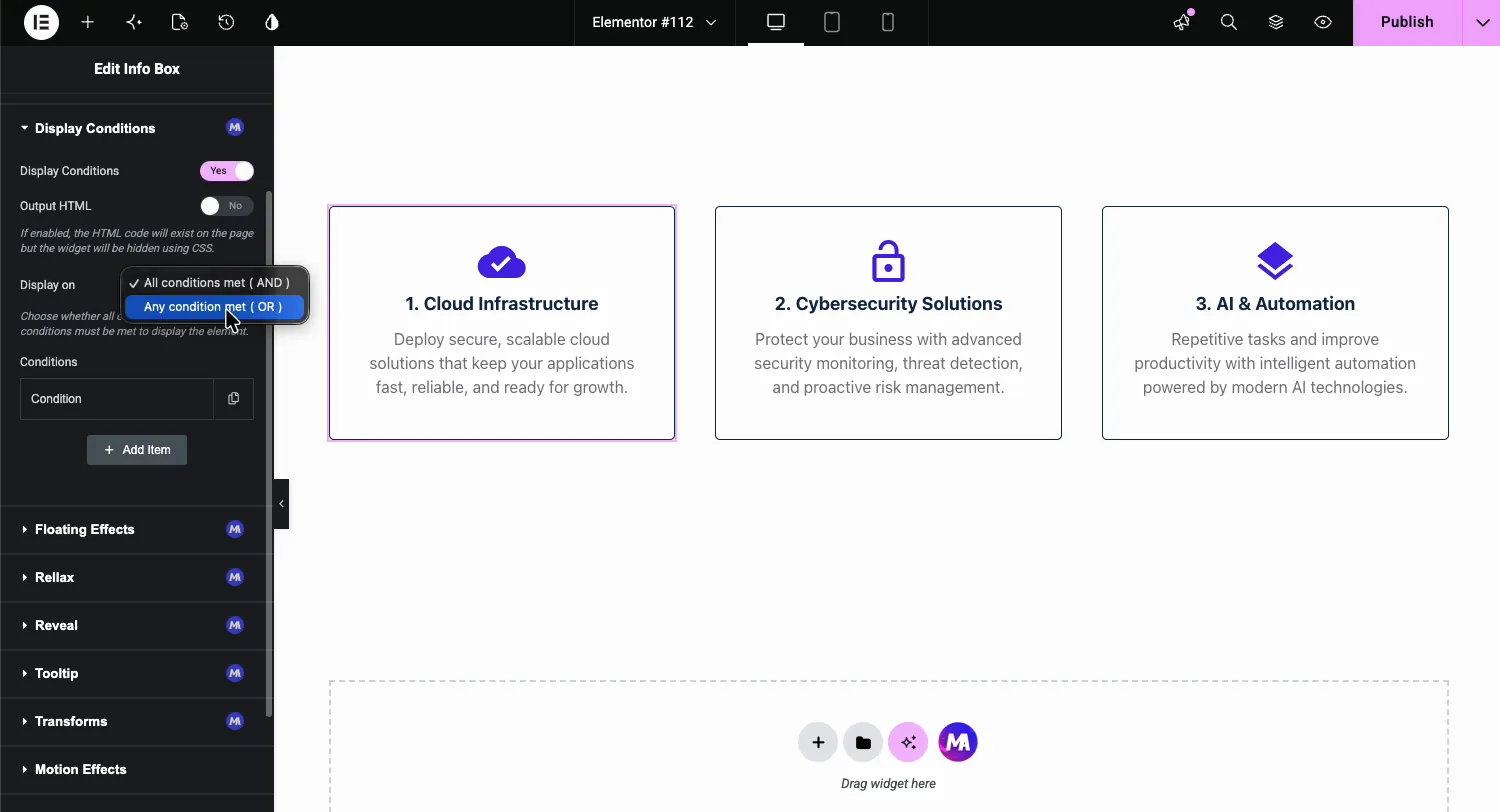
Select the element in the Elementor editor, open the Advanced tab, and expand the Display Conditions section with the purple MA badge. Flip Display Conditions to Yes and the controls appear:
- Output HTML: off by default, so a hidden element is skipped entirely. Turn it on and the HTML still loads but stays hidden with CSS, which matters if scripts on the page expect the markup to exist.
- Display on: the logic between multiple rules. All conditions met (AND) requires every rule to pass; Any condition met (OR) shows the element when at least one does.
- Conditions: a repeater list. Click Add Item for each new rule.
Pick a condition type #
Open a condition and the first dropdown lists everything you can check, grouped into Visitor, Date & Time, Single, and Archive.
Example: show only to logged-out visitors #
Set the rule to Login Status, Is not, Logged in. A signup card with this rule disappears for members and keeps pitching everyone else. Flip the operator to Is, and the same card becomes members-only.
Example: limit by post type #
A Post Type rule with the Is or Is not operator keeps an element on, or off, specific content types. Leave the value blank to match any post type, as the panel hint says. Stack it with more rules through Add Item, and remember the Display on setting decides whether they combine as AND or OR.
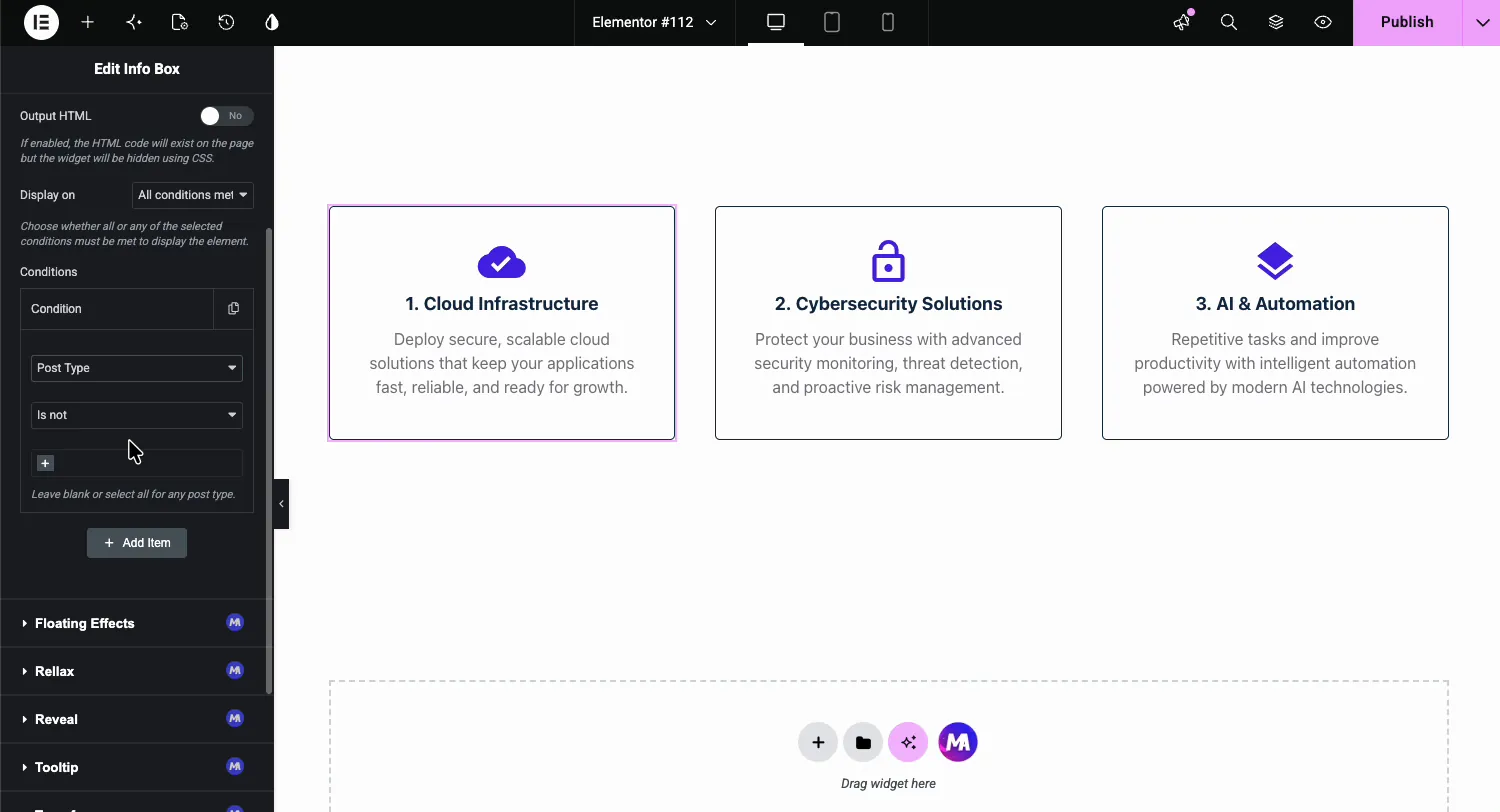
The result on the page #
Publish and load the page as someone who fails the rule. The element is gone: in the demo the first card of a three-card row is hidden, and the other two render as usual.
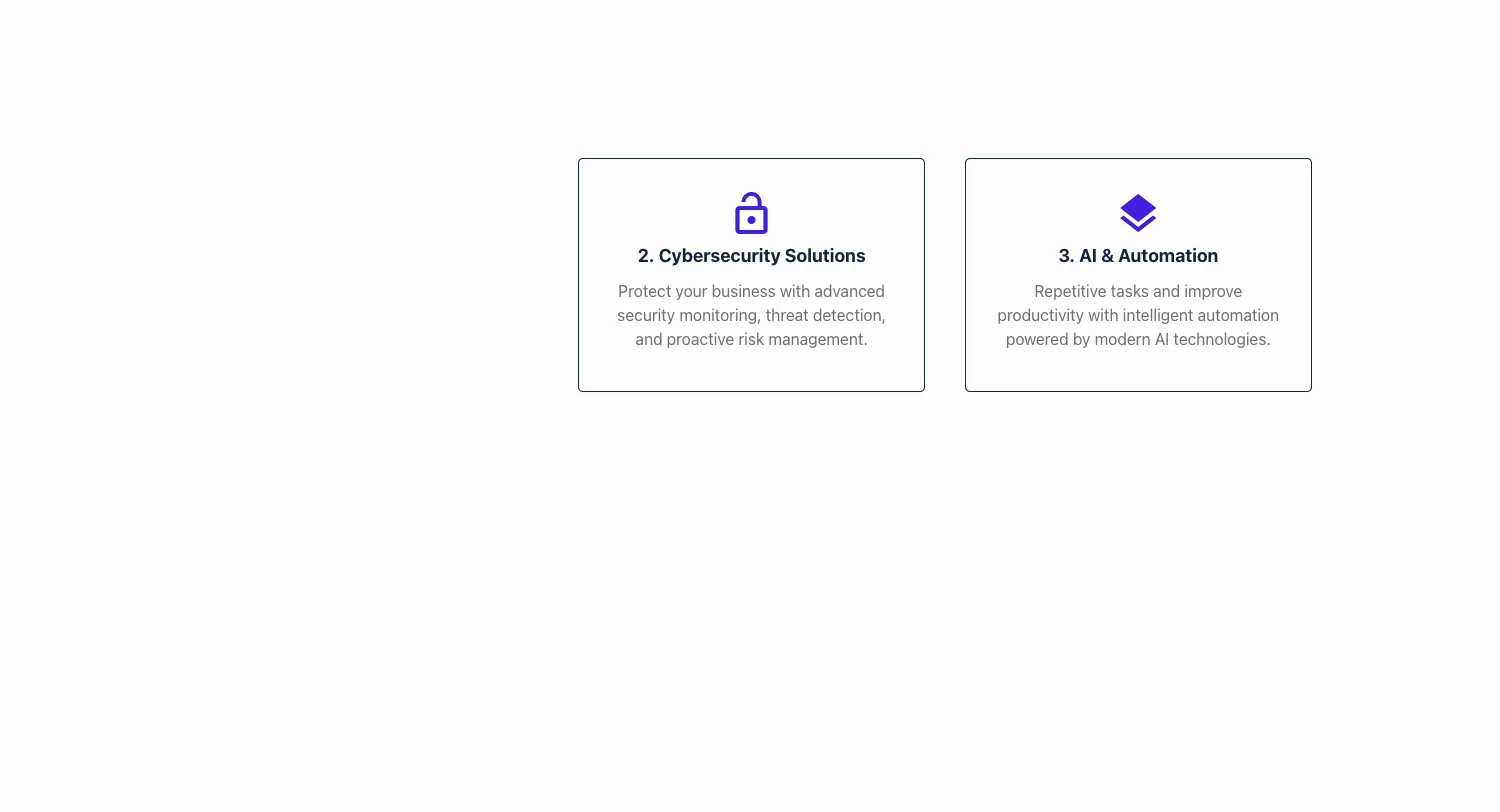
With Output HTML off, the hidden card is not in the page source at all. The server never sent it in the first place. A legacy section works differently: its content always stays in the source and is hidden with CSS.
Where display conditions earn their keep #
- Member content. Show download buttons to logged-in users, signup pitches to everyone else.
- Scheduled promos. A Date Range or Day of Week rule runs the weekend banner without you touching the page on Monday.
- Role-based dashboards. User Role rules show admin shortcuts to admins only.
- Browser and OS quirks. Hide an element that misbehaves in one browser instead of debugging it at midnight.
- Template fine-tuning. Page, Post Type, and Archive rules let one template carry sections that appear only where they belong.
Video Tutorial #
See the rules built end to end, from enabling the extension to a card that hides itself.
Frequently Asked Questions #
How do I show or hide an Elementor element for logged-in users?
Enable the Display Conditions extension, open the element’s Advanced tab, and add a Login Status condition. Set it to Is Logged in to show the element only to members, or Is not Logged in to show it only to guests.
What conditions can I use to control visibility?
Login Status, User Role, Operating System, Browser, Date Range, Time of Day, Day of Week, Page, Post, Static Page, Post Type, Post Has Term, and archive checks like Taxonomy Archive, Author Archive, and Search Results. Each takes an Is or Is not operator.
Can I combine multiple conditions on one element?
Yes. Add as many rules as you need with Add Item, then set Display on to All conditions met (AND) or Any condition met (OR). AND requires every rule to pass, while OR shows the element when at least one rule does.
Does a hidden element still load in the page HTML?
On a widget with Output HTML off, no. The widget is skipped on the server and never reaches the browser. Turn on the Output HTML toggle if you want the markup present but hidden with CSS, which some scripts need to find the element in the DOM. Legacy sections always stay in the source and are hidden with CSS.
Is the Display Conditions extension free?
No. Display Conditions is part of Master Addons Pro. Once Pro is active, you switch it on in the Dynamic Widgets group of the Extensions tab. The pricing page lists the Pro plans.
Wrapping up #
The Display Conditions extension turns Elementor widgets and legacy sections into conditional content: pick what to check, set Is or Is not, and let AND/OR logic handle the rest. Guests see the pitch, members see the content, and the weekend banner clocks out on its own. It combines well with Dynamic Tags in templates, and the rest of the Master Addons widgets and extensions cover the other gaps in the free editor. For the full condition list and a comparison with Elementor Pro, see the Display Conditions extension page.


