

Glassmorphism is the frosted glass look: a semi-transparent card that blurs whatever sits behind it, the style Apple and Windows leaned into across their interfaces. Building it by hand in Elementor means custom CSS with backdrop-filter and a few browser quirks. The free Glassmorphism extension in Master Addons for Elementor turns it into a toggle on the Advanced tab of any element.
You switch it on, set a blur value and a semi-transparent background color, round the corners, and the element becomes a glass card. Here is the whole setup.
What the Glassmorphism extension does #
The extension adds a Glassmorphism section to the Advanced tab of every Elementor element, from full sections down to single widgets. Enable it and the element gets a backdrop blur, so the background image or content behind it smears into frosted glass while the element’s own text stays sharp.
The look works best when the element sits on top of something visually busy, like a photo background or a gradient. Over a plain white section there is nothing to blur, so the effect has nothing to show.
Before you start #
- WordPress with Elementor installed and active.
- Master Addons for Elementor installed and active. New to the plugin? Follow the installation guide first.
- Glassmorphism is a free extension, so no Pro license is required.
- An element placed over an image or colorful background, so the blur has something to work with.
How to enable the Glassmorphism extension #
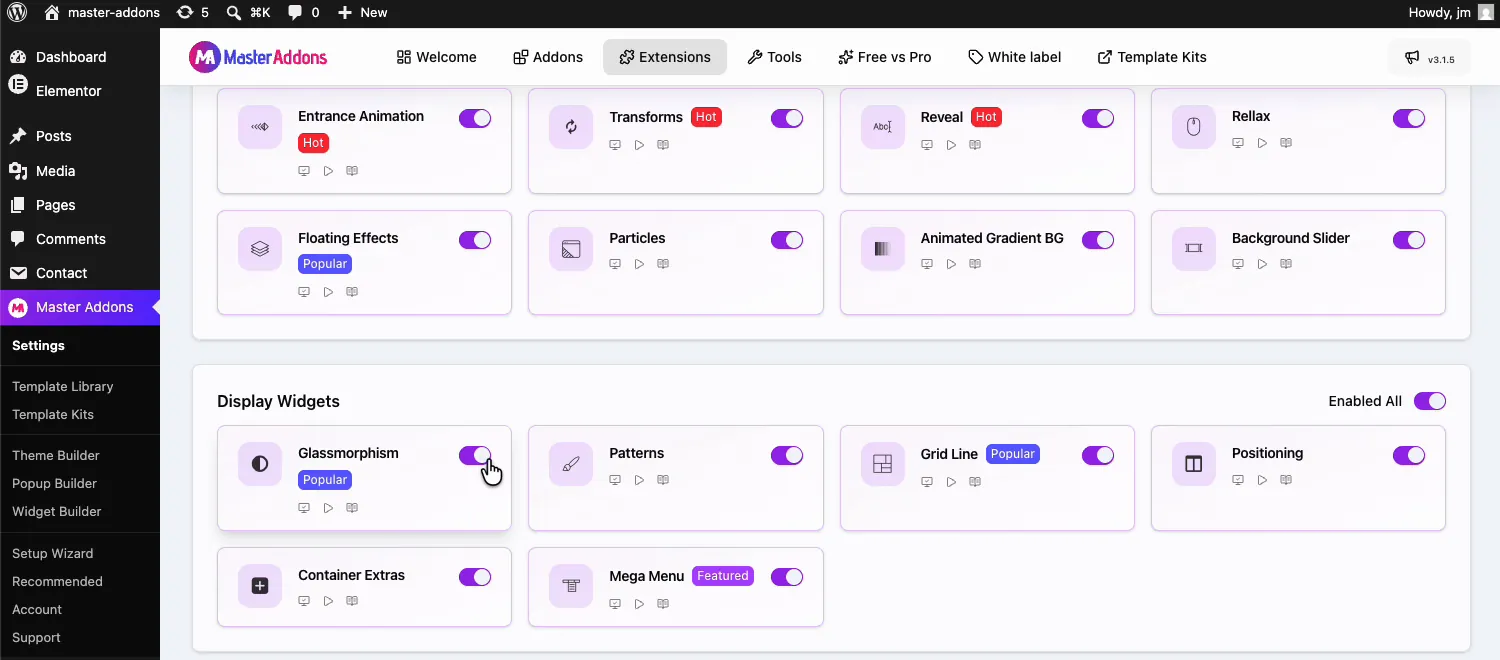
From your WordPress dashboard, go to Master Addons and open the Extensions tab. Glassmorphism sits in the Display Widgets group with a Popular badge, next to Patterns and Grid Line. Click its toggle so it turns purple, then hit Save Changes at the top of the page and wait for the green “Settings saved successfully” notice.
Where to find it in the Elementor editor #
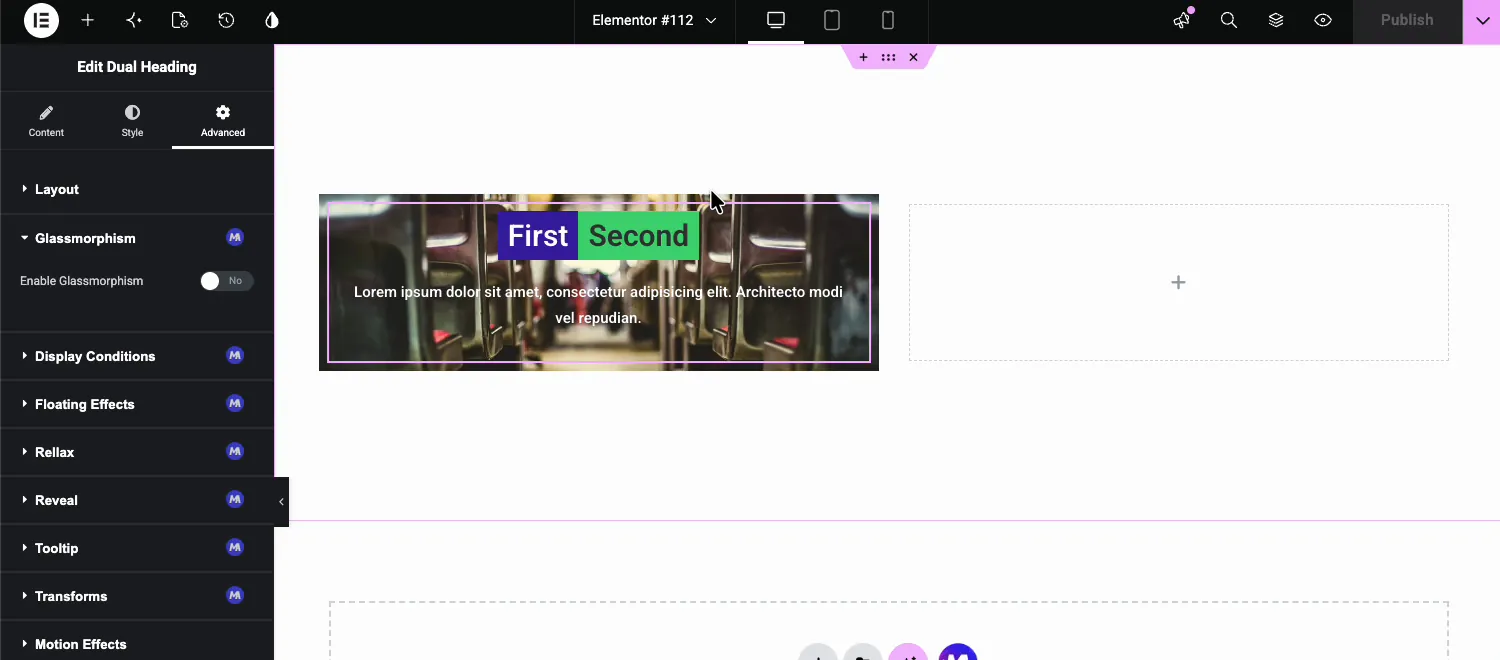
Open your page with Elementor and select the element you want to turn into glass. In the video example it is a Dual Heading widget sitting on a photo background. Go to the Advanced tab, and you will find the Glassmorphism section with the purple MA badge, alongside the other Master Addons extensions like Display Conditions and Floating Effects.
Glassmorphism settings explained #
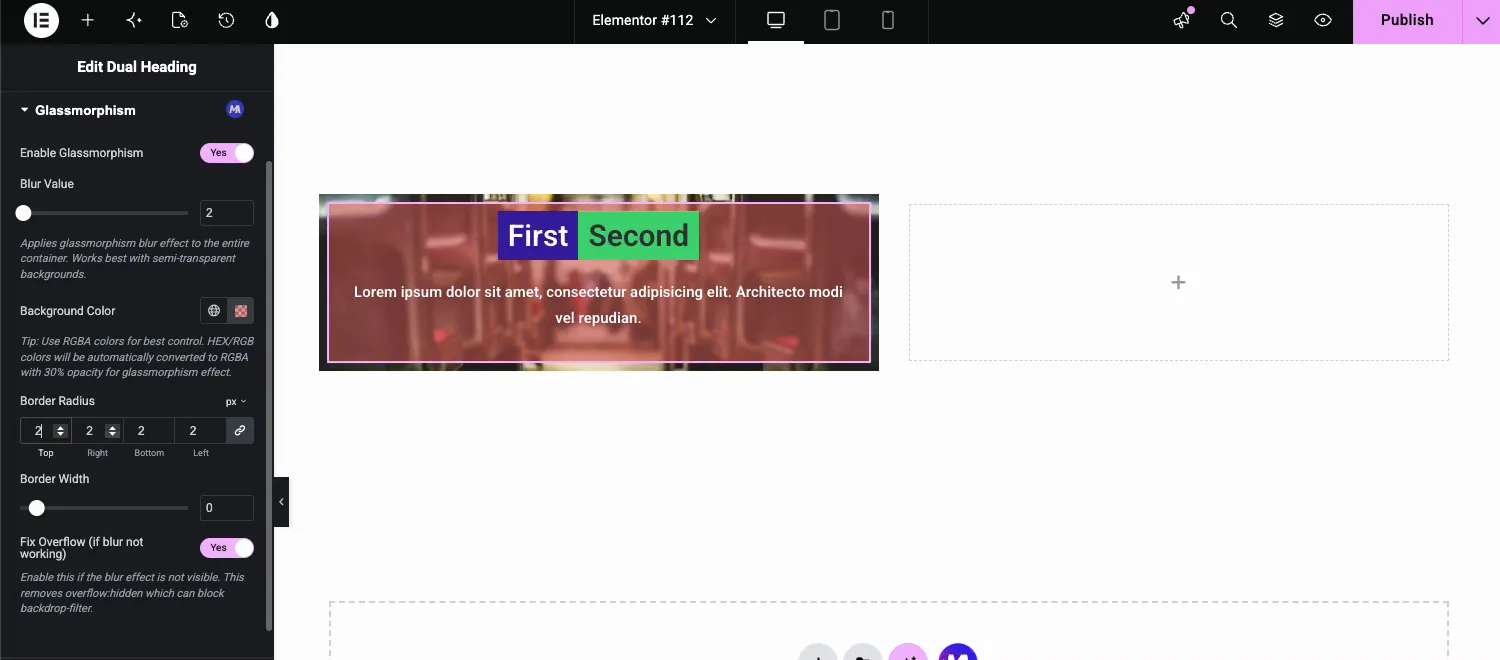
Flip Enable Glassmorphism to Yes and the controls appear.
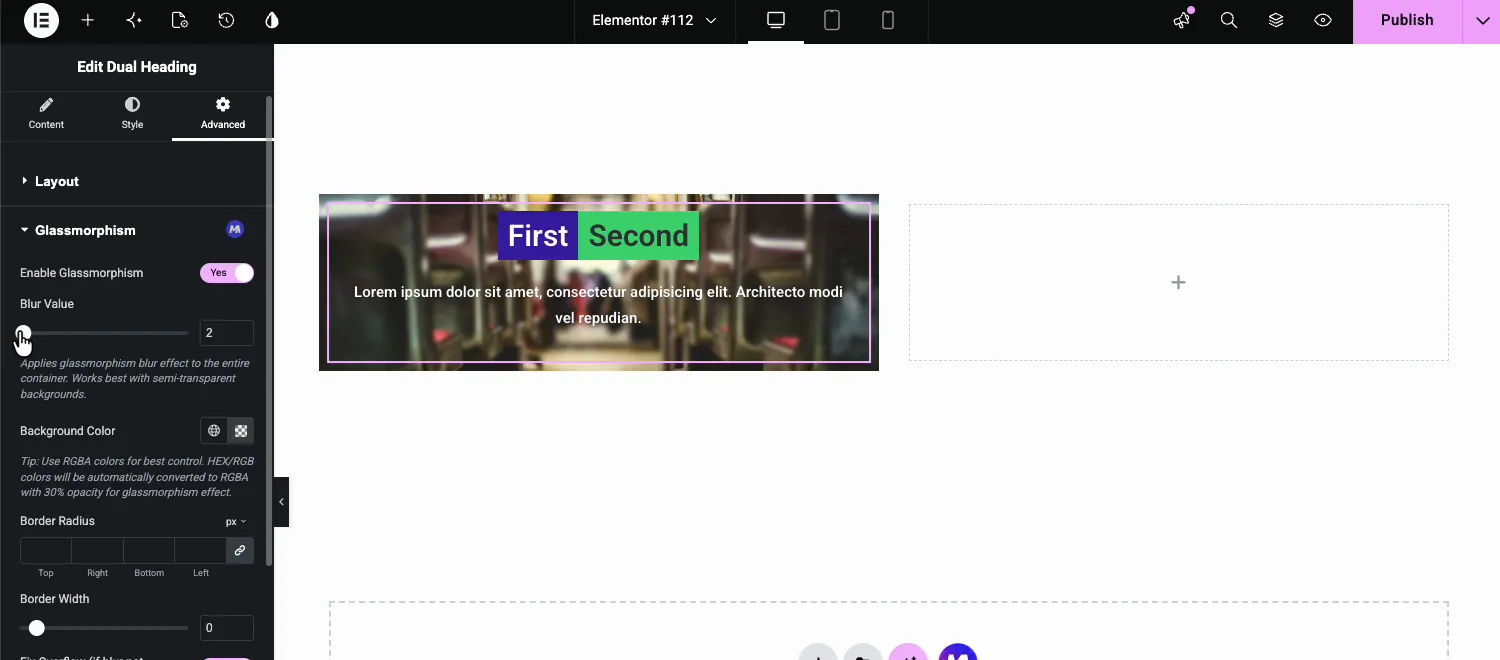
- Blur Value: how strongly the background behind the element smears, from 0 to 100px (20px by default). The blur applies to the entire container, and even a small value like 2 reads clearly over a photo.
- Background Color: the tint of the glass. The panel tip says it plainly: use RGBA colors for best control. A plain HEX color gets converted to RGBA at 30 percent opacity automatically, so the glass never turns solid.
- Border Radius: rounds the corners of the glass card, per side or linked.
- Border Width: adds a semi-transparent white outline from 0 to 10px, which reads like the edge of a glass pane. The border color isn’t adjustable here.
- Fix Overflow (if blur not working): a rescue switch. Some layouts carry overflow:hidden, which blocks the backdrop-filter that powers the blur. Turn this on if you enabled everything and still see no effect.
Pick the glass tint with an RGBA color #
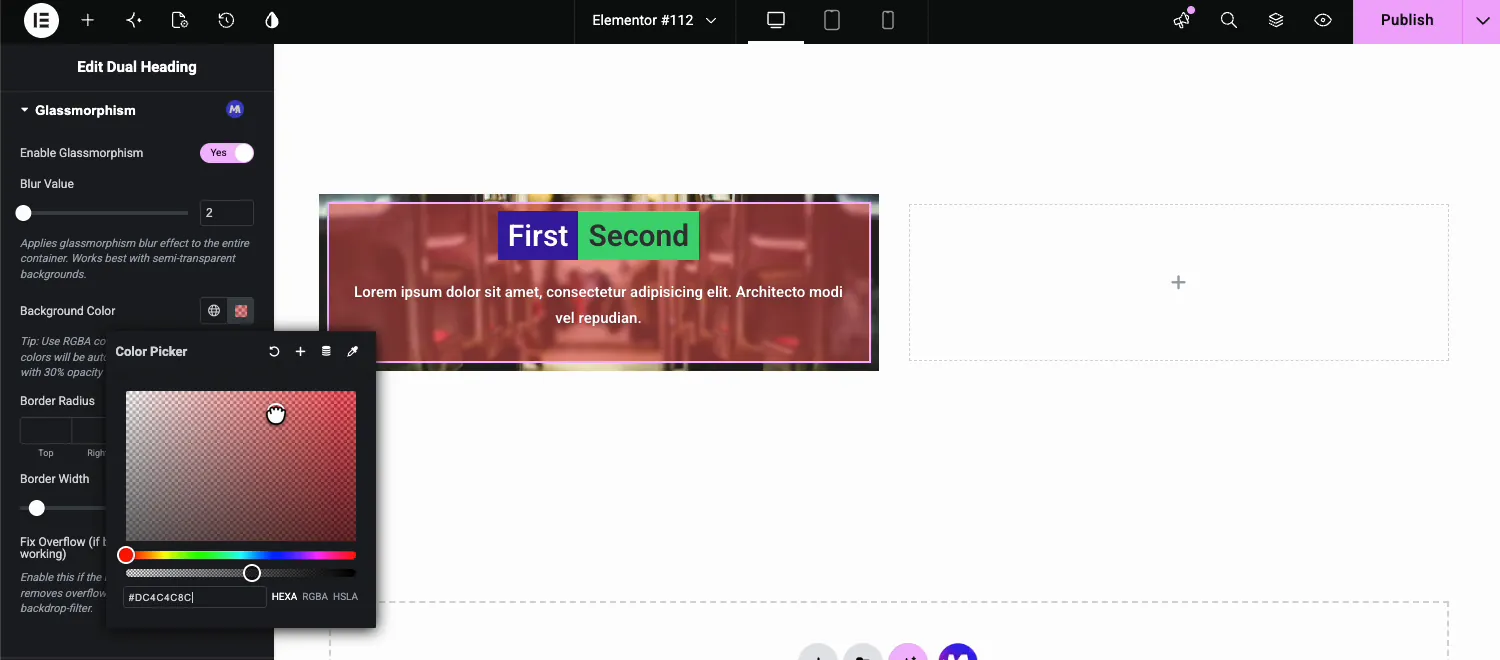
Click the custom swatch next to Background Color and choose a color, then pull the alpha slider down. In the demo the value is a semi-transparent red (#DC4C4C8C), which tints the card while the seats in the photo behind it stay visible through the blur.
Round the corners and rescue a missing blur #
Set a Border Radius to soften the card. A few pixels is enough for the glass look. And if the blur refuses to show, flip Fix Overflow to Yes: it removes the overflow:hidden rule that blocks backdrop-filter in some containers.
The finished effect #
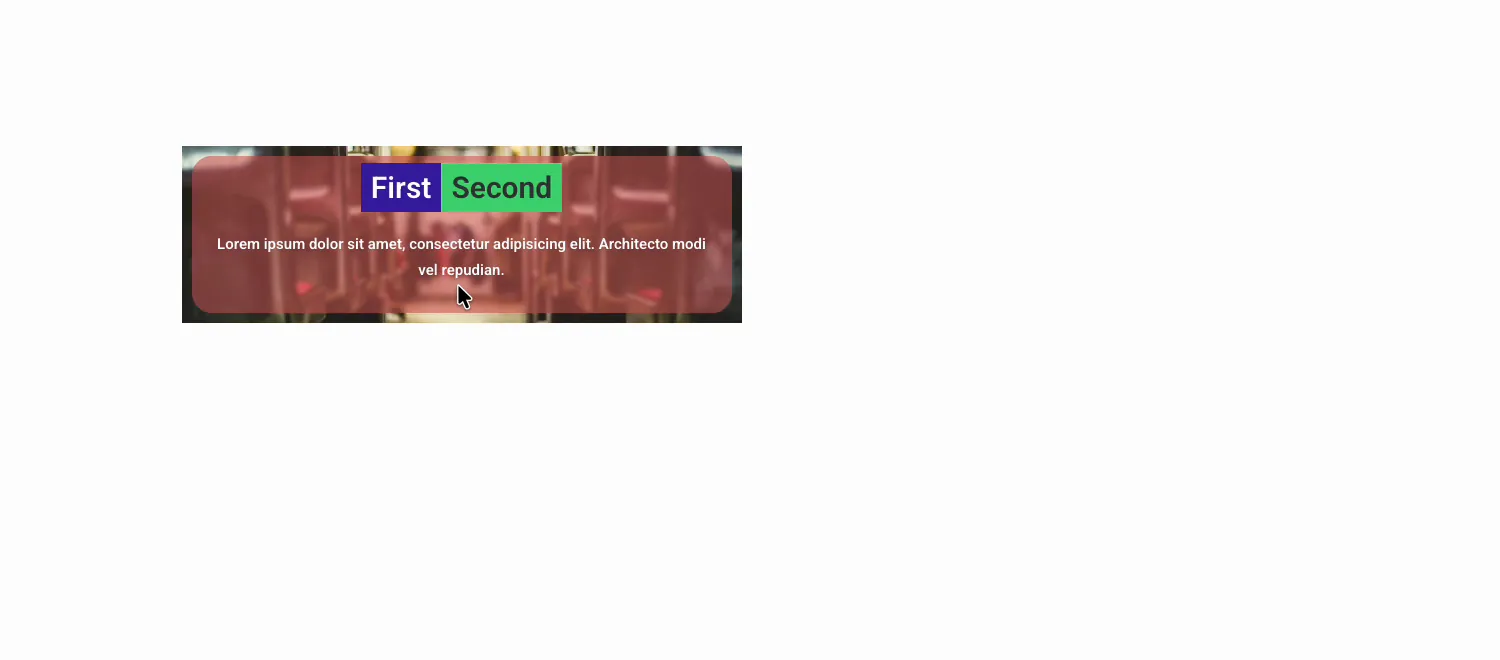
Here is the result on the front end: a rounded glass card with a red tint, the photo blurred behind it, and the heading and text sharp on top.
Where glassmorphism works well #
- Hero overlays. A glass panel for the headline and CTA on top of a full-width photo.
- Pricing and feature cards. Glass cards over a gradient section background.
- Testimonial blocks. Quotes that float over imagery without hiding it.
- Sticky headers. A subtle blur keeps the menu readable as content scrolls under it.
- Login or signup boxes. The classic frosted panel over a brand image.
Frequently Asked Questions #
What is the Glassmorphism extension in Master Addons?
It is a free extension that adds a frosted glass effect to any Elementor element from the Advanced tab. You get controls for blur strength, a semi-transparent background color, border radius, and border width, and you never have to write the CSS yourself.
Why is the glassmorphism blur not showing?
Usually a parent container carries overflow:hidden, which blocks the backdrop-filter behind the effect. Turn on the Fix Overflow toggle at the bottom of the Glassmorphism section. Also check that the element sits over an image or colored background, since blur over plain white is invisible.
Which elements can use the glassmorphism effect?
Any Elementor element with an Advanced tab: sections, columns, containers, and individual widgets. Enable the extension once in the Master Addons dashboard, and the Glassmorphism section appears on the Advanced tab of every element in the editor.
What background color should I use for glassmorphism?
A semi-transparent RGBA color. Pick any hue and lower the alpha channel so the background stays visible through the tint. If you enter a solid HEX color, the extension converts it to RGBA at 30 percent opacity so the glass effect still works.
Is the Glassmorphism extension free?
Yes. It ships with the free version of Master Addons for Elementor, in the Display Widgets group of the Extensions tab. The pricing page lists what the Pro plans add beyond the free features.
Wrapping up #
The Glassmorphism extension turns a fiddly CSS trick into a few controls on the Advanced tab: enable, blur, tint, radius and border. Put a widget over a photo, keep the background color semi-transparent, and reach for Fix Overflow if the blur ever hides. The Glassmorphism extension page compares it with writing the CSS yourself. For more editor upgrades like this, browse the Master Addons widgets and extensions, or grab a ready-made design from the template kits and add the glass on top.


