

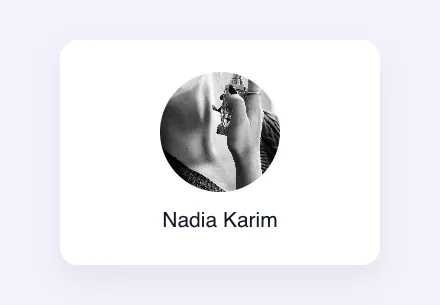
The Media field adds an image picker to a custom widget built with the Master Addons Widget Builder. Editors choose an image from the Media Library or upload a new one in Elementor, and your template prints its URL, ID or alt text. Use it for profile photos, logos, hero images, product shots and any other single image slot.
Media is one of the fields you can use in the free version’s Widget Builder. The free plugin includes a limited Widget Builder, and the full set of fields comes with Master Addons Pro.
What the Media field does #
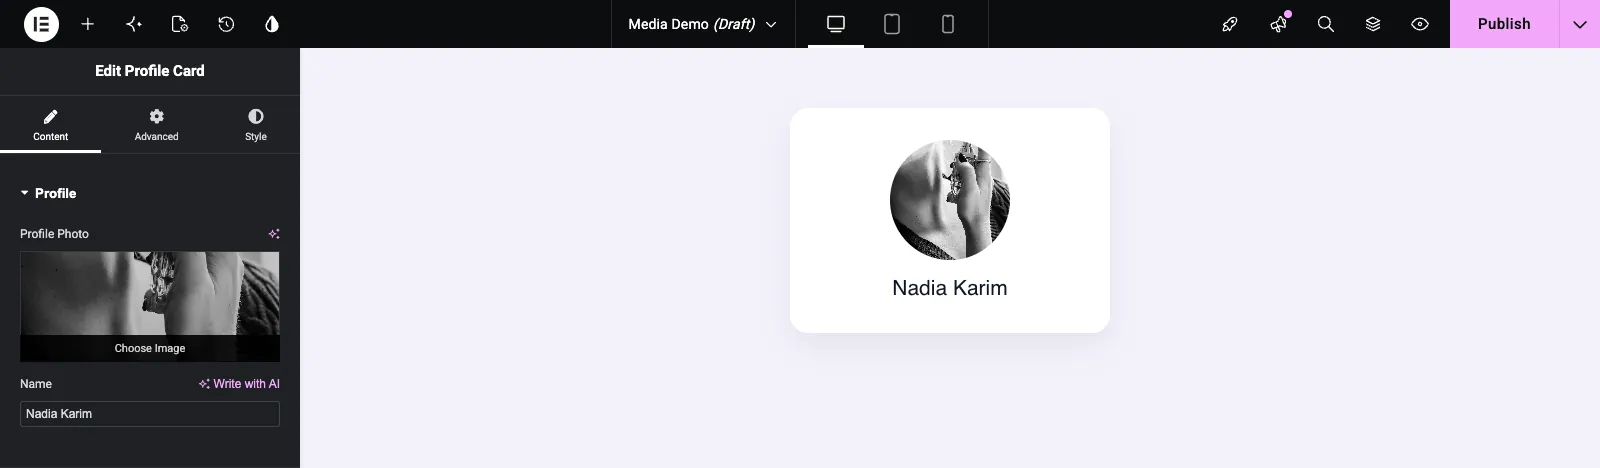
- It adds Elementor’s image box to your widget’s panel, with a Choose Image button.
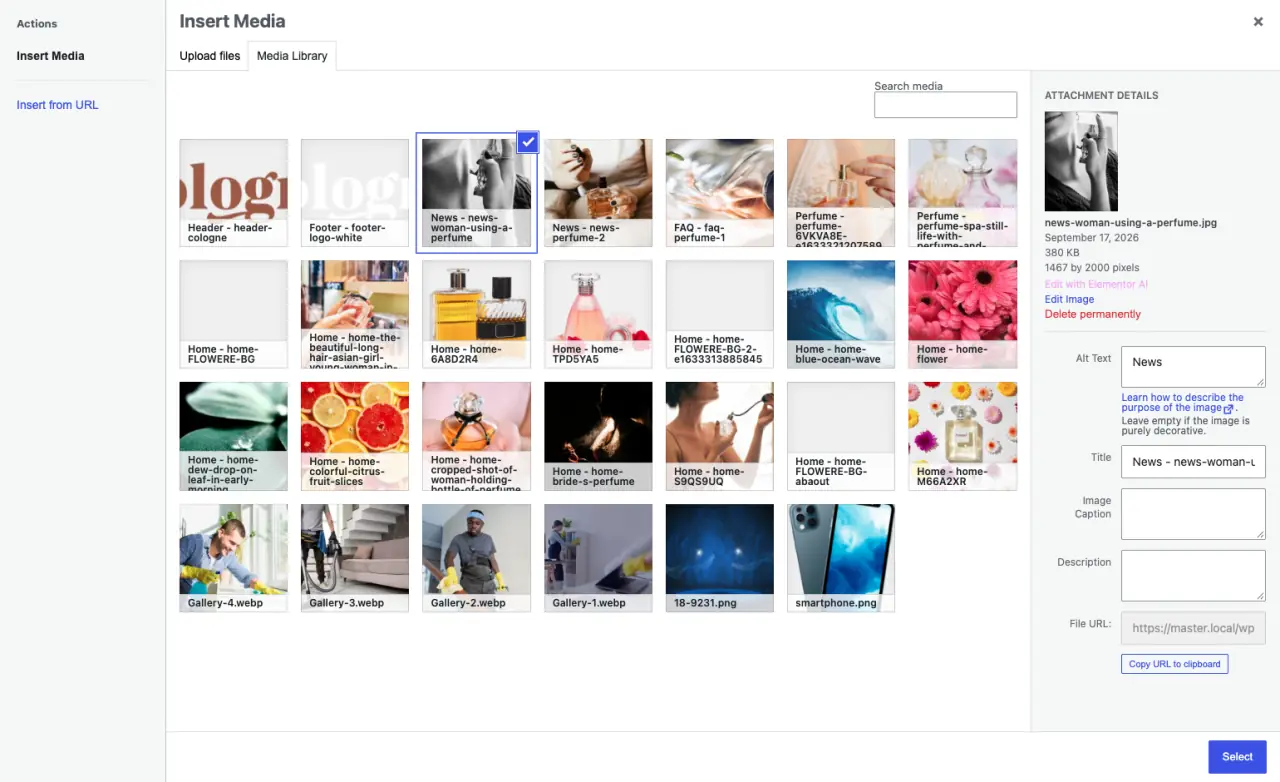
- Choose Image opens the WordPress media window, where editors upload a file, pick one from the Media Library or insert one from a URL.
- The field stores the image’s
url,idandalttext, and your template prints whichever it needs. - It works in the HTML tab and the CSS tab, for example as a background image.
If you haven’t built a widget yet, read the Widget Builder overview first.
Before you start #
- WordPress with Elementor installed and active.
- Master Addons for Elementor installed and active. The installation guide covers setup.
- A widget open in the Widget Builder. The example in this guide is a “Profile Card” widget with a Media field named
profile_photoand a Text field for the name.
How to add a Media field #
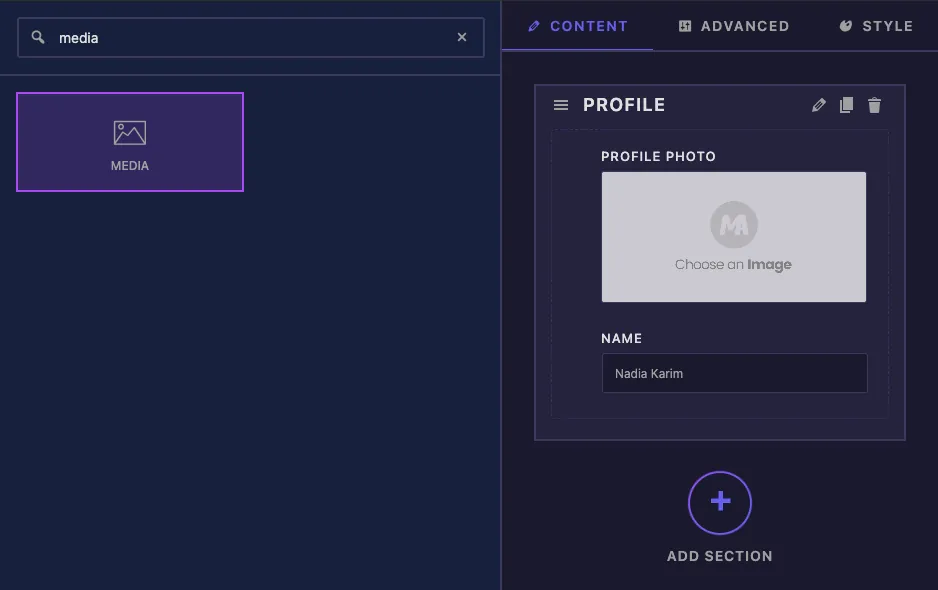
- Go to Master Addons > Widget Builder and open your widget.
- On the Content tab, add a section, for example “Profile”.
- Type
mediain the field search box on the left. - Drag Media into the section. Its settings open in the left sidebar.
Media field options explained #
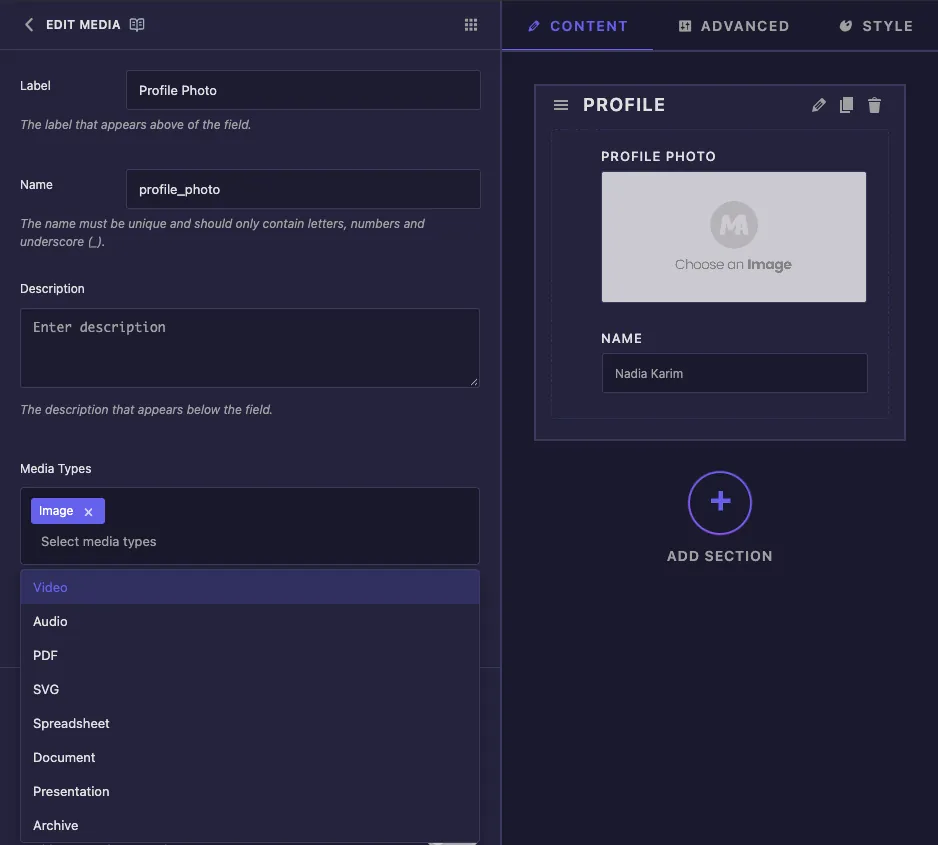
- Label is the text above the image box in Elementor, for example “Profile Photo”.
- Name is the field’s unique ID and the start of its tokens, so
profile_photogives{{ profile_photo.url }}. Letters, numbers and underscores only. - Description appears under the image box in Elementor.
- Media Types lists Image (the default), Video, Audio, PDF, SVG, Spreadsheet, Document, Presentation and Archive. In our tests this setting didn’t reach Elementor. A field set to Video still showed up as a normal image picker, so treat the Media field as an image field.
There’s no default image setting, so a new copy of the widget starts with no image until an editor picks one. The common settings further down work as they do on other fields.
Print the image in your template #
The field holds several values, and you print each one with a dot:
{{ profile_photo.url }}is the image file URL.{{ profile_photo }}on its own prints the same URL.{{ profile_photo.id }}is the image’s Media Library ID.{{ profile_photo.alt }}is the alt text the image had in the Media Library when the editor picked it.
Wrap the <img> tag in a check, so nothing prints while the field is empty:
{% if profile_photo.url %}
  <img class="profile-photo" src="{{ profile_photo.url }}" alt="{{ profile_photo.alt }}">
{% endif %}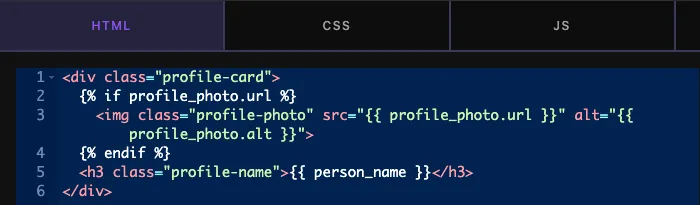
The token works in the CSS tab too, for example for a background image:
.profile-card {
  background-image: url('{{ profile_photo }}');
}
If your image styles don’t apply, make the selector more specific. Elementor has its own rules for images inside widgets, and in our tests .profile-photo alone didn’t win against them, while .profile-card .profile-photo did.
Click Save Settings when you’re done.
Use the Media control in Elementor #
Add the widget to a page, or reload the editor if the page was already open. The image box shows the current image. Hover over it and click Choose Image to change it, or use the trash icon to clear it.
The Insert Media window opens. Upload a file under Upload files, pick one under Media Library, or use Insert from URL. The details panel on the right shows the image’s Alt Text, which is what {{ profile_photo.alt }} prints. Fill it in there before you click Select.
Common use cases #
- Profile photos and team member cards.
- Logos in headers, footers and client lists.
- Hero and banner images, as an
<img>tag or a CSS background. - Product or feature images inside cards.
Tips for working with the Media field #
- Always guard the
<img>tag with{% if profile_photo.url %}so an empty field doesn’t leave a broken image. - Print
{{ profile_photo.alt }}in the alt attribute, and add alt text in the Media Library before picking the image. - Use
object-fit: coverwith a fixed width and height when images of different shapes need to line up. - Give image rules two classes, such as
.profile-card .profile-photo, so Elementor’s own image styles don’t override them. - For several images, use the Gallery field. For icons or SVG symbols, use the Icons field.
Frequently Asked Questions #
Is the Media field available in the free version?
Yes. Media is one of the fields you can use in the free version’s Widget Builder. The full set of Widget Builder fields comes with Master Addons Pro.
What does {{ profile_photo }} print?
The image URL. It’s the same as {{ profile_photo.url }}. Use .id for the attachment ID and .alt for the alt text.
Why is my alt text empty?
The field copies the alt text the image has in the Media Library when it’s picked. Add Alt Text in the Insert Media window, then select the image again.
Can I use the Media field for videos or PDFs?
Not reliably. In our tests the Media Types setting didn’t change the Elementor control, which stayed an image picker. Use a URL field for links to other files.
Why doesn’t my CSS change the image size?
Elementor applies its own styles to images inside widgets. Use a more specific selector, such as .profile-card .profile-photo, for your width, height and border radius.
Wrapping up #
Add the Media field, print {{ field_name.url }} and {{ field_name.alt }} inside an {% if %} check, and give your image styles a specific selector. Editors then pick or upload images straight from Elementor. For a link to go with the image, add a URL field, and check pricing for what each plan includes.


