

Some backgrounds sit still, and some drift. Floating dots connected by thin lines, or snow falling behind a headline: particle effects give a section quiet motion without a video file in sight. The free Particles extension in Master Addons for Elementor renders exactly that behind your content, powered by the well-known particles.js library and configured with a single JSON field.
Here is the demo section running the Snow preset on the published page:

What the Particles extension does #
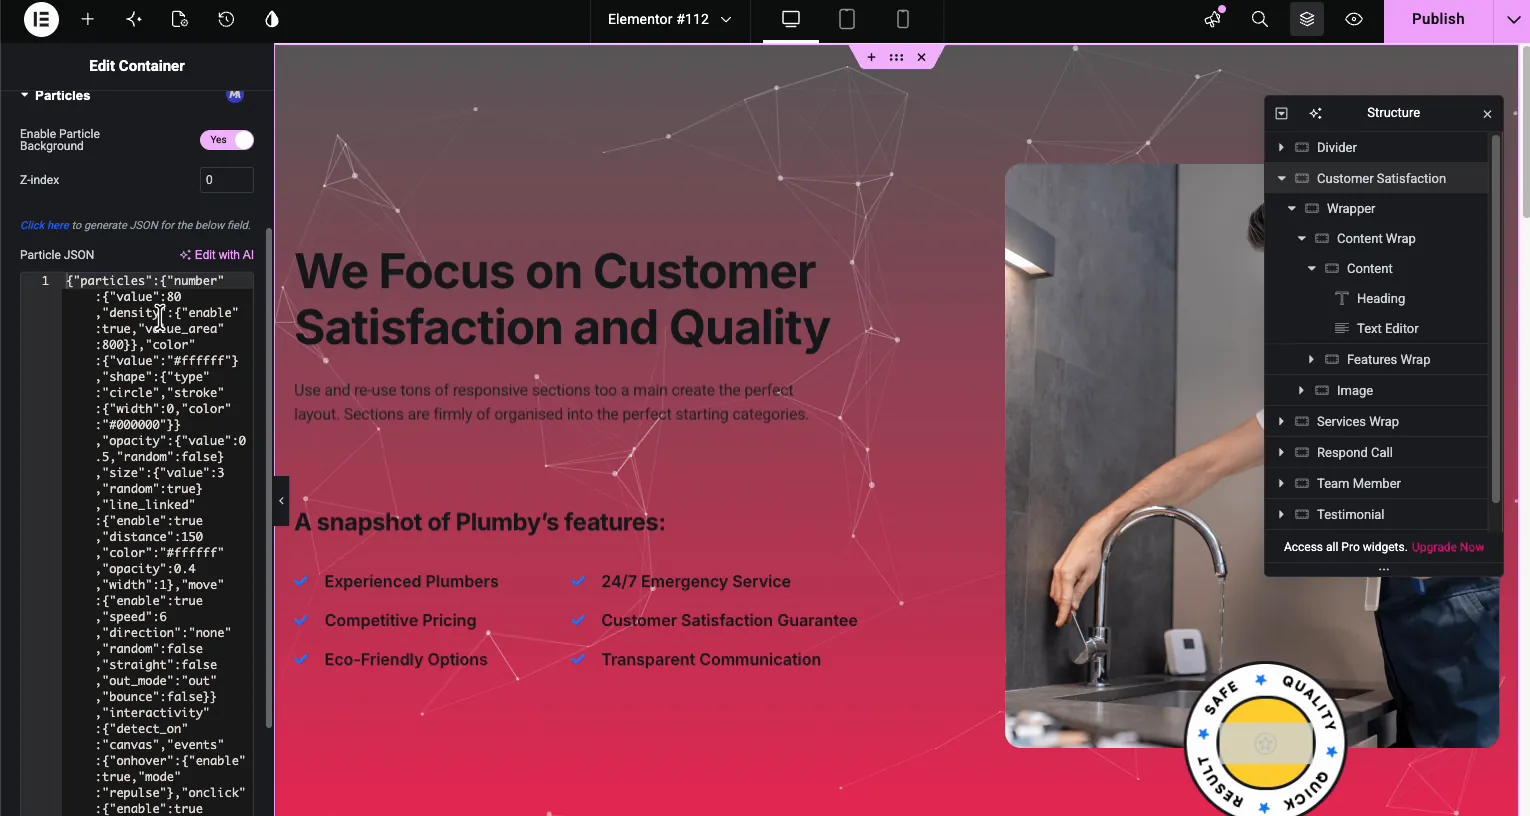
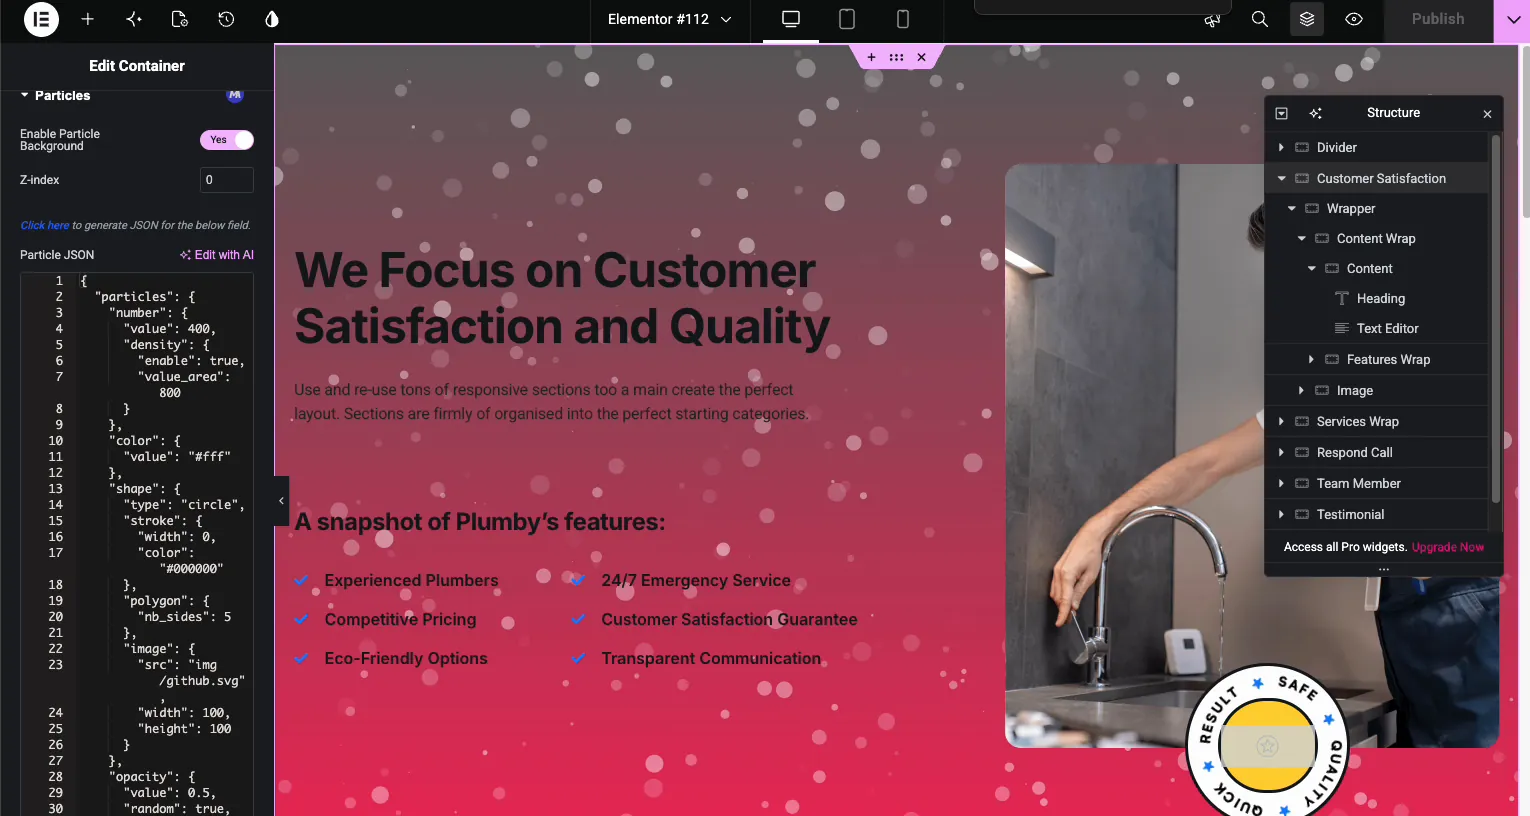
Once enabled, sections, columns and containers get a Particles panel in their Style tab. Flip Enable Particle Background to Yes and the section background becomes a live particle canvas. The panel keeps it minimal:
- Enable Particle Background: the on/off switch for the effect.
- Z-index: where the particle layer sits in the stack, so it stays behind the content.
- Particle JSON: a code field holding the particles.js configuration: particle count, color, shape, size, linking lines, movement speed, and hover interactivity all live here.
A default configuration ships in the box, white dots joined by a subtle line network, and the panel links straight to the particles.js generator for building your own.
Before you start #
- WordPress with Elementor installed and active.
- Master Addons for Elementor installed and active. New to the plugin? Follow the installation guide first.
- Particles is a free extension, so no Pro license is required.
- No coding needed: the JSON comes from a point-and-click generator.
How to enable the Particles extension #
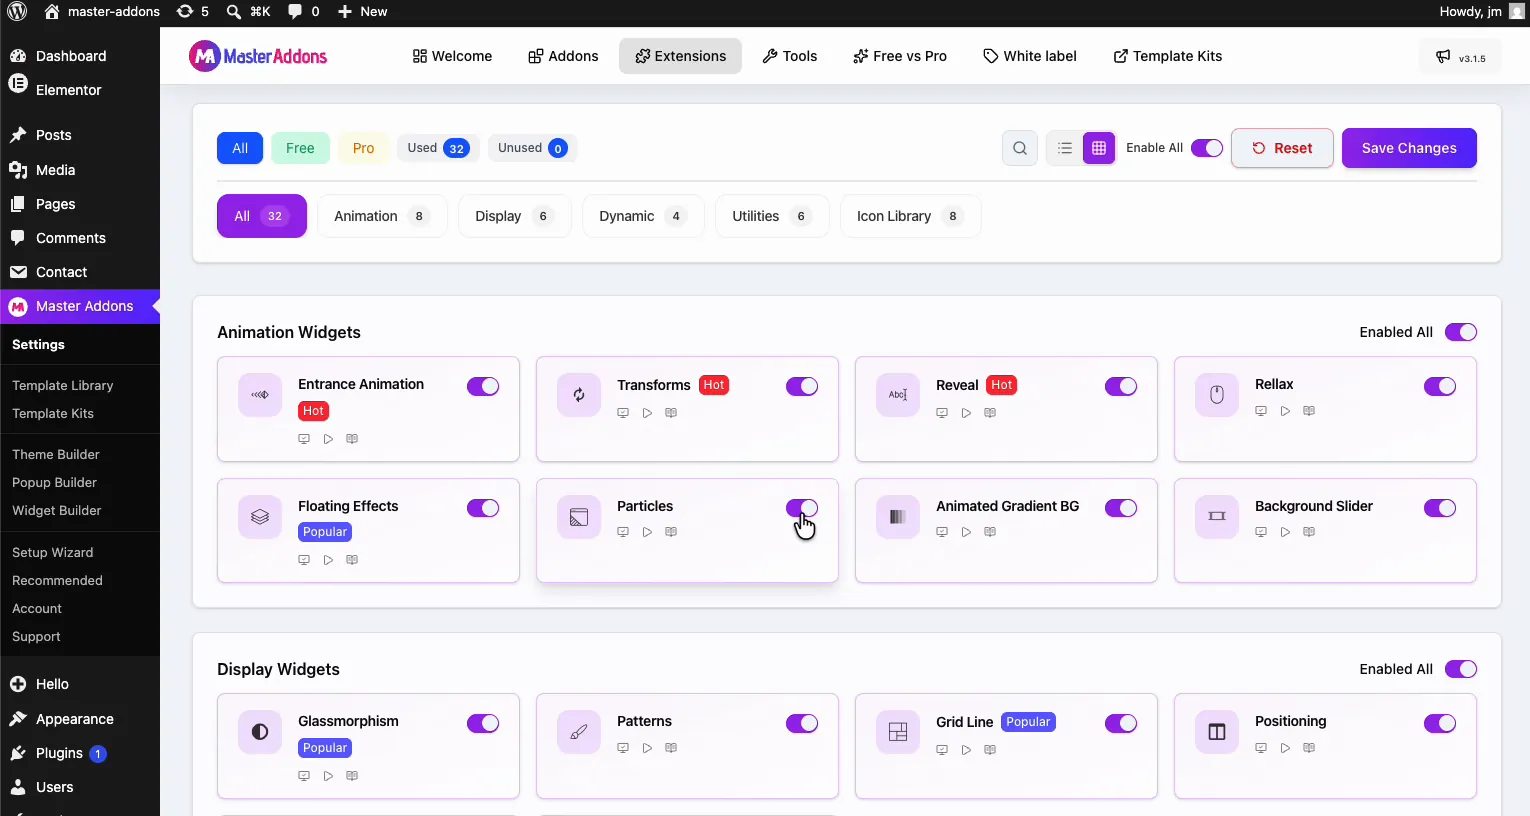
From your WordPress dashboard, go to Master Addons and open the Extensions tab. Particles sits in the Animation Widgets group with a Popular badge, next to Floating Effects and Animated Gradient BG. Click its toggle so it turns purple, then hit Save Changes and wait for the green “Settings saved successfully” notice.
Find the Particles panel on a section #
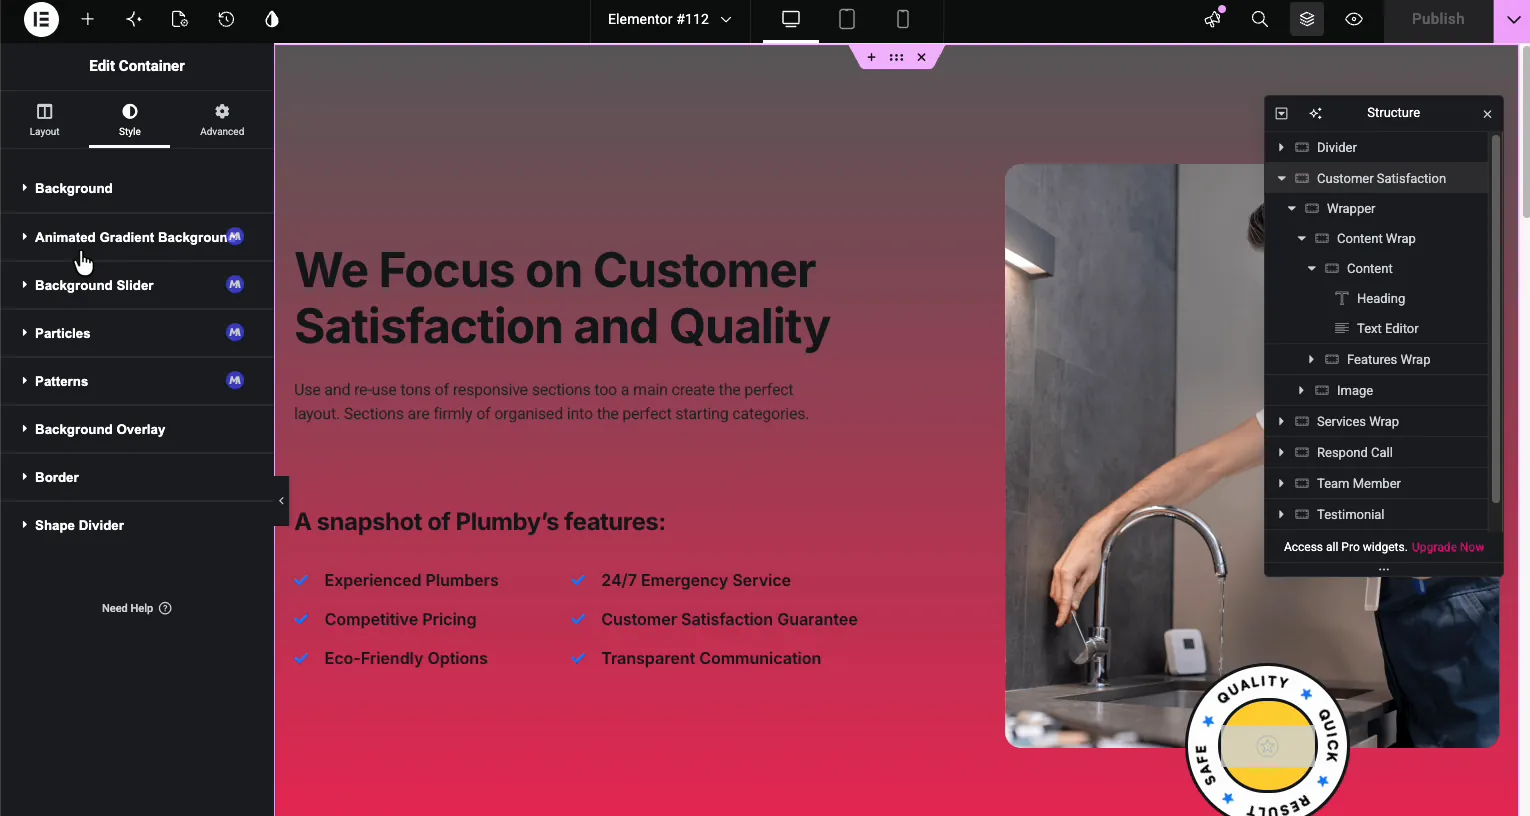
Select the container or section in the Elementor editor and open the Style tab. The Particles section with the purple MA badge sits with the other Master Addons background tools: Animated Gradient Background, Background Slider, and Patterns.
Turn it on and meet the default effect #
Expand Particles and switch Enable Particle Background to Yes. The canvas immediately runs the default configuration: white dots drifting across the section, connected by thin lines into a moving network. The Particle JSON field below holds the config that drives it, and Z-index keeps the layer behind your text.
Grab a preset from the particles.js generator #
The Click here link above the JSON field opens the particles.js demo site, a live generator with preset configurations: Default, NASA, Bubble, Snow, and Nyan Cat. Pick one, tune the sliders if you like, and hit Download current config (json).
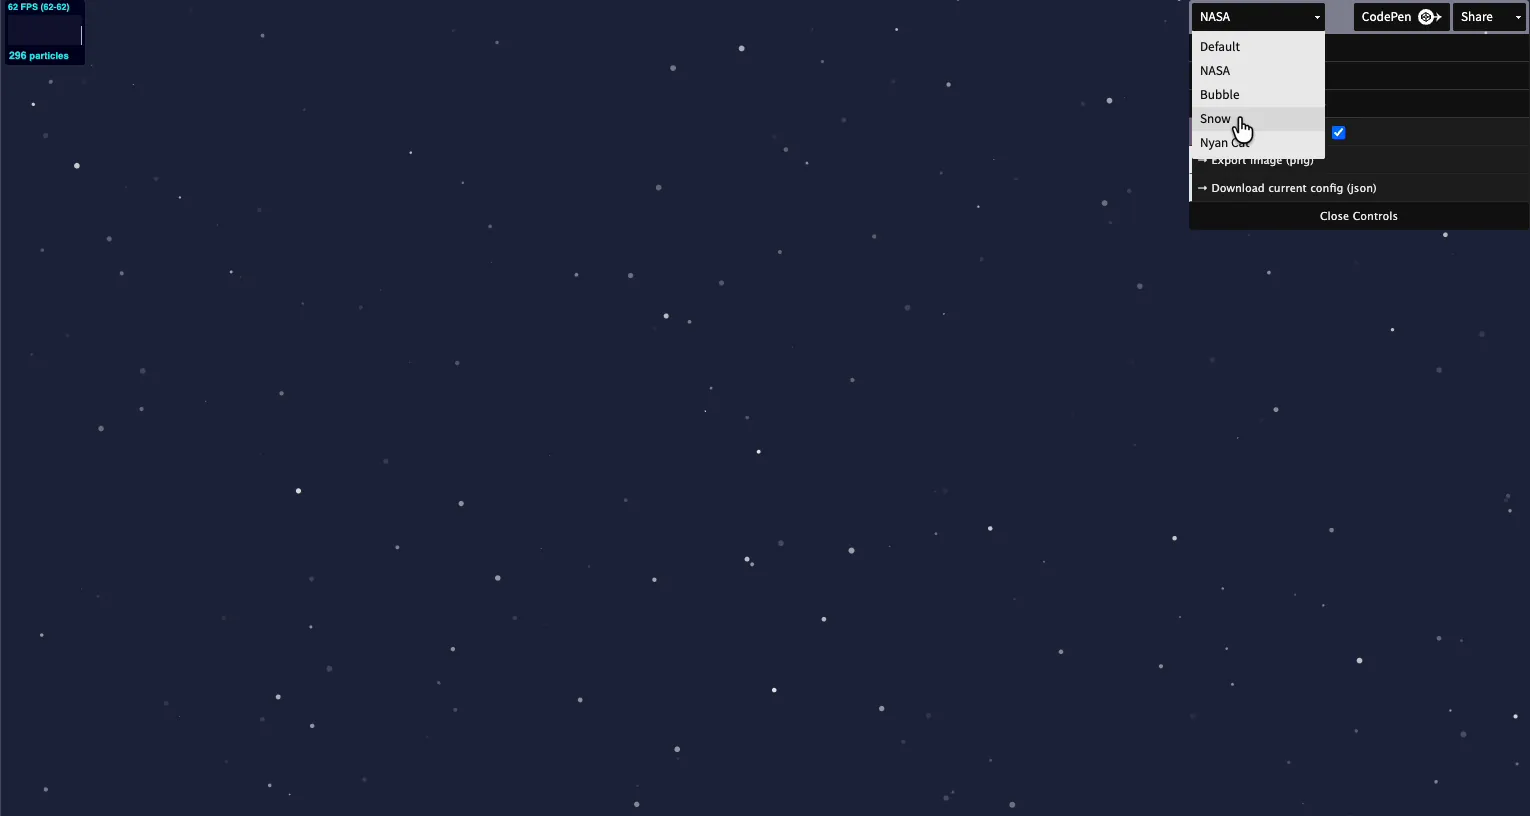
Open the downloaded file, copy the JSON, and paste it into the Particle JSON field. The demo goes with the Snow preset, and the canvas switches from the line network to soft white flakes falling over the section the moment the config lands.
The result on the page #
Publish and the section snows on its own, as in the GIF at the top of this page. The particles render on a canvas behind the content, so everything on top stays crisp while the background keeps moving. The default configs also react to the cursor; the standard network effect repulses particles on hover.
One practical note: particle count drives performance. The Snow preset runs 400 particles and stays smooth, but if a page stacks several particle sections, keep the counts modest and check it on a mid-range phone.
Where particle backgrounds fit #
- Hero sections. The connected-dots network reads tech and modern behind a bold headline.
- Seasonal campaigns. The Snow preset turns any promo section wintry in one paste.
- SaaS and startup pages. Slow-drifting particles add depth without distracting from the pitch.
- Dark sections. Star-field configs like NASA make dark backgrounds feel deliberate.
- Event and launch pages. Motion behind a countdown keeps a sparse page alive.
Video Tutorial #
Watch the whole setup, from enabling the extension to the snow falling on the published page.
Frequently Asked Questions #
How do I add a particle background in Elementor?
Enable the Particles extension in the Master Addons Extensions tab, select a section, and open Particles in the Style tab. Switch Enable Particle Background to Yes and the default animated network appears immediately, no configuration required.
Where do I get different particle effects?
The Click here link in the panel opens the particles.js generator with presets like NASA, Bubble, Snow, and Nyan Cat. Adjust the settings live, download the config as JSON, and paste it into the Particle JSON field.
Do particles slow down the page?
The effect runs on a lightweight canvas and stays smooth at typical counts; the Snow demo runs 400 particles without stutter. Keep counts reasonable and avoid stacking many particle sections on one page, especially for mobile visitors.
Can the particles react to the mouse?
Yes. The particles.js config includes interactivity settings, and the default configuration repulses particles when the cursor moves over the section. Hover and click behaviors are both configurable in the JSON.
Is the Particles extension free?
Yes. Particles ships with the free version of Master Addons for Elementor, in the Animation Widgets group of the Extensions tab. The pricing page covers what the Pro plans add.
Wrapping up #
The Particles extension puts a live particle canvas behind any Elementor section: one toggle for the default network, one pasted JSON for anything the particles.js generator can dream up. Keep the counts sane, let Z-index hold the layer behind the content, and the section moves without a single asset upload. It sits naturally beside the Animated Gradient Background and Background Slider extensions in the same Style tab, and the full set of Master Addons widgets and extensions is one page away. To compare it with adding particles.js by hand, see the Particles extension page.


