

Sooner or later every Elementor build hits a wall the panel controls cannot climb: a hover effect the Style tab does not offer, or a keyframe animation you found in a tutorial. Elementor keeps per-element custom CSS behind a Pro license. The Custom CSS extension in Master Addons for Elementor removes that wall: a CSS editor on every section, container, column, and widget, in the free editor.
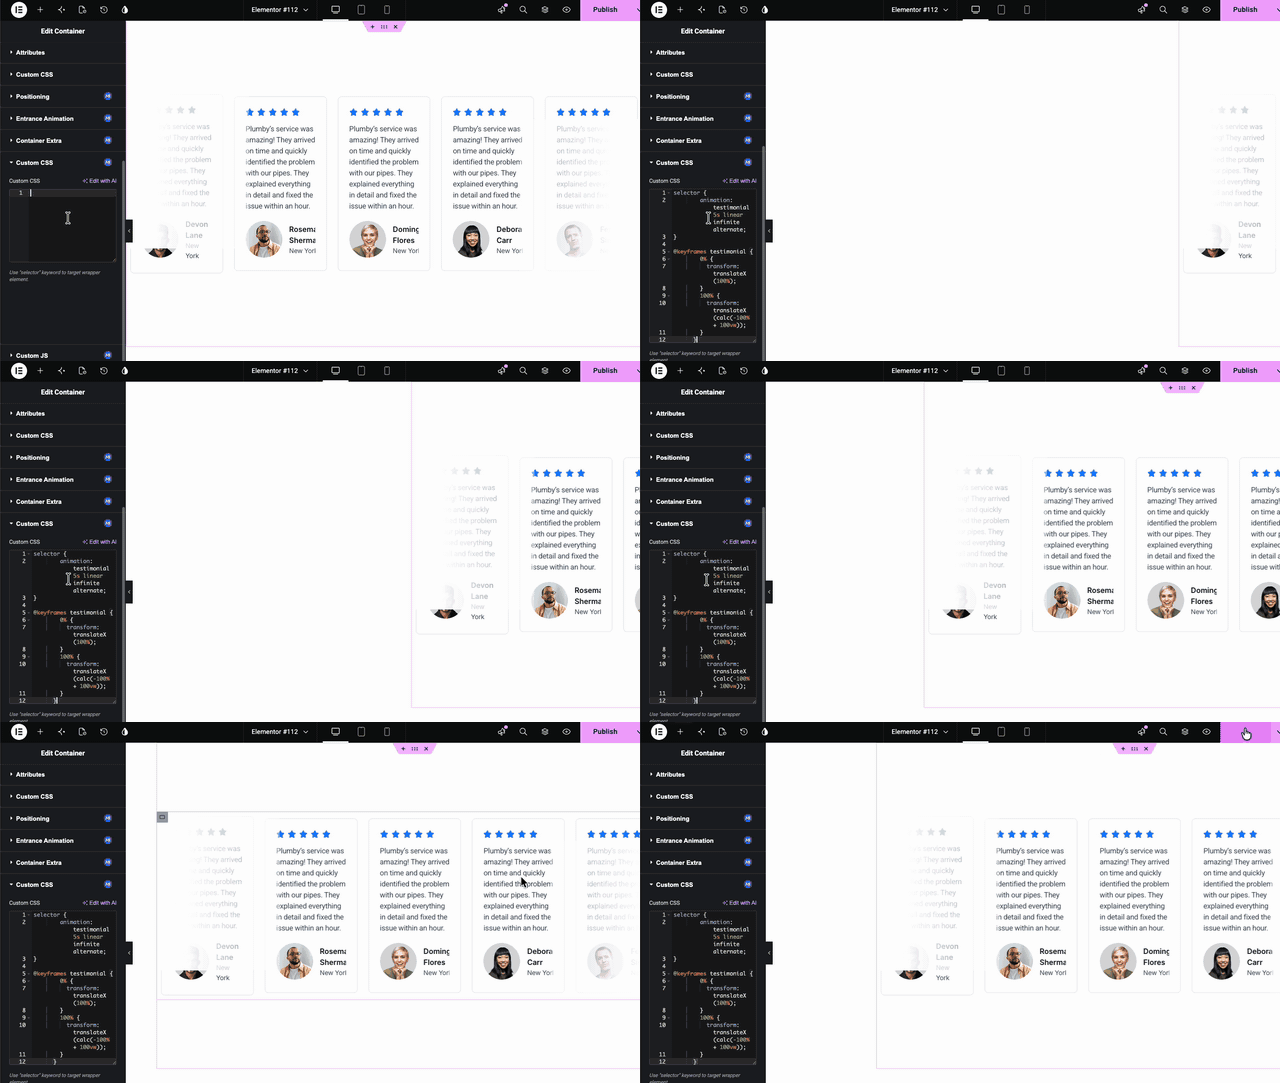
Here it is in the editor. The CSS lands in the box, and the testimonial cards start sliding across the canvas the same second:
What the Custom CSS extension does #
Once enabled, every element in the Elementor editor gets a Custom CSS section under its Advanced tab. Inside sits a code editor with syntax highlighting and line numbers. Whatever you write there applies to that element only, and the canvas previews it live, so you watch the rule take effect as you type.
The editor supports the selector keyword, which stands for the element’s own wrapper. Write selector { } and the rule targets exactly this section or widget, no hunting for Elementor’s generated class names. Child selectors work too: selector .some-class reaches inside the element.
Before you start #
- WordPress with Elementor installed and active. The free version is enough.
- Master Addons for Elementor installed and active. New to the plugin? Follow the installation guide first.
- Custom CSS is a free extension, so no Pro license is required.
- Some CSS. Even copy-pasted snippets work, since the selector keyword removes the hard part.
How to enable the Custom CSS extension #
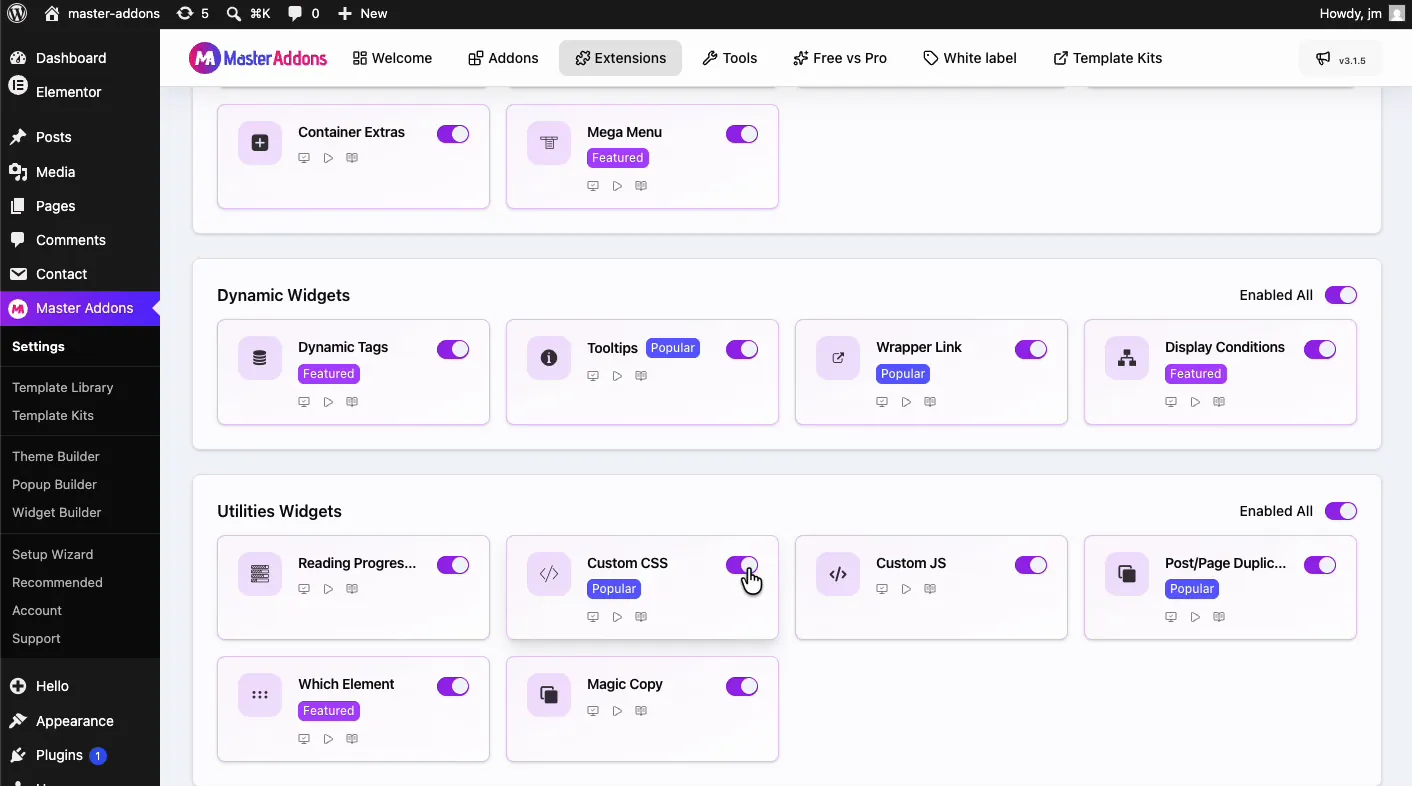
From your WordPress dashboard, go to Master Addons and open the Extensions tab. Custom CSS sits in the Utilities Widgets group with a Popular badge, next to Custom JS and Post/Page Duplicator. Click its toggle so it turns purple, then hit Save Changes and wait for the green “Settings saved successfully” notice.
Open the Custom CSS editor on an element #
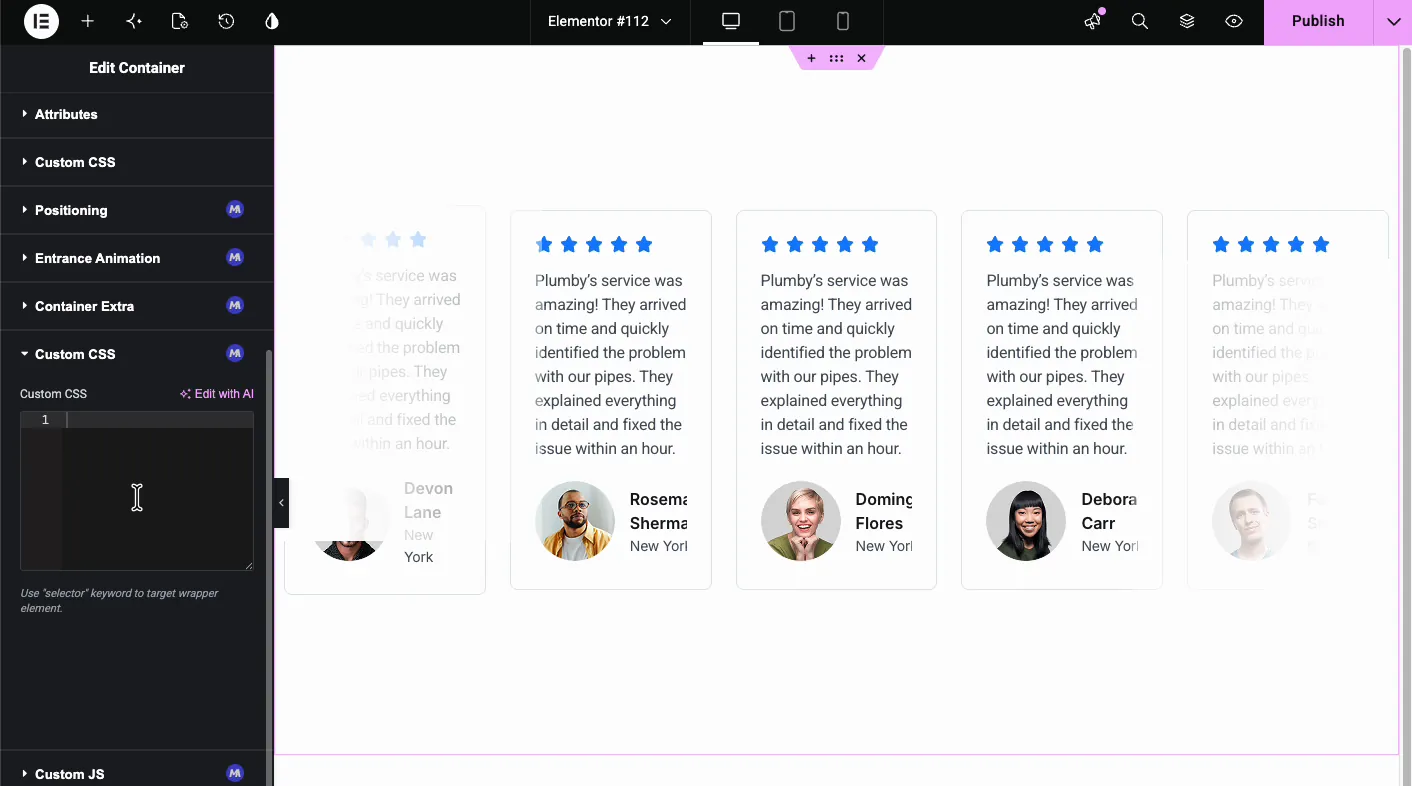
Select any element in the Elementor editor, a whole container in the demo, and open the Advanced tab. Scroll to the Custom CSS section with the purple MA badge and expand it. An empty code editor appears, with a hint below it: use the “selector” keyword to target the wrapper element.
Write or paste the CSS #
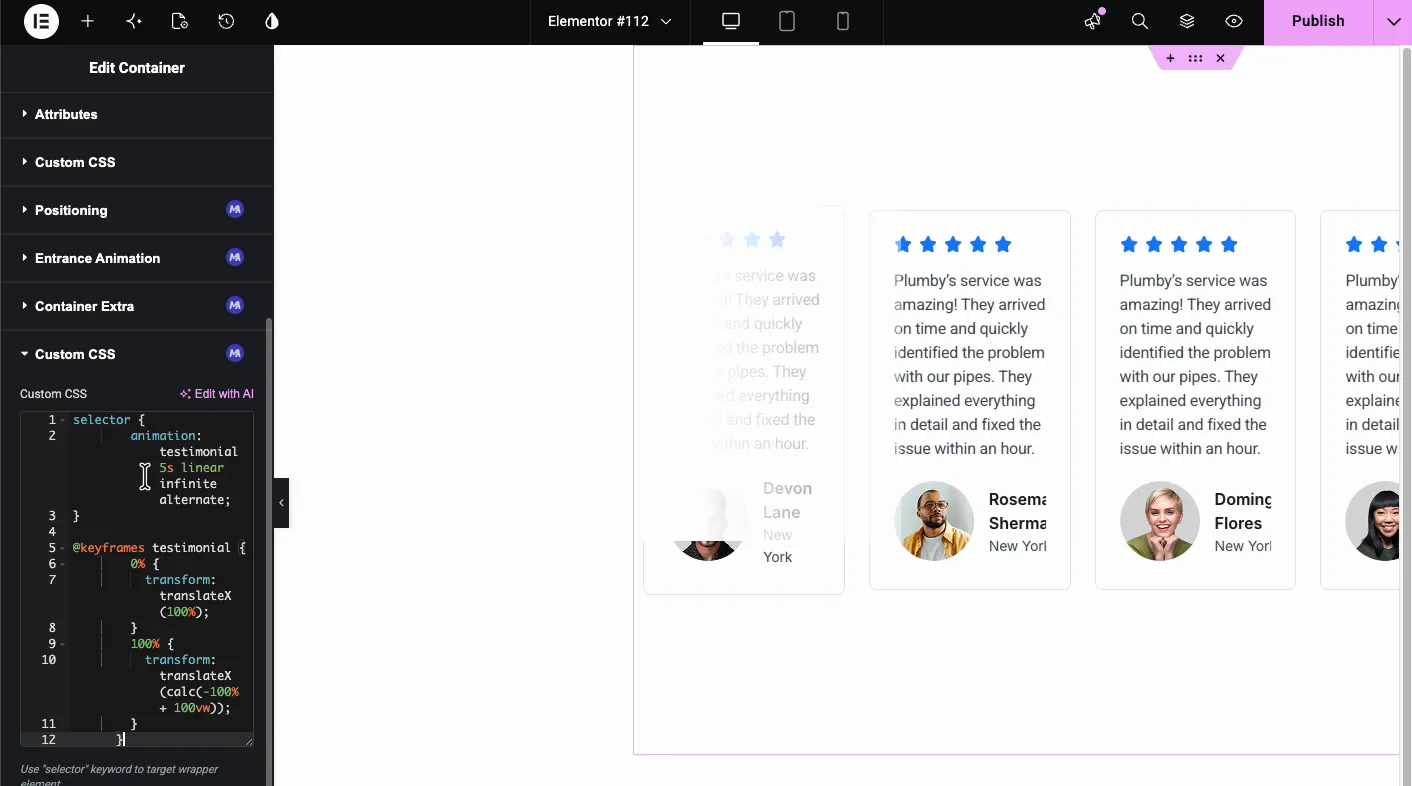
The demo turns a static row of testimonial cards into a moving marquee with one keyframe animation:
selector {
    animation: testimonial 5s linear infinite alternate;
}

@keyframes testimonial {
    0% {
        transform: translateX(100%);
    }
    100% {
        transform: translateX(calc(-100% + 100vw));
    }
}
Paste it in and the canvas obeys immediately: the cards begin sliding right to left, reverse at the end, and loop, exactly as the GIF at the top of this page shows. There is nothing to save or refresh first. The selector keyword pins the animation to this one container, so nothing else on the page is touched.
The result on the page #
Hit Publish and the front end runs the same animation: the testimonial row drifts across the viewport, pauses direction at each end, and keeps cycling on its own.

One habit worth keeping: the CSS lives on the element, not in a global stylesheet. Duplicate the section onto another page and the animation travels with it.
Where per-element custom CSS helps #
- Keyframe animations. Marquees, pulsing buttons, floating badges, anything the panel controls cannot express.
- Hover states.
selector:hoverrules for lifts, shadows, and color shifts on cards. - Snippet fixes. That one Stack Overflow answer that solves your layout bug, applied exactly where the bug lives.
- Responsive tweaks. A media query on one section instead of a site-wide stylesheet edit.
- Design experiments. Test a rule live on the canvas before promoting it to your theme’s CSS.
Video Tutorial #
Watch the whole flow, from enabling the extension to the animated cards running on the published page.
Frequently Asked Questions #
How do I add custom CSS in Elementor without Pro?
Enable the Custom CSS extension in the Master Addons Extensions tab, select any element in the editor, and open Custom CSS under the Advanced tab. Write or paste CSS in the code editor and it applies to that element with a live preview, no Pro license needed.
What does the selector keyword do?
It stands for the wrapper of the element you are editing. A rule like selector { color: red; } targets exactly this section or widget without knowing Elementor’s generated class names, and selector .child reaches elements inside it.
Does the CSS apply to the whole site or just one element?
Just the element carrying it. Each section, column, or widget has its own Custom CSS box, so rules stay scoped. Duplicating the element copies its CSS along with it, which keeps effects portable between pages.
Can I run CSS animations with this extension?
Yes. The editor accepts full CSS including @keyframes, media queries, and pseudo-classes like hover. The demo on this page runs a keyframe marquee animation on a testimonial row, previewed live in the editor before publishing.
Is the Custom CSS extension free?
Yes. Custom CSS ships with the free version of Master Addons for Elementor, in the Utilities Widgets group of the Extensions tab. The pricing page covers what the Pro plans add.
Wrapping up #
The Custom CSS extension gives free Elementor the escape hatch every real project eventually needs: a scoped CSS editor on any element, with live preview and a selector keyword that spares you the class-name archaeology. Pair it with the Animated Gradient Background extension (Pro) for motion without writing keyframes at all, and browse the full set of Master Addons widgets and extensions for the rest of the toolbox.


