Open a page built by someone else, or one you imported from a template kit, and you hit the same question every time: which plugin is rendering this widget? Elementor’s editor shows a plain handle icon on hover, and that icon looks identical whether the element comes from Elementor core, Master Addons, or any other addon installed on the site.
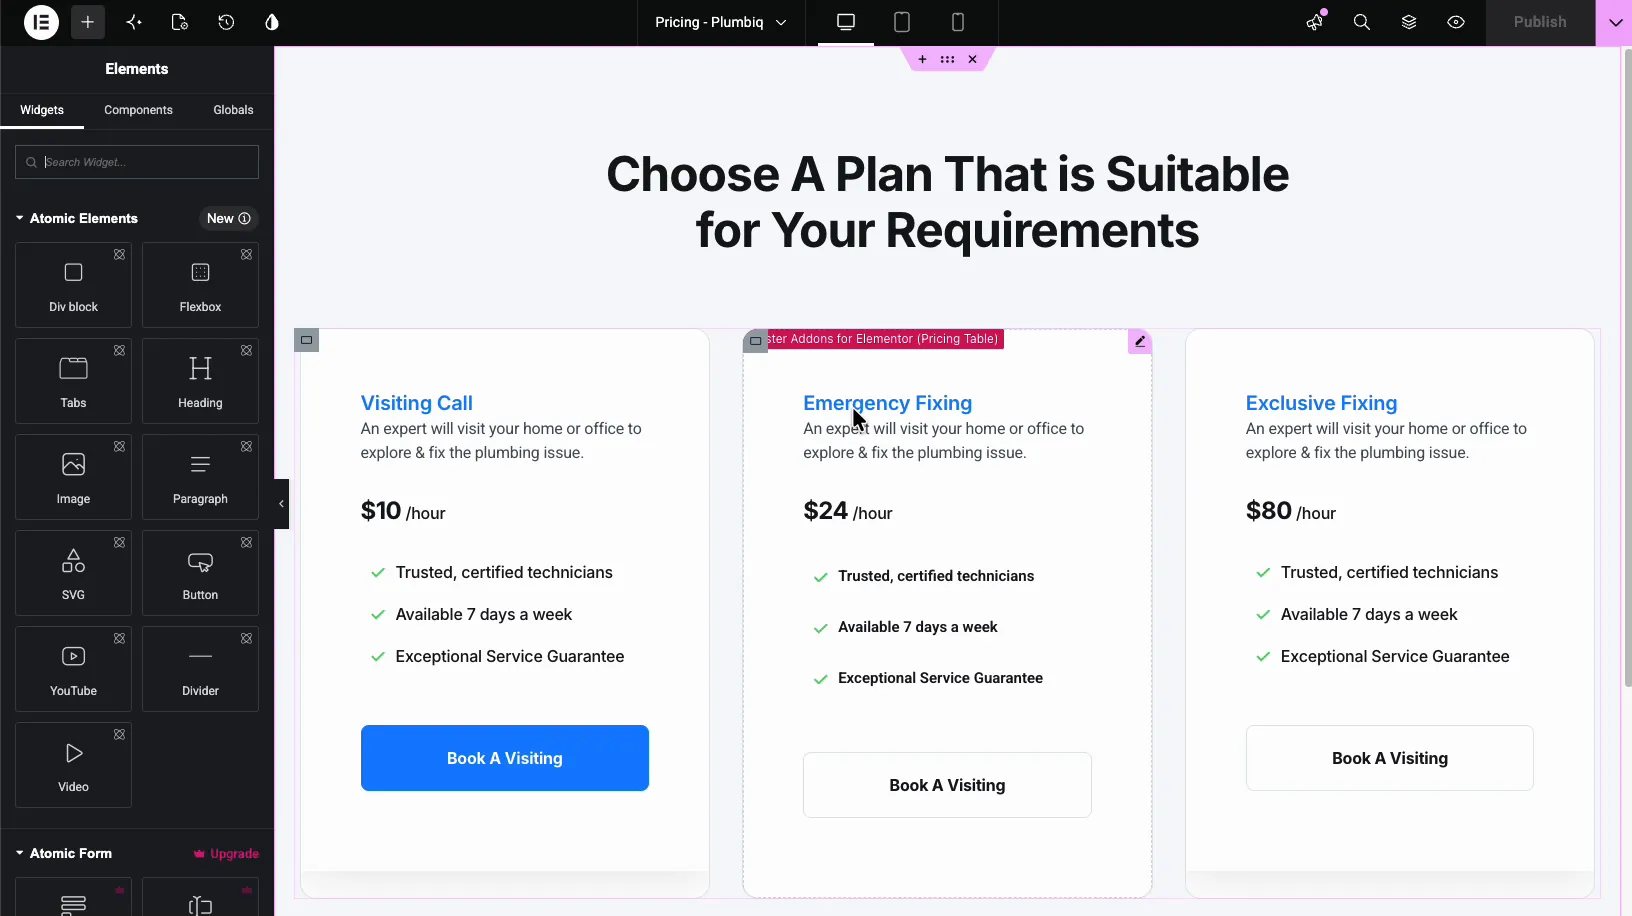
The Which Element extension in Master Addons for Elementor answers that question right in the editor. Once it is on, hovering over any widget shows a small label with the source plugin and the widget name, for example “Master Addons for Elementor (Pricing Table)”. No digging through the Navigator, no guessing from the settings panel.
What the Which Element extension does #
Which Element adds an identification label to every widget in the Elementor editor preview. Hover over a widget and the label tells you two things. Containers, sections and columns get no label.
- The source plugin, so you know whether the element belongs to Elementor core, Master Addons, or another addon.
- The widget name, so you know exactly which widget you are looking at, like Pricing Table or Info Box.
The label only appears inside the editor while you hover. It changes nothing on the live page, adds nothing to the front end, and disappears the moment you move the cursor away. Think of it as a name tag for your widgets that only editors can see.
Before you start #
- WordPress with Elementor installed and active.
- Master Addons for Elementor installed and active. New to the plugin? Follow the installation guide first.
- Which Element is a free extension, so no Pro license is required to use it.
How to enable the Which Element extension #
The extension ships disabled by default, so it takes a quick trip to the Master Addons dashboard to switch it on.
Step 1: Open the Extensions tab #
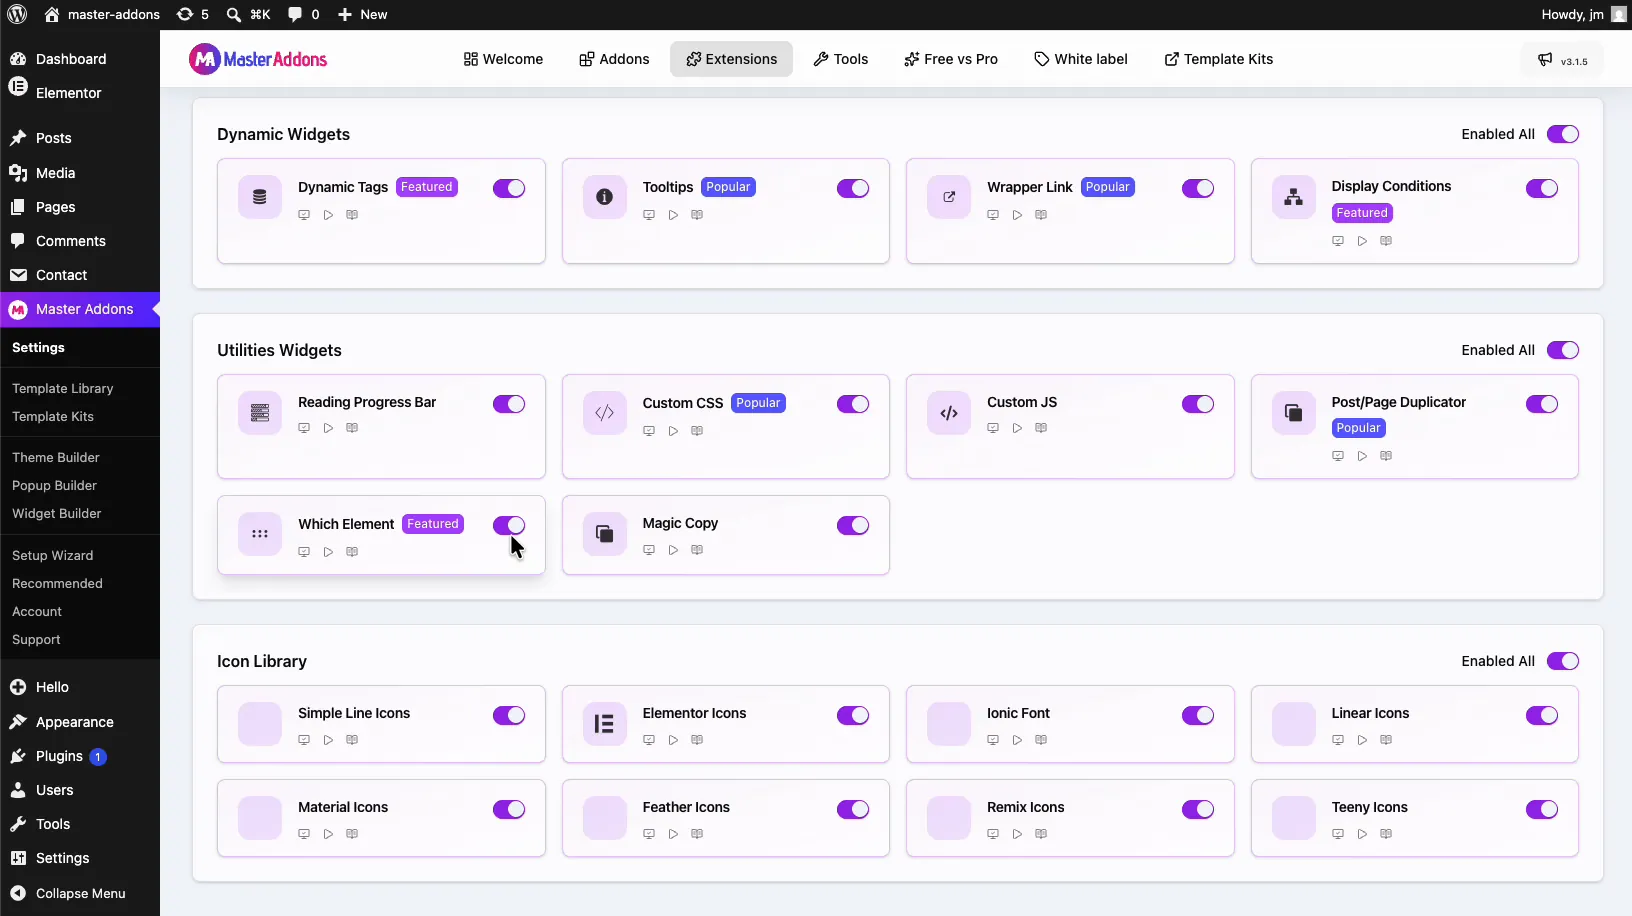
From your WordPress dashboard, go to Master Addons and click the Extensions tab in the top navigation. Scroll down to the Utilities Widgets group. Which Element sits there next to tools like Custom CSS and Post/Page Duplicator, marked with a Featured badge.
Step 2: Turn on the toggle #
Click the toggle on the Which Element card so it turns purple.
Step 3: Save your changes #
Scroll to the top of the Extensions page and click the Save Changes button on the right side of the filter bar.
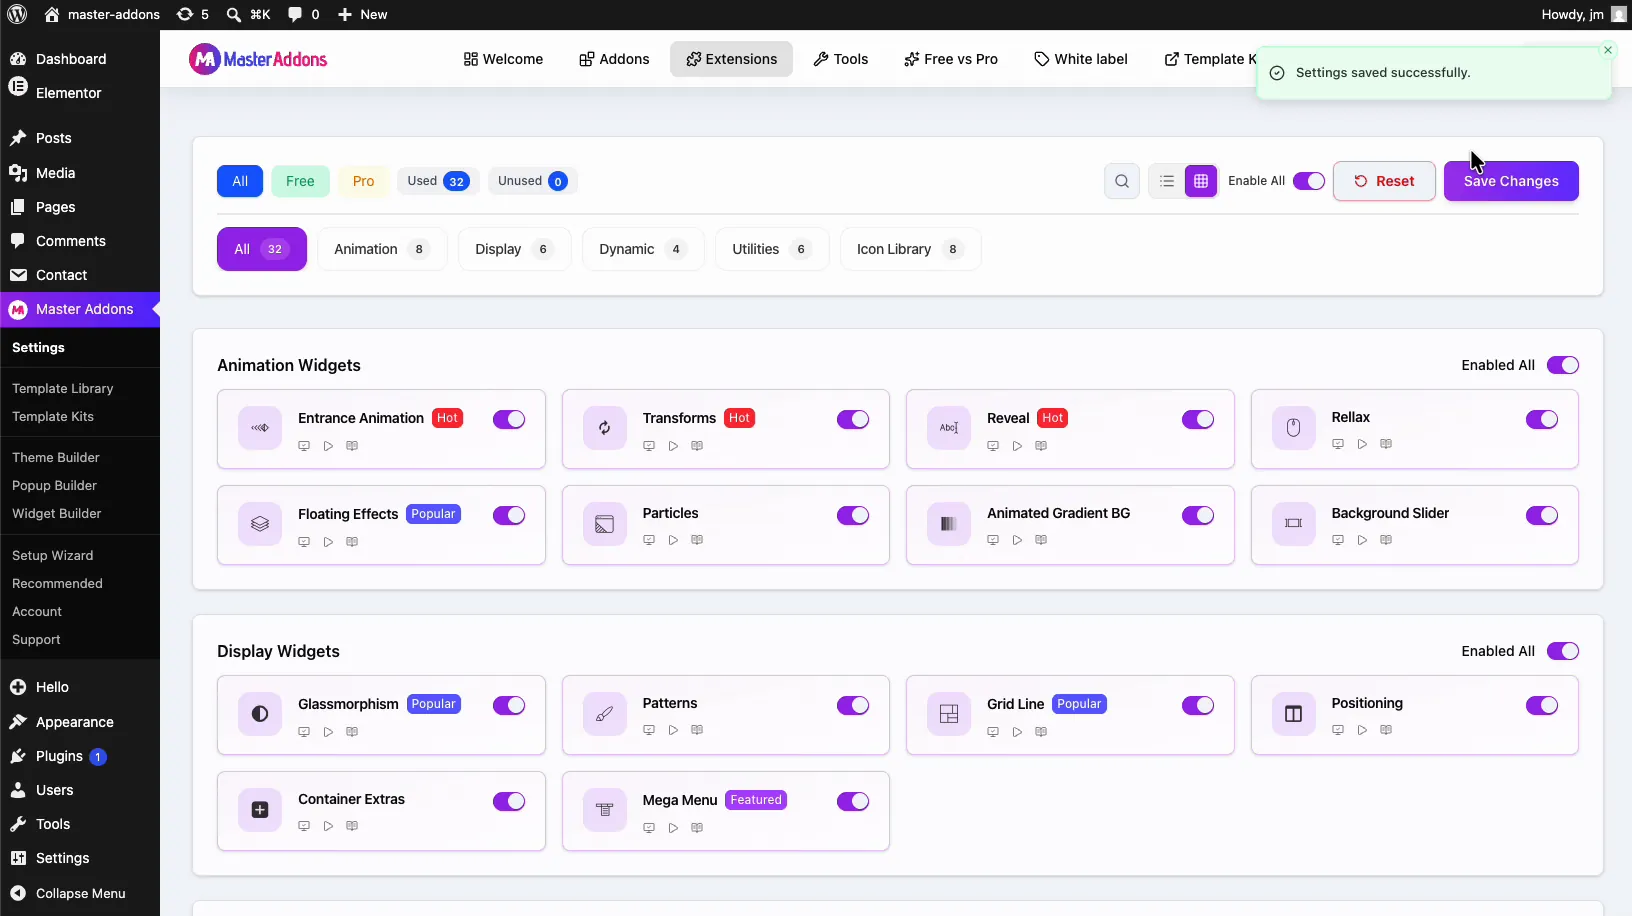
A green “Settings saved successfully” notice appears at the top of the page, confirming the extension is active. If you had the Elementor editor open while saving, reload it once so the new setting kicks in.
How it works in the Elementor editor #
Here is the difference the extension makes. This is a normal page in the Elementor editor. Nothing on the canvas tells you which plugin renders the pricing columns, and without the extension, hovering only shows the same anonymous handle icon on every element.
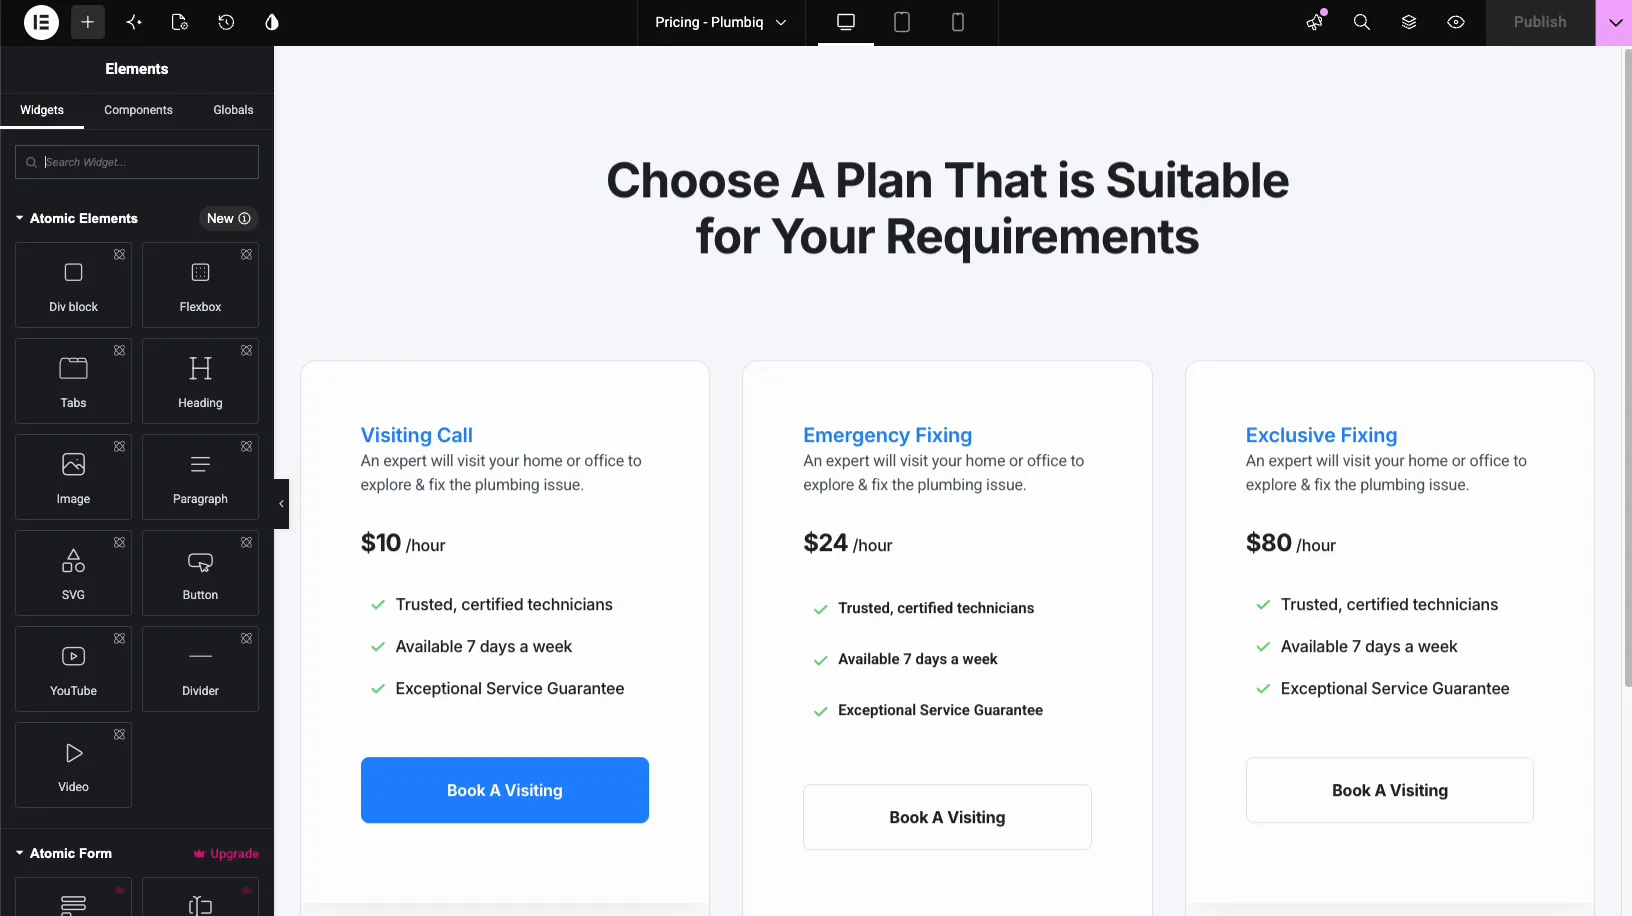
Turn the extension on, and the same hover now shows a colored label next to the handle. In this example, hovering over a pricing column reveals “Master Addons for Elementor (Pricing Table)”. One hover, and you know both the plugin and the exact widget.
That is the whole workflow. There is nothing to configure inside the editor and no extra panel to keep open. Hover an element whenever you need to know what it is, then keep working.
When Which Element saves you time #
- Imported templates. Pages from template kits mix core widgets with addon widgets. The label tells you which is which, so you know where to look for each widget’s settings.
- Client handovers. When you inherit a site built by another agency, the label maps out which plugins the previous builder relied on, page by page.
- Multiple addons installed. Sites often run two or three Elementor addon packs with similar widget names. The plugin name in the label tells them apart.
- Cleanup before deactivating a plugin. Before you remove an addon, hover through your key pages to spot every widget that depends on it, so nothing breaks on the front end.
- Team documentation. When writing internal notes or recording tutorials, the label makes it obvious which widget is on screen.
Video Tutorial #
Prefer to watch the whole process? This short video walks through enabling the Which Element extension and using the hover labels in the Elementor editor.
Frequently Asked Questions #
What does the Which Element extension do in Elementor?
It shows an identification label when you hover over any widget in the Elementor editor. The label displays the source plugin and the widget name, such as “Master Addons for Elementor (Pricing Table)”, so you can tell which plugin renders each widget without opening its settings.
Is the Which Element extension free?
Yes. Which Element is included in the free version of Master Addons for Elementor. You will find it in the Utilities Widgets group of the Extensions tab, and it works without a Pro license. See the pricing page for what the Pro plans add.
Does Which Element affect my live website?
No. The label appears only inside the Elementor editor while you hover over an element. It loads nothing on the front end, so visitors never see it and your page speed stays the same.
Why don’t I see the labels after enabling the extension?
Make sure you clicked Save Changes on the Extensions page after turning the toggle on. If the Elementor editor was already open, reload the editor tab. The labels appear on hover over widgets only, so move your cursor over a widget rather than a container.
Does the label show for Elementor core widgets too?
Yes. The hover label identifies widgets from Elementor core and from any active addon plugin, not just Master Addons widgets. Widgets registered by a theme get no label. That makes it useful for auditing every element on a page, whatever its source.
Wrapping up #
Which Element is one of those small utilities you enable once and never think about again, until it saves you ten minutes of detective work on an unfamiliar page. Flip the toggle in the Extensions tab, save, and every widget in your editor carries a name tag identifying its plugin and widget type. See the Which Element extension page, or browse the rest of the Master Addons widgets and extensions to see what else can speed up your Elementor workflow.