

Free Elementor has no posts widget, and building a decent blog feed usually means fighting with query loops or a theme template. The free Blog Posts widget in Master Addons for Elementor pulls your posts into a grid, list, or carousel from a few dropdowns, then lets you filter by category, tag, or author and style every part of the card.
You pick a layout, choose how many columns and posts to show, decide which meta to display, then style the thumbnails, titles, and buttons. No shortcodes, no template files. This guide covers every setting in the widget.
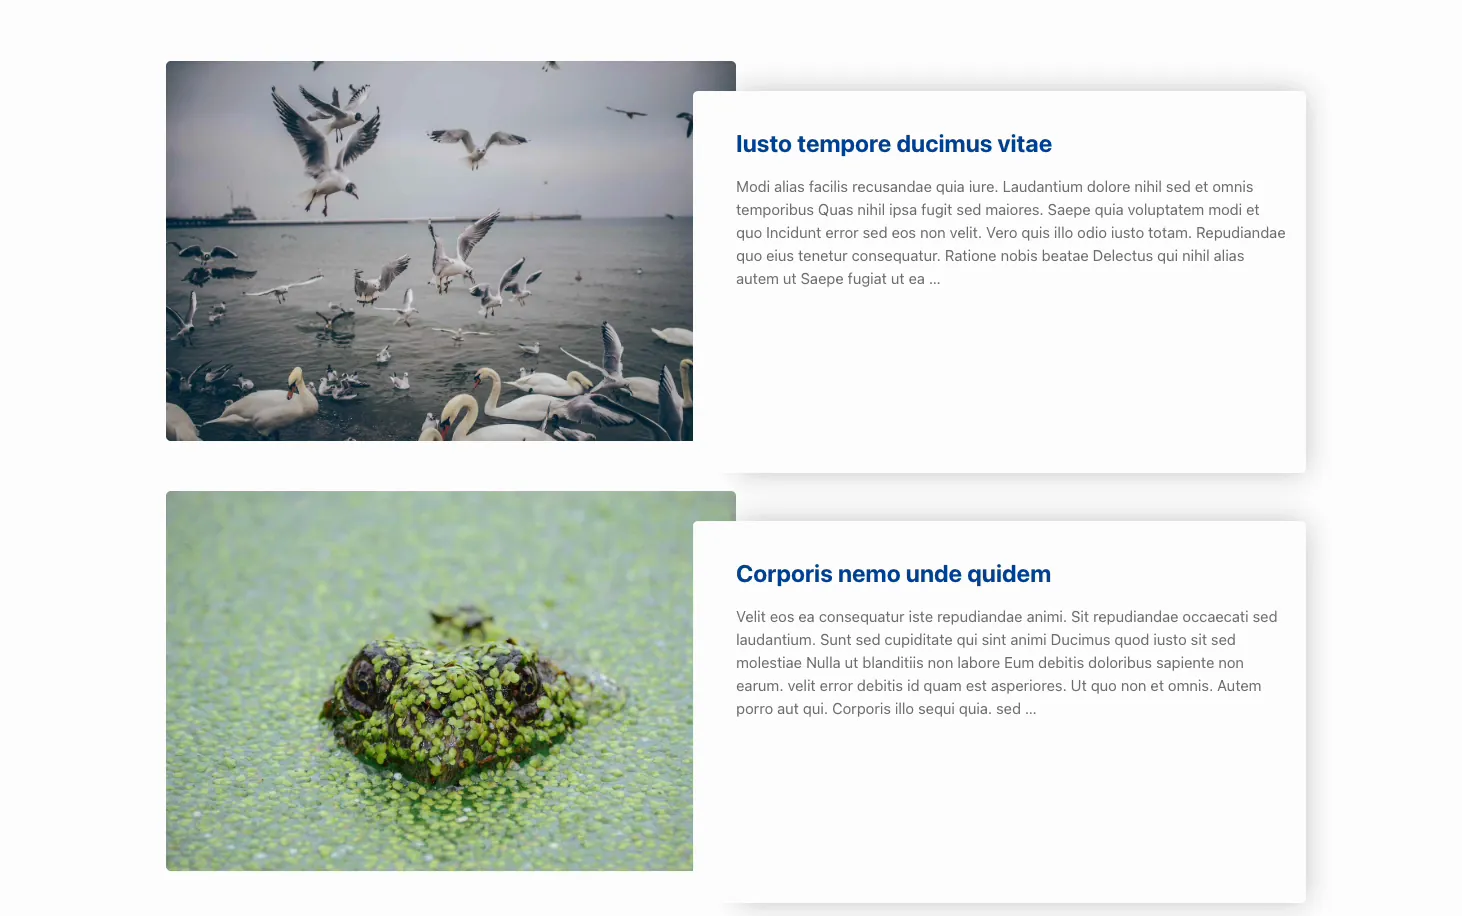
What the Blog Posts widget does #
The widget queries your WordPress posts (or any custom post type) and lays them out as cards. Each card can show the featured image, title, excerpt, post meta like author, date, and comments, the category, and a Read More button. A layout dropdown switches between a grid, several list styles, and a carousel.
It has three tabs. Content holds the layout, query, and which fields to show. Style controls the look of each part: the thumbnail, title, meta, content, buttons, and carousel controls. Advanced carries the usual Elementor spacing and visibility options.
Before you start #
- WordPress with Elementor installed and active.
- Master Addons for Elementor installed and active. New to the plugin? See the installation guide.
- Some published posts with featured images, so the feed has something to show.
How to add the Blog Posts widget #
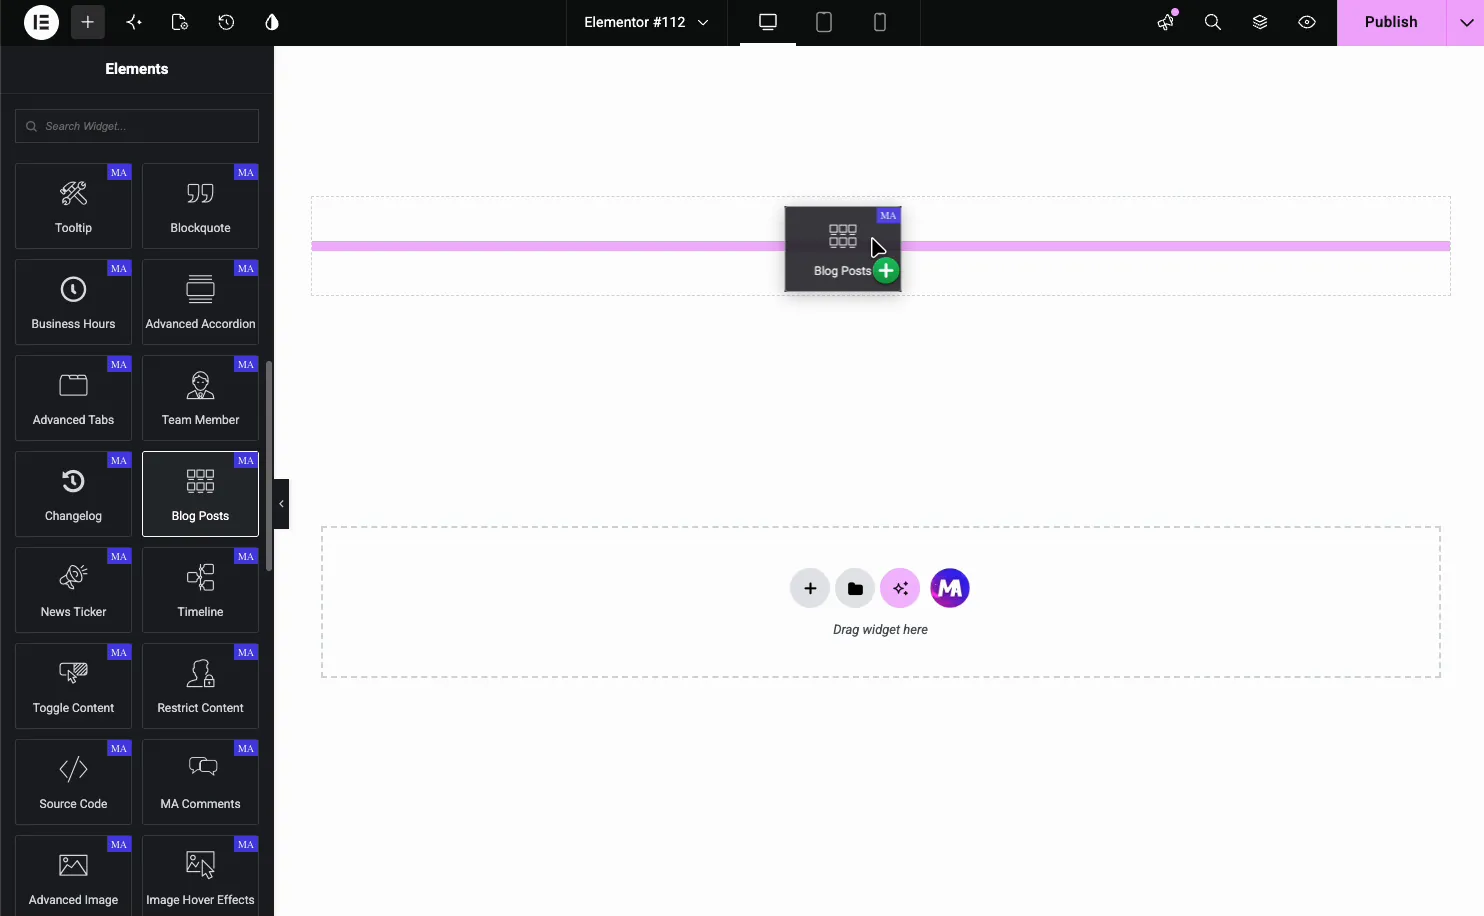
In the Elementor editor, open the Elements panel and search for Blog Posts, or scroll to the Master Addons section (the widgets carry a purple MA badge). Drag it onto your page and it loads your latest posts right away, so you edit against a real feed instead of placeholders.
Choose a layout #
Open the Content tab and the Display Options section. This is where you shape the feed. Set Blog Layout to Cards or Classic, then set Blog Type to a grid or list, and pick the number of columns.
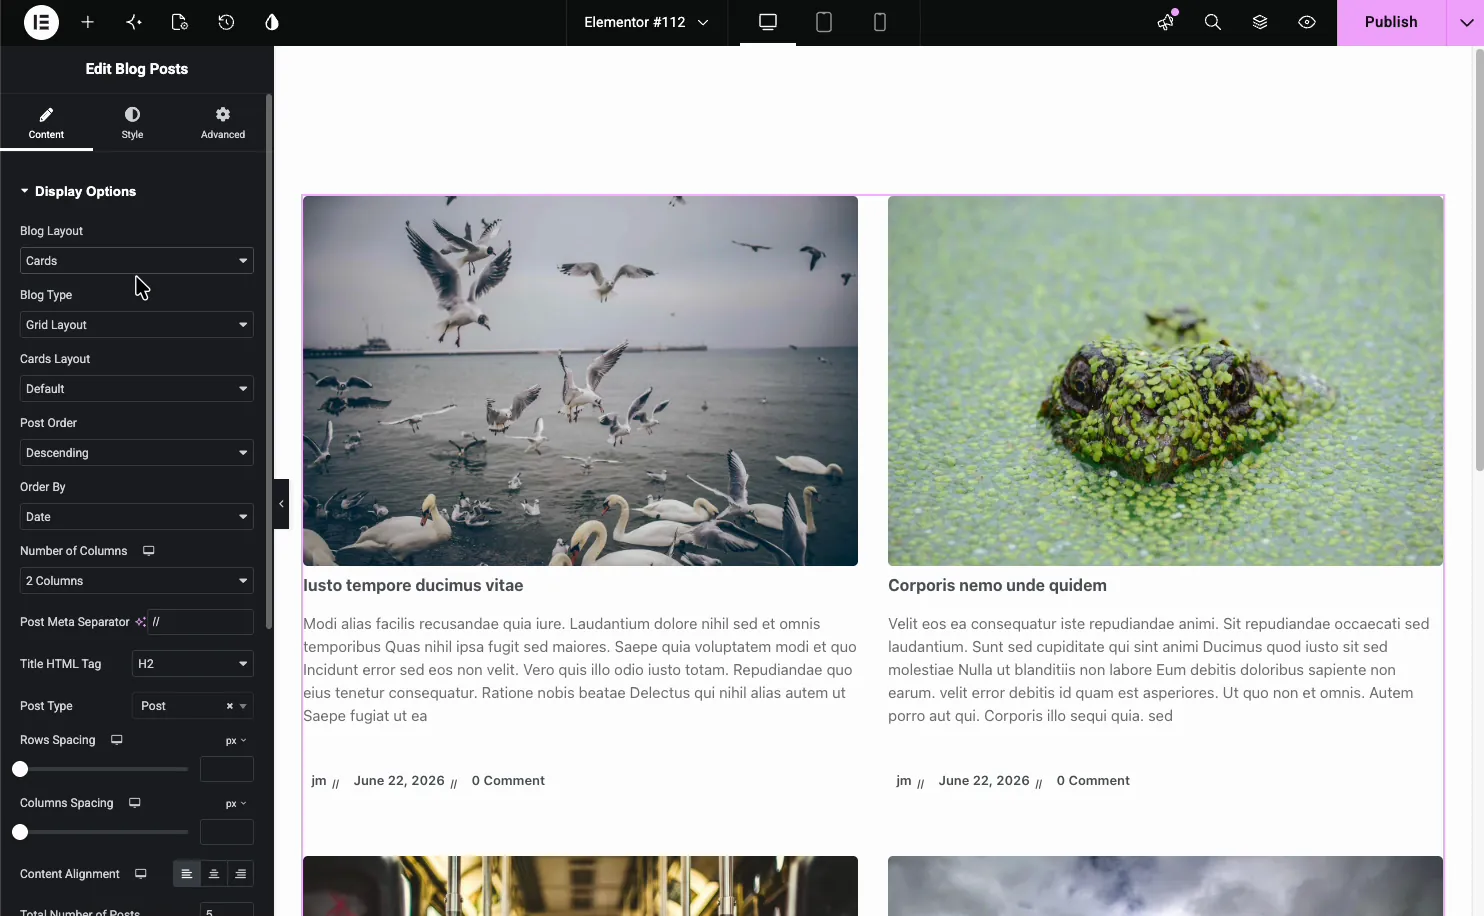
The main Display Options controls:
- Blog Layout: Cards or Classic, the overall card treatment.
- Blog Type: Grid Layout, List Layout or Masonry Layout. Cards in a grid add seven Cards Layout styles.
- Post Order and Order By: sort ascending or descending, by date, title, and more.
- Number of Columns: 1 to 4 posts side by side, set per device.
- Title HTML Tag and Post Meta Separator: the heading level for titles and the character between meta items.
- Post Type: pull from Posts or any custom post type.
- Total Number of Posts and Posts Per Page: how many to load and show per page.
Grid, list, and the layout variations #
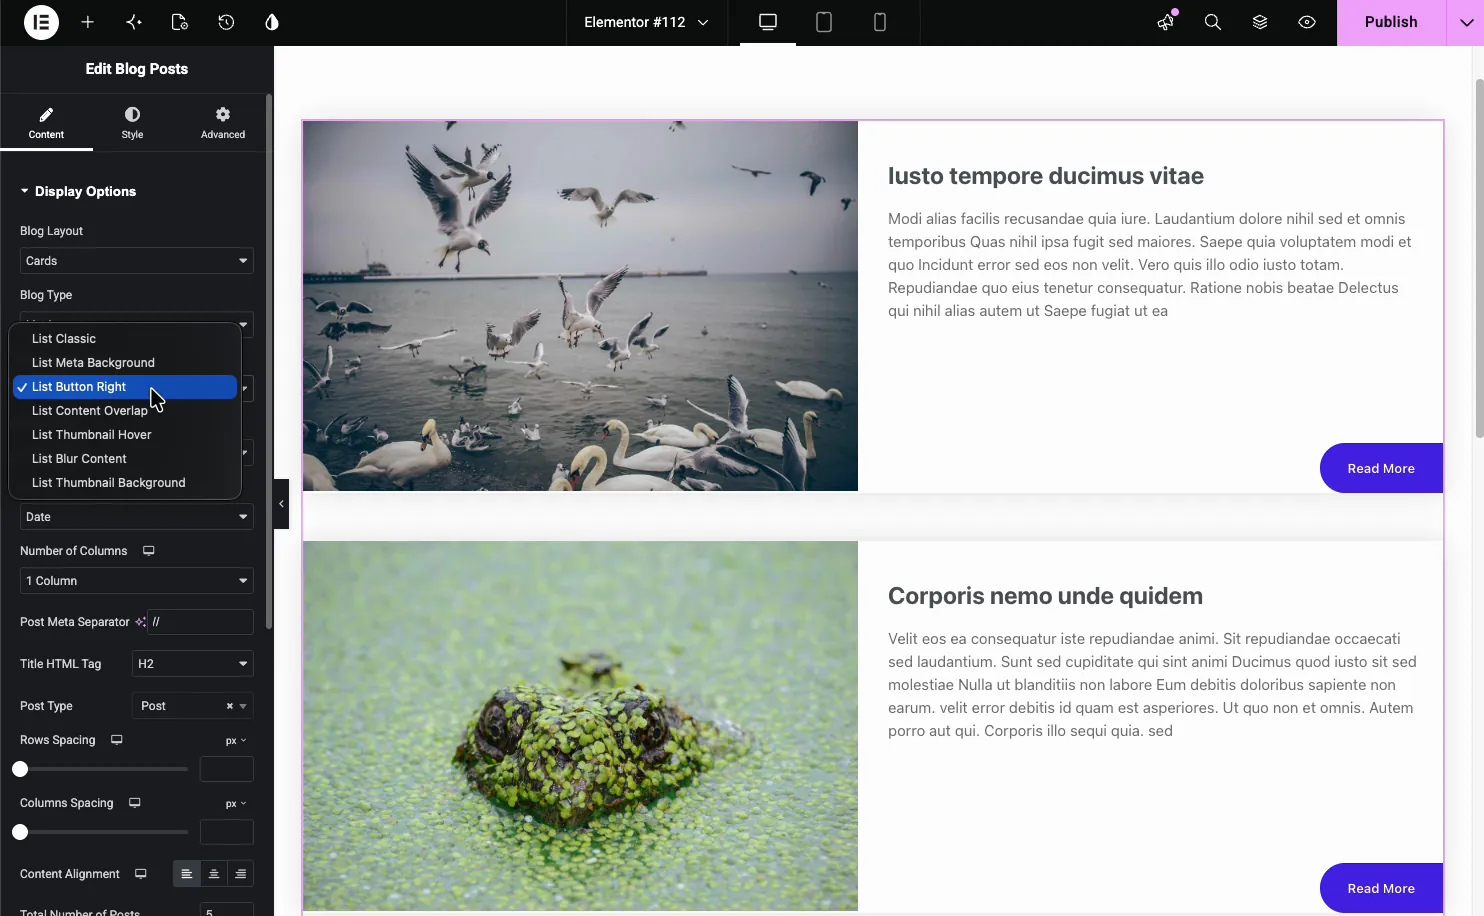
Grid Layout tiles the posts in columns. List Layout stacks them full width with the image on one side and the text on the other, which suits a main blog page. Each type has its own sub-styles.
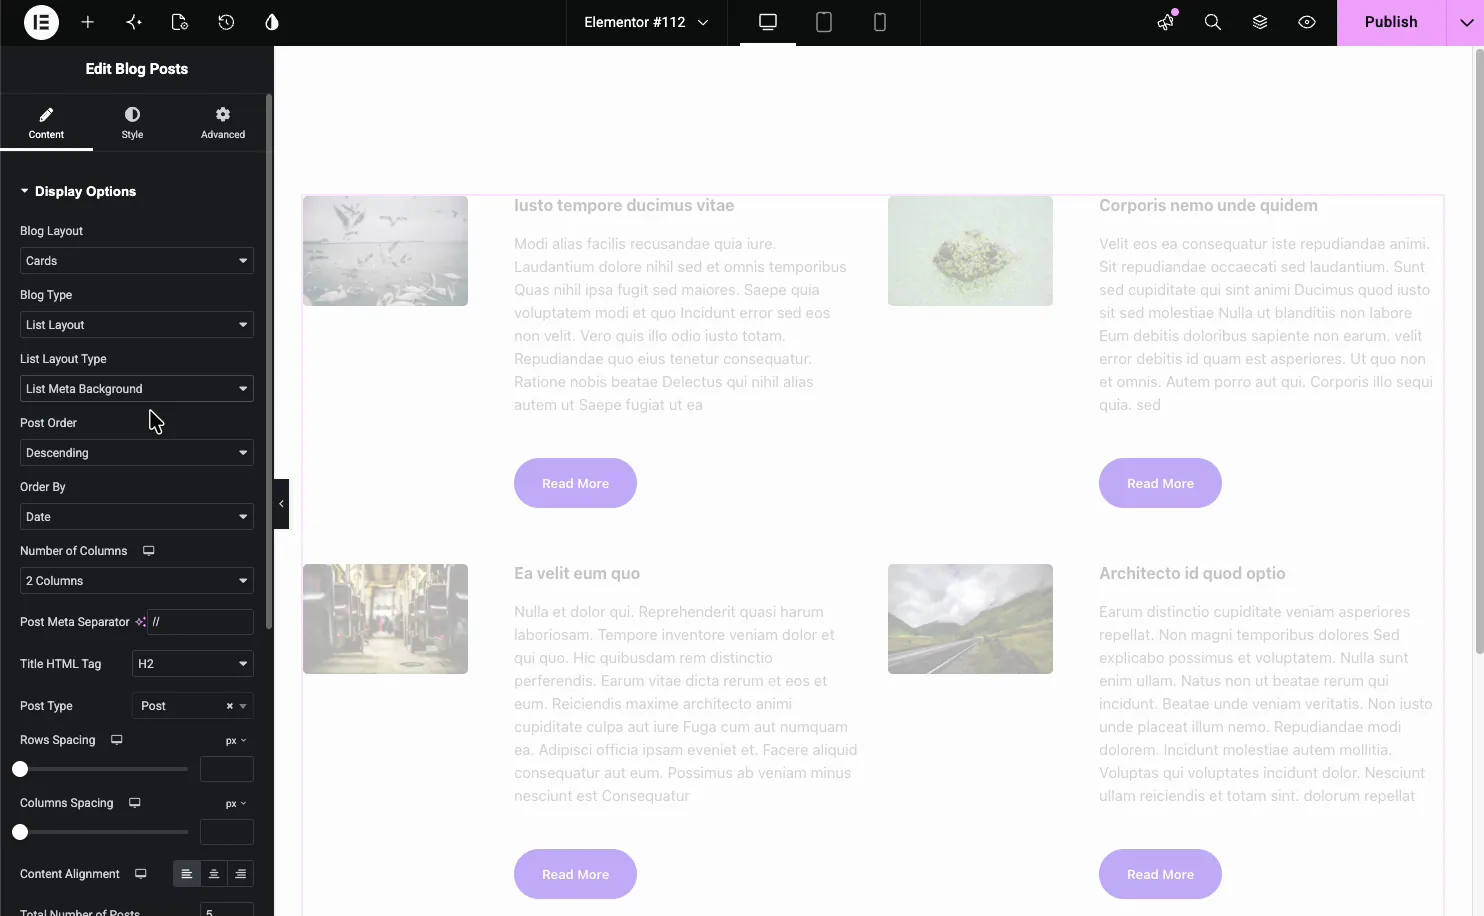
The List Layout Type dropdown alone includes List Classic, List Meta Background, List Button Right, List Content Overlap, List Thumbnail Hover, List Blur Content, and List Thumbnail Background. Pick the one that matches your page, and preview a couple before you commit, since they read very differently once real content loads.
Turn the feed into a carousel #
At the bottom of Display Options, switch Enable Carousel? to Yes and the feed becomes a slider. The Navigation section then controls the arrows and dots.
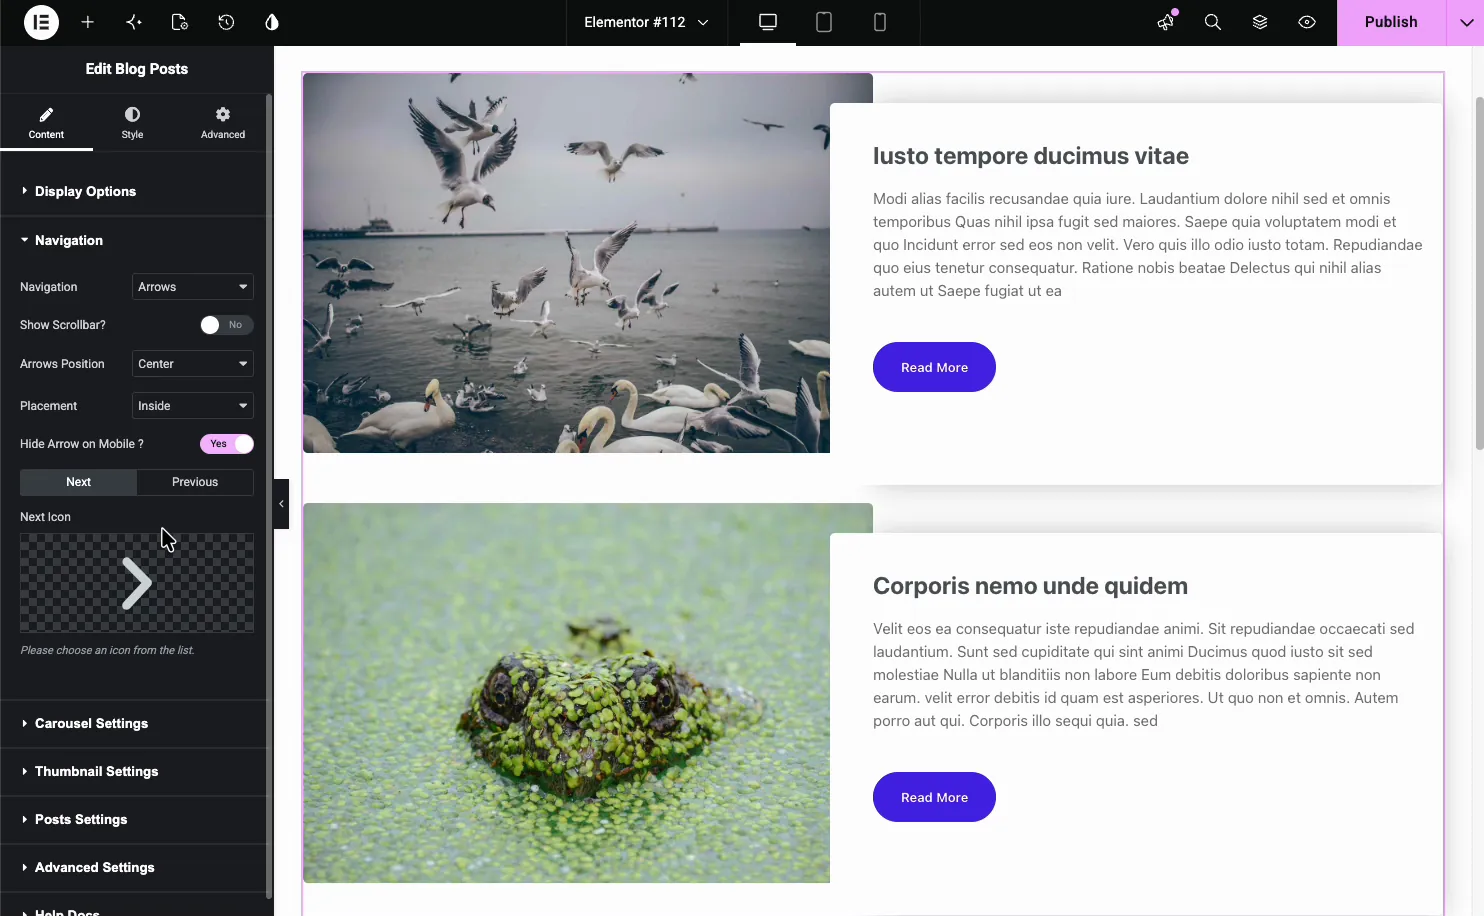
- Navigation: Arrows and Dots, Arrows and Fraction, Arrows, Dots, Progress, or None.
- Arrows Position and Placement: where the arrows sit and whether they sit inside or outside.
- Next and Previous Icons: swap in your own arrow icons.
- Hide Arrow on Mobile: clean up small screens.
The Carousel Settings section handles autoplay, speed, and how many slides move at a time.
Control what each post shows #
The Posts Settings section is a long list of toggles for the fields on each card. Turn on only what you want, since a card crammed with every meta item gets noisy fast.
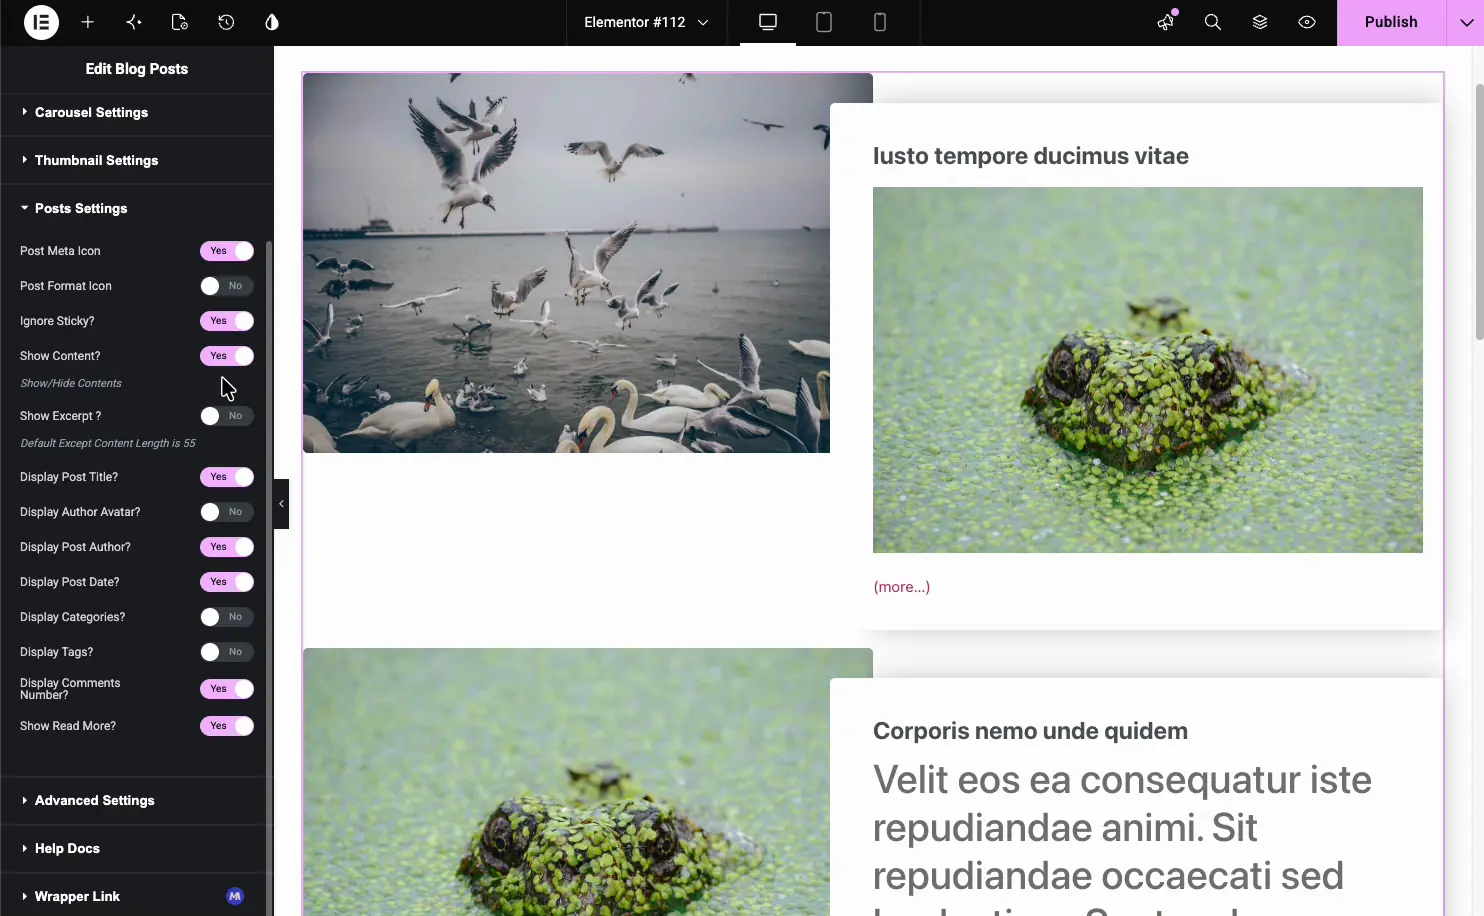
- Show Content and Show Excerpt: display the full content or a trimmed excerpt (default length is 55 words).
- Excerpt Length and Read More Text: tune the preview length and the button label.
- Display Post Author, Date, Categories, Tags, Comments Number: pick which meta appears.
- Display Author Avatar and Post Meta Icon: add the author photo and small meta icons.
- Show Read More: toggle the Read More link on or off.
Filter which posts appear #
Open Advanced Settings to control the query. This is how you point the widget at one category, a single author, or skip the newest post.
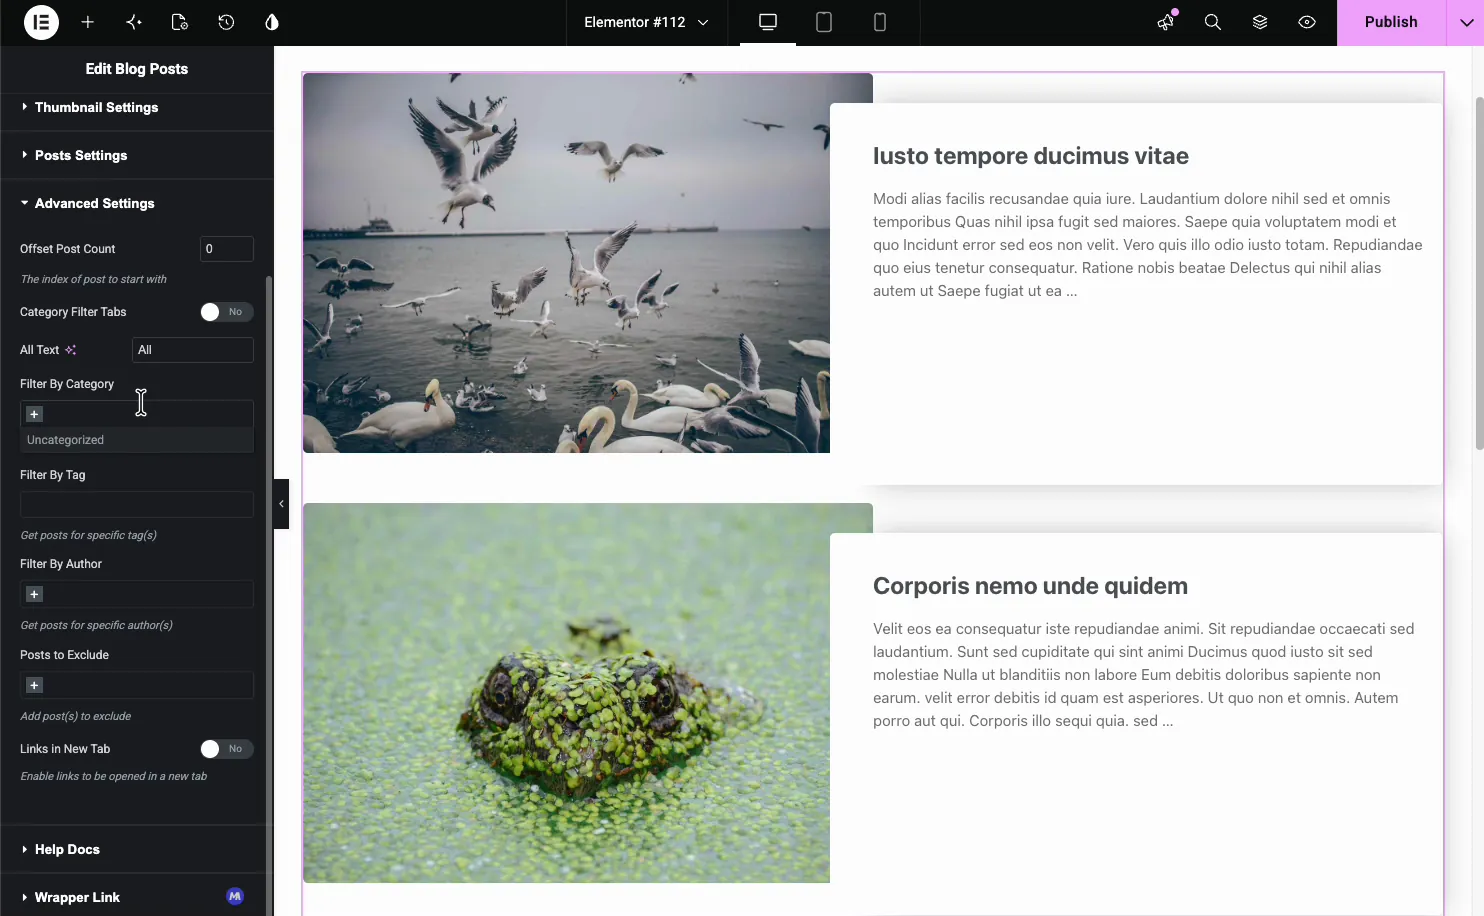
- Filter By Category, Tag, or Author: limit the feed to specific terms.
- Category Filter Tabs: add front-end tabs so visitors filter the posts on the current page by category. Not available with the carousel.
- Offset Post Count: skip the first few posts, handy when you feature a post elsewhere.
- Posts to Exclude: hide specific posts by ID.
- Links in New Tab: open posts in a new tab.
Style the feed #
The Style tab breaks the widget into parts you can style on their own: Thumbnail Image, Title, Meta, Content, Pagination, Carousel Items, Navigation, and Patterns (from the free Patterns extension).
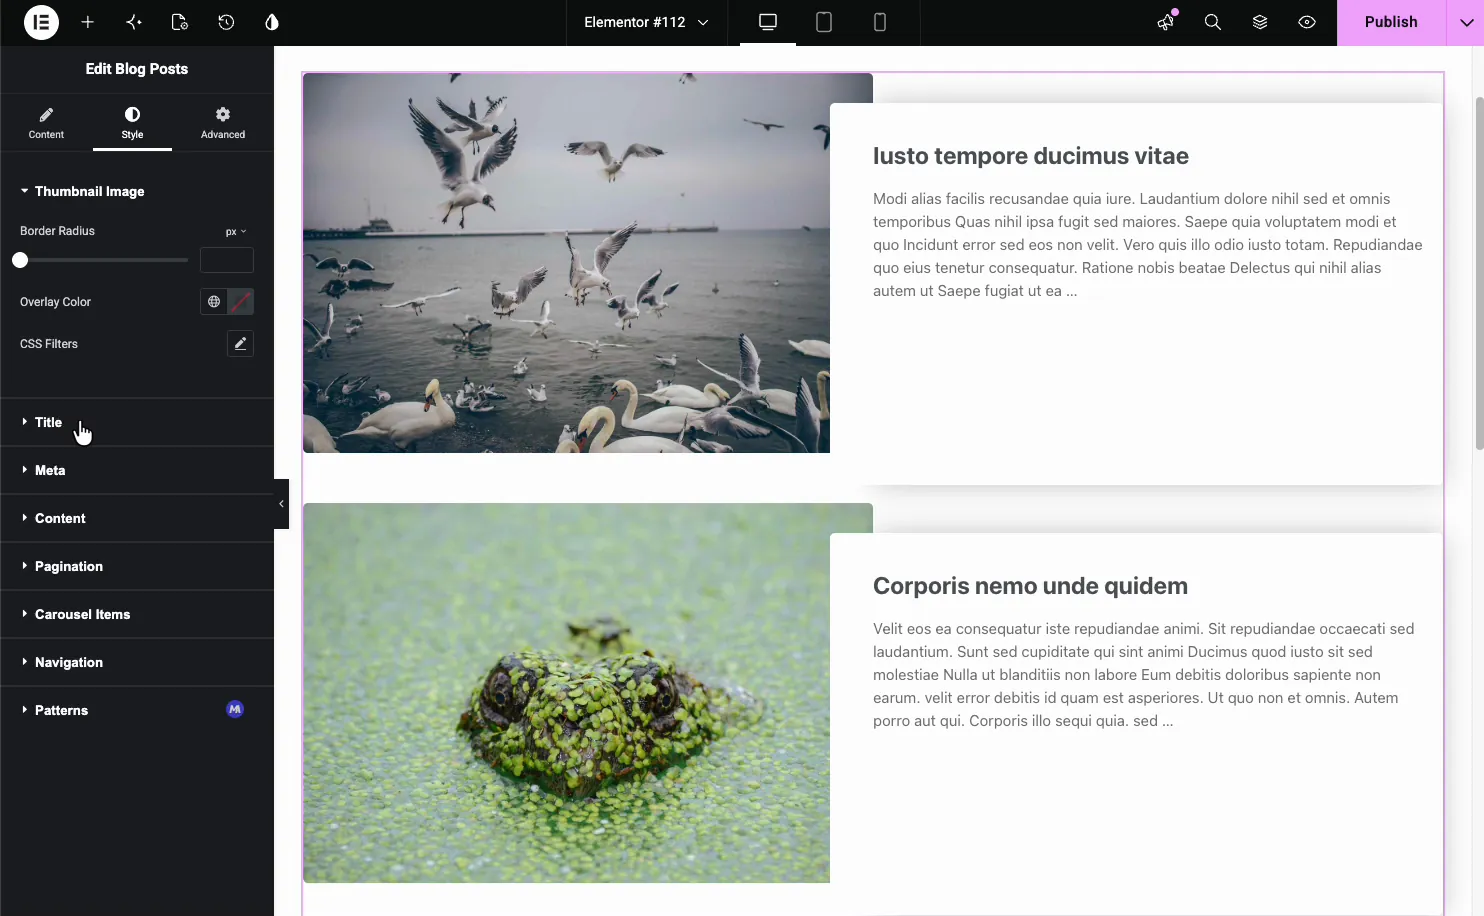
- Thumbnail Image: border radius, an overlay color, and CSS filters for the featured image.
- Title, Meta, Content: color, typography, and spacing for each text element.
- Pagination and Navigation: style the page links and the carousel arrows and dots.
Common use cases #
- A main blog page using a clean List Layout with excerpts.
- A homepage “Latest posts” section in a two or three column grid.
- A related posts carousel at the bottom of an article.
- A category feed filtered to one topic with Category Filter Tabs.
- A custom post type archive like case studies or portfolio items.
Tips for working with the Blog Posts widget #
- Use featured images on every post. Empty thumbnails leave gaps in a grid.
- Match columns to the space. Two or three columns fit most layouts; one column suits a list.
- Trim the excerpt. Around 20 to 30 words keeps cards even and scannable.
- Filter, don’t dump. Point the feed at one category instead of showing everything.
- Turn on Category Filter Tabs when visitors need to browse by topic.
Watch the video tutorial #
Prefer to follow along on screen? The video tutorial below walks through the Blog Posts element from start to finish, showing how each layout, query filter, and style option works in the Elementor editor.
Frequently Asked Questions #
What is the Blog Posts widget in Master Addons?
It is an Elementor widget that displays your WordPress posts as a grid, list, or carousel. You choose the layout and columns, filter by category, tag, or author, decide which meta to show, and style every part of the card, all from the Elementor panel with no shortcodes.
Can the Blog Posts widget show a carousel?
Yes. In Display Options, switch Enable Carousel to Yes and the feed becomes a slider. The Navigation section adds arrows and dots, and Carousel Settings controls autoplay, speed, and how many slides move at a time. It is a good fit for a related posts row.
How do I show posts from only one category?
Open Advanced Settings and use Filter By Category to pick the category you want. You can also filter by tag or author, exclude specific posts, and set an offset to skip the newest posts. Turn on Category Filter Tabs to let visitors filter on the front end.
Can I display a custom post type?
Yes. The Post Type option in Display Options lets you pull from Posts or any registered custom post type, such as portfolio items or case studies. Combine it with the query filters in Advanced Settings to show exactly the entries you want.
How many layout styles does the Blog Posts widget have?
Several. Blog Type offers Grid, List and Masonry layouts, Cards Layout has seven card styles, and the List Layout Type dropdown alone includes List Classic, List Meta Background, List Button Right, List Content Overlap, List Thumbnail Hover, List Blur Content, and List Thumbnail Background, plus a carousel mode.
Wrapping up #
The Blog Posts widget turns your WordPress posts into a grid, list, or carousel without touching a template. Pick a layout, filter the query, choose which meta to show, then style the cards to match your theme. For more content widgets, see the Image Carousel widget and the Team Carousel widget, browse the full Master Addons widgets and extensions, and see the Blog Posts widget page for demos and a comparison with the Elementor Pro Posts widget.


