

Elementor keeps elements in their columns, which is exactly right until the design calls for something else: a badge that sits half on the photo and half off it, or a label pushed past the section edge. The Positioning extension in Master Addons for Elementor adds offset controls to every widget, column, section and container. You can nudge or fully reposition anything from the panel in px, em or %, with separate values per device.
What the Positioning extension does #
Once enabled, every element gets a Positioning section under its Advanced tab. Pick a Position Type and move the element with offset sliders:
- Position Type: Default and Static keep the normal flow, Relative offsets the element from its own spot, and Absolute places it inside the nearest positioned parent. There is no Fixed option here; for that, use Elementor’s own Position setting.
- Top / Right / Bottom / Left: offsets in px, em or % for each side, including negative values for pushing past edges.
- From Center: a horizontal offset from the middle of the parent. It sets left to 50% plus your value.
- Z-Index: decides which element wins when things overlap.
Every control carries the responsive icon, so desktop, tablet, and mobile each keep their own values. The panel adds one sensible warning: avoid combining From Center and Left at the same time.
Before you start #
- WordPress with Elementor installed and active.
- Master Addons for Elementor installed and active. New to the plugin? Follow the installation guide first.
- Positioning is a free extension, so no Pro license is required.
How to enable the Positioning extension #
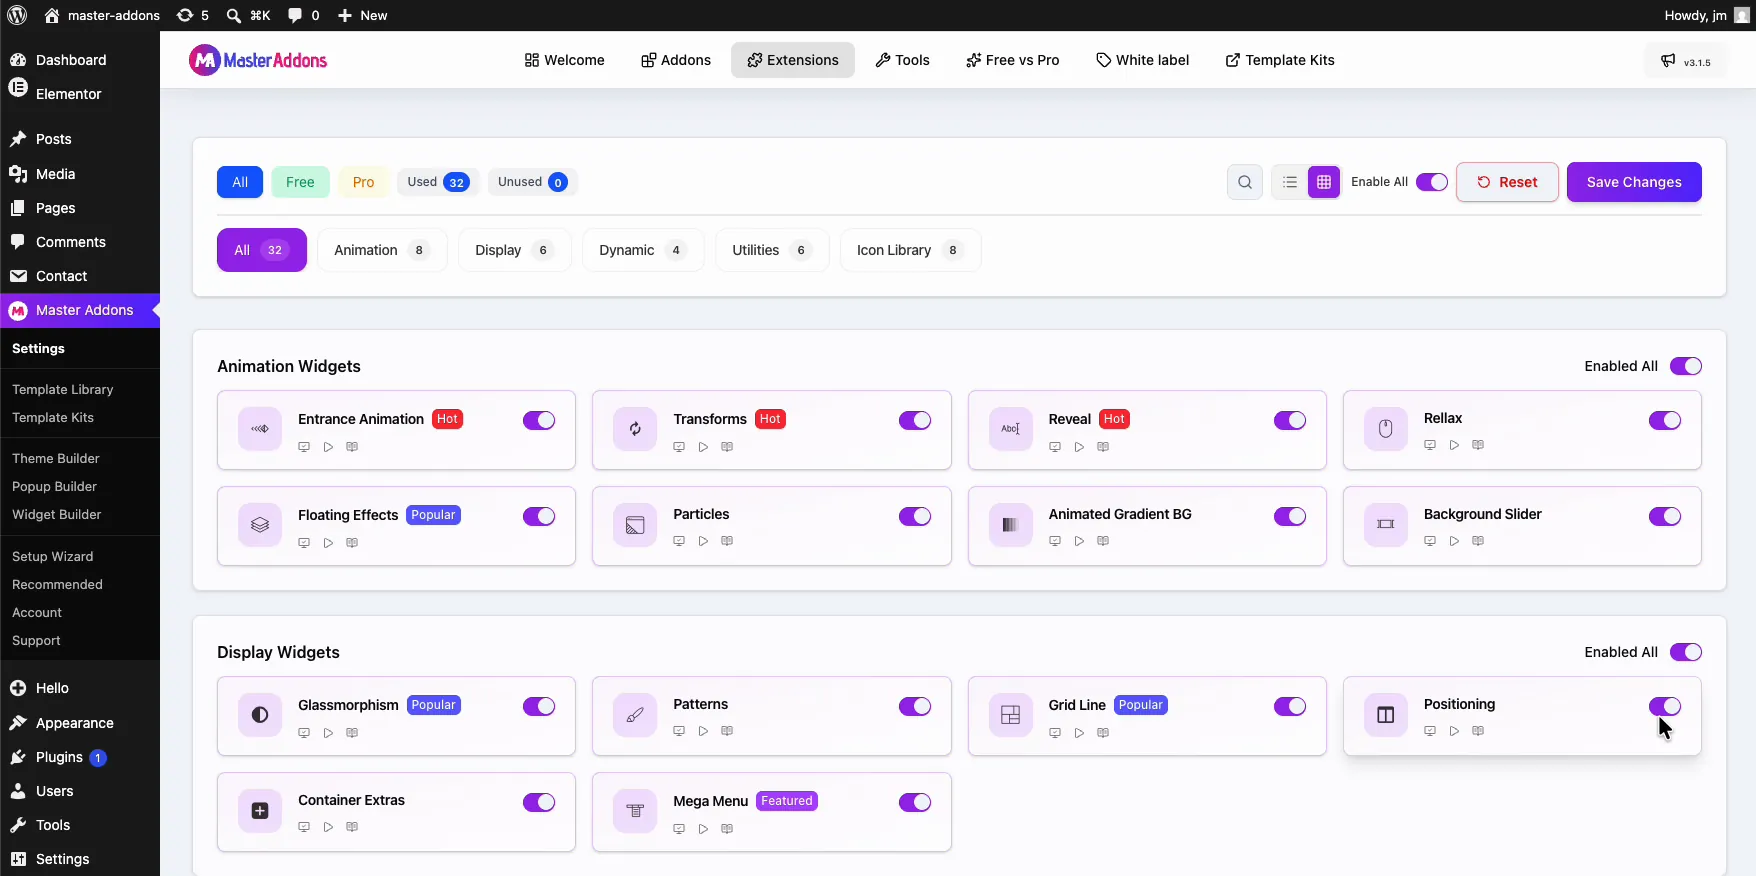
From your WordPress dashboard, go to Master Addons and open the Extensions tab. Positioning sits in the Display Widgets group, next to Grid Line and Container Extras. Click its toggle so it turns purple, then hit Save Changes and wait for the green “Settings saved successfully” notice.
Open the Positioning panel #
Select the element in the Elementor editor, the round quality badge in the demo, and open the Advanced tab. Expand the Positioning section with the purple MA badge and set Position Type to Relative. The offset controls appear: Top, Right, Bottom, Left, From Center, and Z-Index below them.
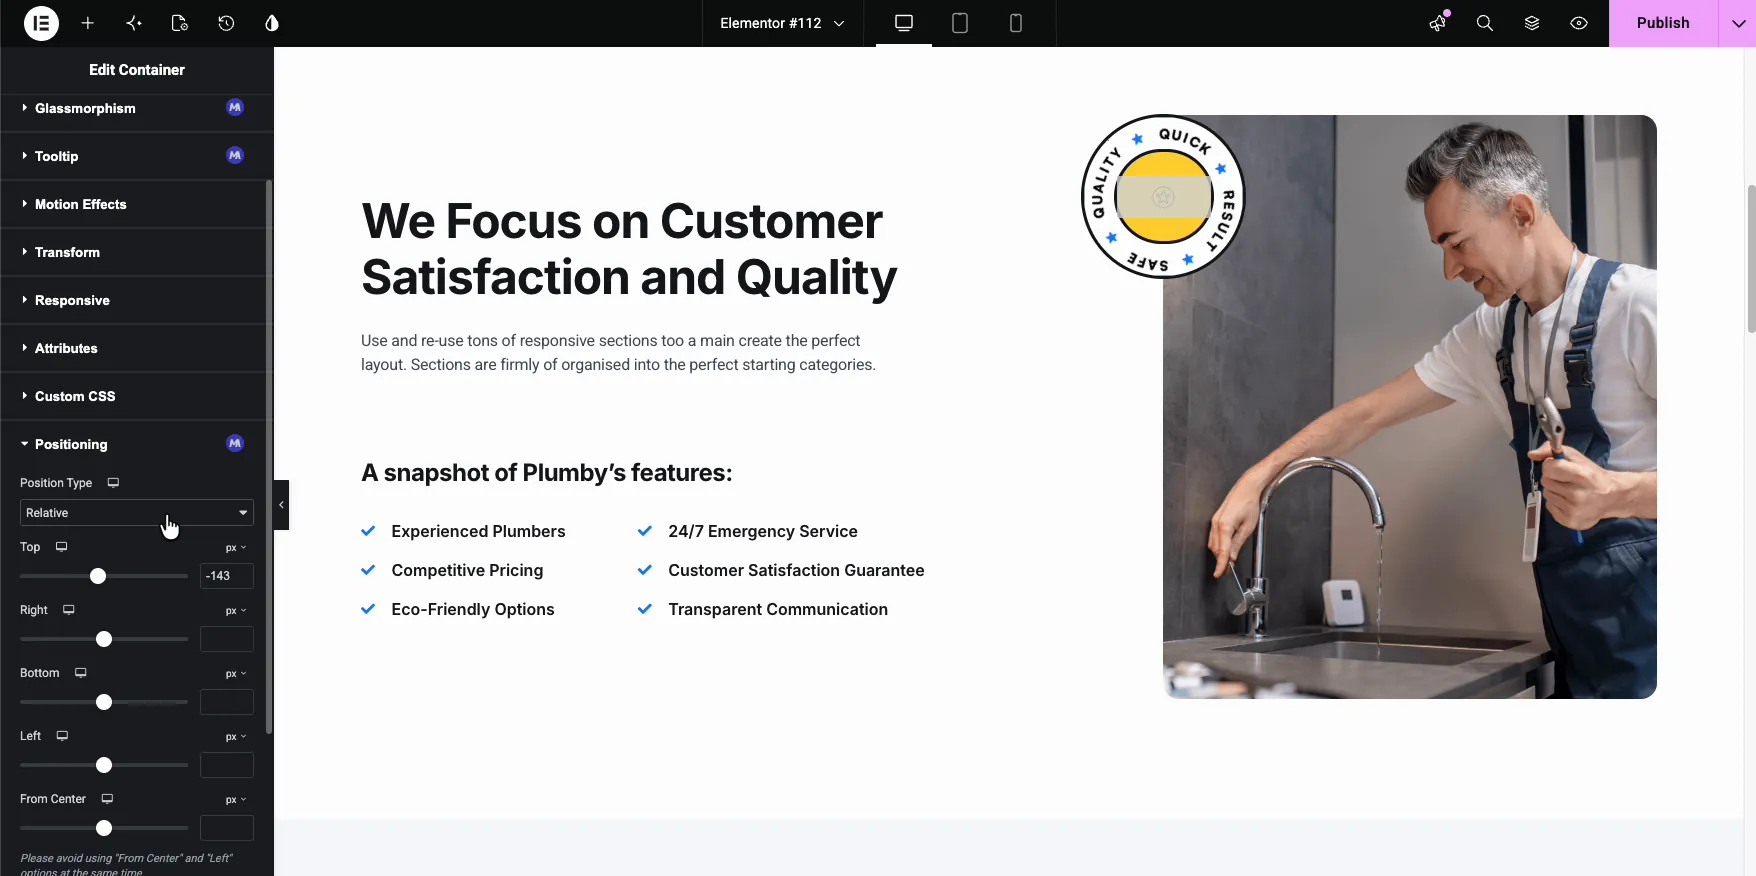
Drag any slider and the element moves live on the canvas. A negative Top of -143 in the demo lifts the badge from the middle of the photo toward its upper edge; positive values push the other way.
Move the element into place #
The demo walks the badge around the photo with a few values: Top 357 drops it toward the lower half, Right -262 slides it outward, and a Bottom value fine-tunes the overlap until the badge straddles the photo’s bottom edge. Each slider also takes typed values, so you can match exact spacing from a mockup.
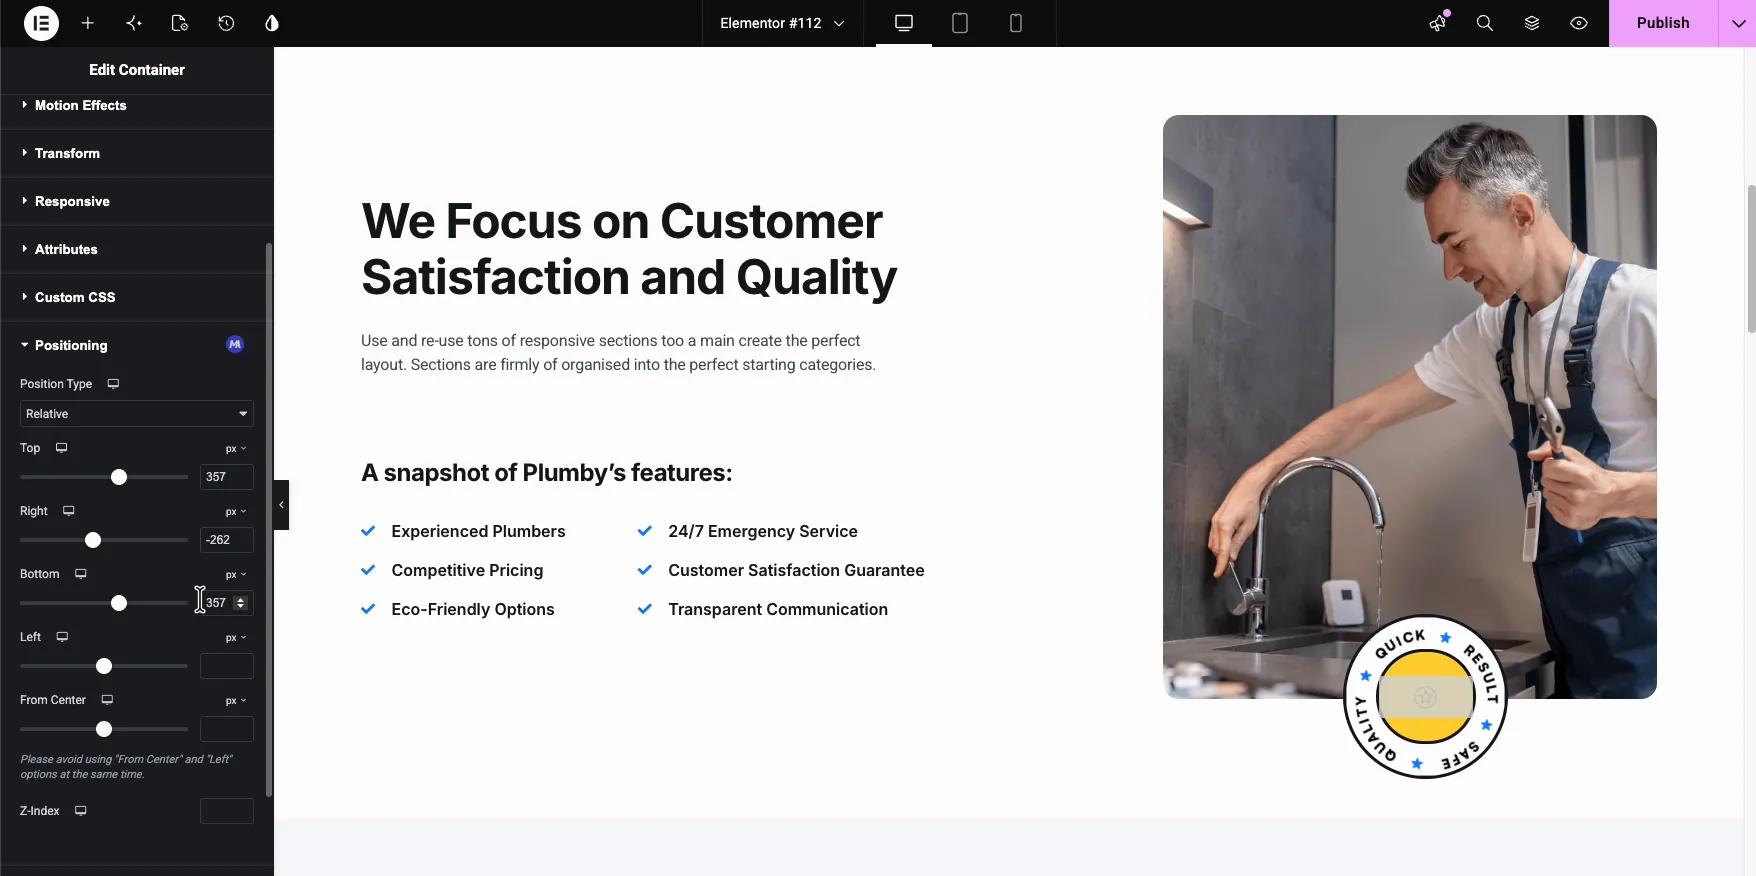
With Relative, the element keeps its slot in the layout and the content around it stays put. Absolute takes the element out of the flow, so the content below moves up to fill the gap. When two elements end up stacked, the Z-Index field settles who sits on top.
The result on the page #
Publish and the badge renders exactly where it was parked: overlapping the photo’s bottom edge, breaking the rectangle without touching the column structure underneath.

Check tablet and mobile before you finish. Offsets that look right on desktop can push an element off-screen on a narrow viewport, which is exactly why every control here is responsive.
Where precise positioning pays off #
- Badges and stamps. A seal that overlaps a photo corner reads as designed, not placed.
- Overlapping cards. Pull a testimonial or stat card onto the edge of the image beside it.
- Section-breaking accents. Shapes or labels that cross section boundaries.
- Fine alignment fixes. Nudge an element a few pixels without wrapping it in margin hacks.
- Layered hero compositions. Stack text over images with Z-Index deciding the order.
Video Tutorial #
Watch the badge move around the layout in real time, from enabling the extension to the published page.
Frequently Asked Questions #
How do I move an element freely in Elementor?
Enable the Positioning extension in the Master Addons Extensions tab, select the element, and open Positioning under the Advanced tab. Set Position Type to Relative and use the Top, Right, Bottom, and Left sliders; the element moves live on the canvas as you drag.
Can I use negative offset values?
Yes. Negative values push the element past its normal boundary, which is how you overlap a badge onto a photo edge or pull an element outside its section. Type the value or drag the slider in either direction.
What does the Z-Index setting do?
Z-Index controls stacking order when elements overlap. The element with the higher number renders on top. Set it in the same Positioning panel whenever a repositioned element needs to sit above, or below, its neighbors.
Do the offsets work on mobile too?
Every offset control is responsive, so desktop, tablet, and mobile keep separate values. Always preview narrow viewports after positioning: an offset that fits a wide screen can push the element off-screen on a phone, and the per-device values are how you correct it.
Is the Positioning extension free?
Yes. Positioning ships with the free version of Master Addons for Elementor, in the Display Widgets group of the Extensions tab. The pricing page covers what the Pro plans add.
Wrapping up #
Positioning lets you place Elementor elements outside their normal slot: pick Relative or Absolute, set the offsets, and use Z-Index and per-device values for the rest. The Positioning extension page compares it with Elementor’s built-in Position setting. If an element also needs rotation or scale, pair it with the Transforms extension (Pro). You can browse the rest of the Master Addons widgets and extensions on one page.


