

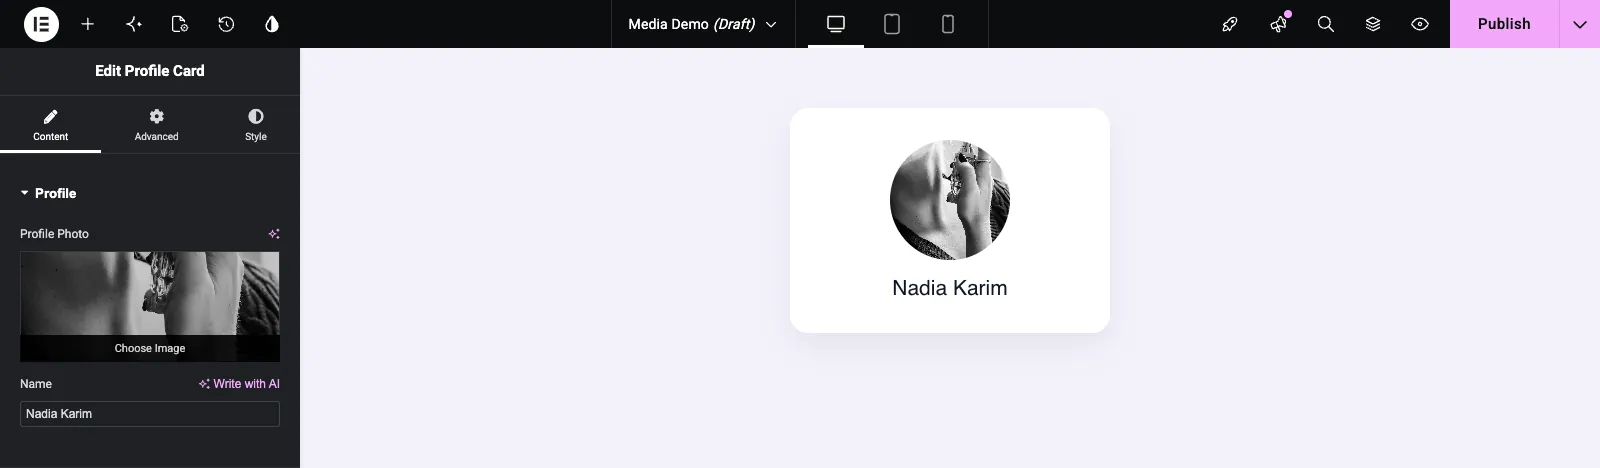
O campo Mídia adiciona um selecionador de imagem a um widget personalizado construído com os Master Addons Construtor de widgets. Os editores escolhem uma imagem da Biblioteca de Mídia ou carregam uma nova no Elementor, e seu modelo imprime seu URL, ID ou texto alternativo. Use-o para fotos de perfil, logotipos, imagens de heróis, fotos de produtos e qualquer outro slot de imagem único.
Media é um dos campos que você pode usar no Widget Builder da versão gratuita O plugin gratuito inclui um Widget Builder limitado, e o conjunto completo de campos vem com Complementos mestres Pro.
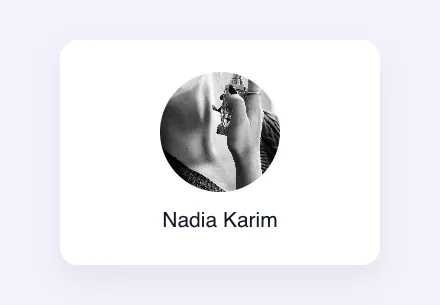
O que o campo Media faz #
- Ele adiciona a caixa de imagem do Elementor ao painel do seu widget, com um botão Escolher imagem.
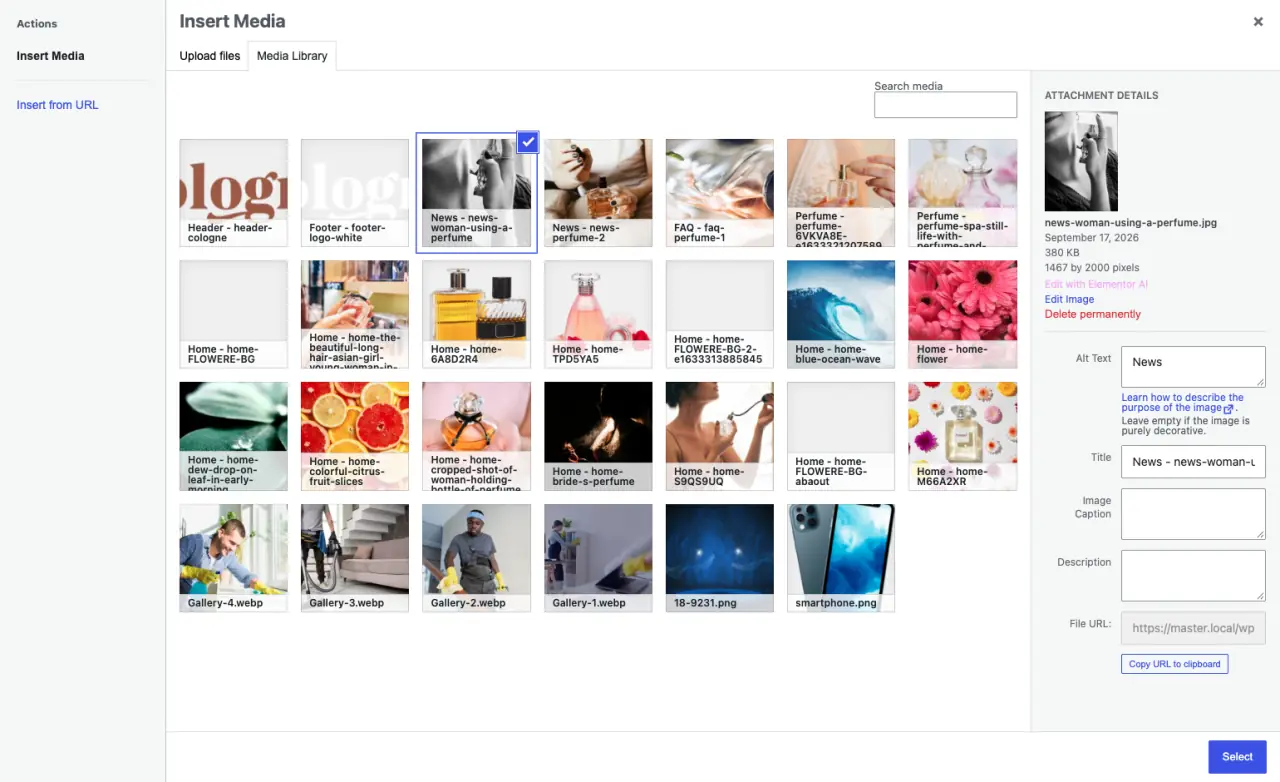
- Escolha Imagem abre a janela de mídia do WordPress, onde os editores carregam um arquivo, escolhem um na Biblioteca de Mídia ou inserem um em uma URL.
- O campo armazena a imagem
url,idealttexto e seu modelo imprime o que for necessário. - Funciona na guia HTML e na guia CSS, por exemplo, como imagem de fundo.
Se você ainda não construiu um widget, leia o Visão geral do Widget Builder primeiro.
Antes de começar #
- WordPress com Elementor instalado e ativo.
- Complementos Mestres para Elementor instalados e ativos. O guia instalação coberturas configuração.
- Um widget aberto no Widget Builder O exemplo neste guia é um widget “Profile Card” com um campo de Mídia nomeado
profile_photoe um campo de Texto para o nome.
Como adicionar um campo Mídia #
- Ir para Complementos mestres > Construtor de widgets e abra seu widget.
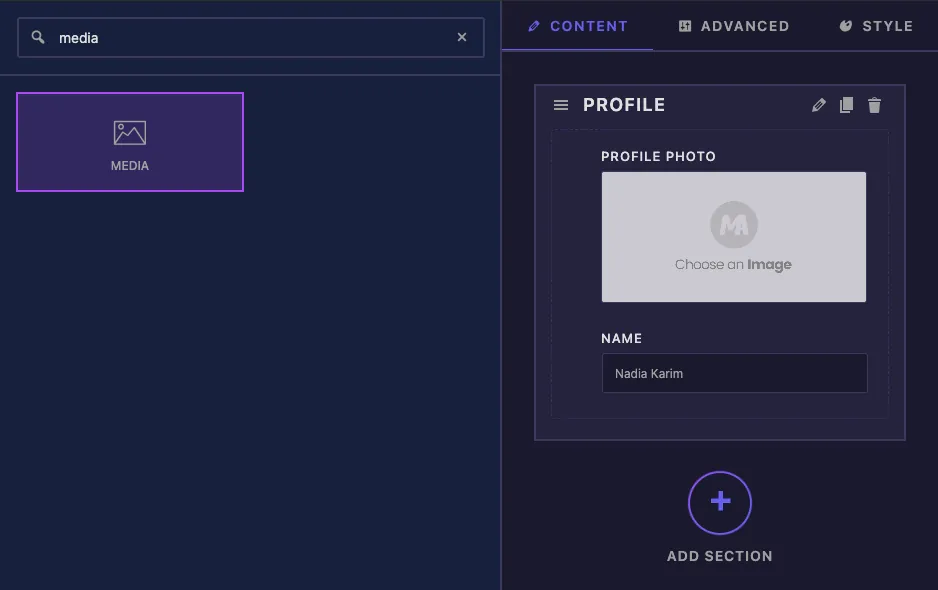
- No Conteúdo tab, adicione uma seção, por exemplo “Profile”.
- Tipo
mediana caixa de pesquisa de campo à esquerda. - Arrastar Mídia na seção. Suas configurações abrem na barra lateral esquerda.
Opções de campo de mídia explicadas #
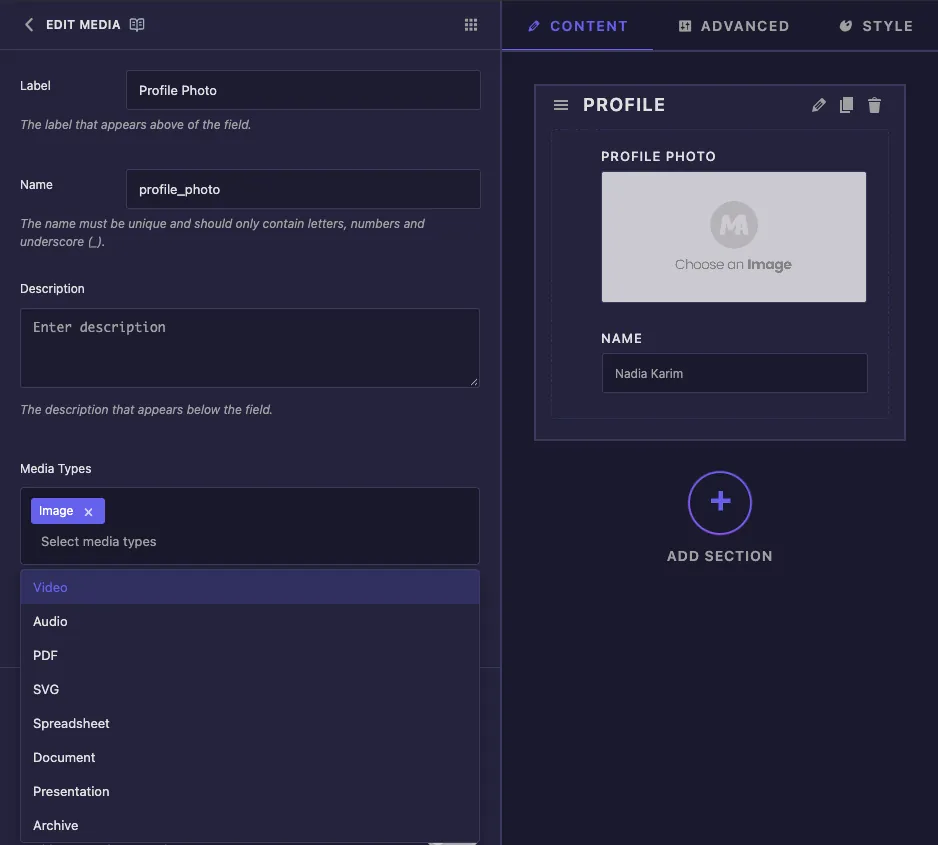
- Etiqueta o texto acima da caixa de imagem no Elementor, por exemplo “Profile Photo”.
- Nome é o ID exclusivo do campo e o início de seus tokens, então
profile_photodá{{ profile_photo.url }}. Apenas letras, números e sublinhados. - Descrição aparece sob a caixa de imagem no Elementor.
- Tipos Mídia lista Imagem (o padrão), Vídeo, Áudio, PDF, SVG, Planilha, Documento, Apresentação e Arquivo Em nossos testes essa configuração não chegou ao Elementor Um campo definido como Vídeo ainda apareceu como um selecionador de imagem normal, então trate o campo Mídia como um campo de imagem.
Não há configuração de imagem padrão, portanto, uma nova cópia do widget começa sem imagem até que um editor escolha uma. As configurações comuns mais abaixo funcionam como em outros campos.
Imprima a imagem no seu modelo #
O campo contém vários valores e você imprime cada um deles com um ponto:
{{ profile_photo.url }}é o URL do arquivo de imagem.{{ profile_photo }}por conta própria imprime o mesmo URL.{{ profile_photo.id }}é o ID da Biblioteca de Mídia da imagem.{{ profile_photo.alt }}é o texto alternativo que a imagem tinha na Biblioteca de Mídia quando o editor a escolheu.
Embrulhe o <img> marque um cheque, para que nada seja impresso enquanto o campo estiver vazio:
{% if profile_photo.url %}
  <img class="profile-photo" src="{{ profile_photo.url }}" alt="{{ profile_photo.alt }}">
{% endif %}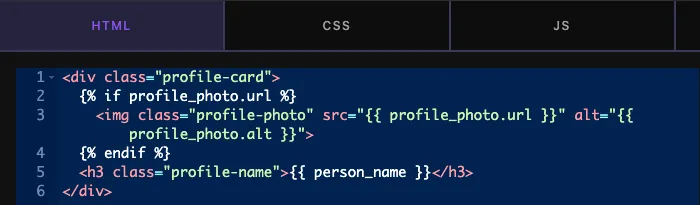
O token também funciona na guia CSS, por exemplo, para uma imagem de fundo:
.profile-card {
  background-image: url('{{ profile_photo }}');
}
Se seus estilos de imagem não se aplicam, torne o seletor mais específico Elementor tem suas próprias regras para imagens dentro de widgets, e em nossos testes .profile-photo sozinho não venceu contra eles, enquanto .profile-card .profile-photo fez.
Clique Salvar configurações quando terminar.
Use o controle de mídia no Elementor #
Adicione o widget a uma página, ou recarregue o editor se a página já estiver aberta A caixa de imagem mostra a imagem atual Passe o mouse sobre ela e clique em Escolher Imagem para alterá-lo, ou use o ícone de lixo para limpá-lo.
A janela Inserir mídia é aberta. Carregue um arquivo abaixo Carregar arquivos, escolha um abaixo Biblioteca de mídia, ou usar Inserir do URL. O painel de detalhes à direita mostra o Texto Alt da imagem, que é o que {{ profile_photo.alt }} imprime. Preencha-o antes de clicar Selecione.
Casos de uso comum #
- Fotos de perfil e cartões de membro da equipe.
- Logotipos em cabeçalhos, rodapés e listas de clientes.
- Imagens de heróis e banners, como um
<img>tag ou um fundo CSS. - Imagens de produto ou recurso dentro de cartões.
Dicas para trabalhar com o campo Mídia #
- Sempre guarde o
<img>marcar com{% if profile_photo.url %}então um campo vazio não deixa uma imagem quebrada. - Imprimir
{{ profile_photo.alt }}no atributo alt, e adicione texto alt na Biblioteca de Mídia antes de escolher a imagem. - Usar
object-fit: covercom largura e altura fixas quando imagens de diferentes formatos precisam se alinhar. - Dê regras de imagem duas classes, como
.profile-card .profile-photo, portanto, os estilos de imagem do próprio Elementor não os substituem. - Para várias imagens, use o Campo galeria. Para ícones ou símbolos SVG, use o Campo ícones.
Perguntas frequentes #
O campo Mídia está disponível na versão gratuita?
Sim. Media é um dos campos que você pode usar no Widget Builder da versão gratuita O conjunto completo de campos do Widget Builder vem com Master Addons Pro.
O que {{ profile_photo }} imprime?
O URL da imagem. é o mesmo que {{ profile_photo.url }}. Usar .id para o ID do anexo e .alt para o texto alt.
Por que meu texto alt está vazio?
O campo copia o texto alternativo que a imagem tem na Biblioteca de Mídia quando é escolhida Adicione o Texto Alt na janela Inserir Mídia e selecione a imagem novamente.
Posso usar o campo Mídia para vídeos ou PDFs?
Não de forma confiável Em nossos testes a configuração Tipos de mídia não alterou o controle Elementor, que permaneceu um selecionador de imagem Usar um campo URL para links para outros arquivos.
Por que meu CSS não altera o tamanho da imagem?
Elementor aplica seus próprios estilos a imagens dentro de widgets Use um seletor mais específico, como .profile-card .profile-photo, para sua largura, altura e raio da borda.
Embrulhando #
Adicionar o campo Media, imprimir {{ field_name.url }} e {{ field_name.alt }} dentro de um {% if %} verifique e forneça aos seus estilos de imagem um seletor específico. Os editores então escolhem ou carregam imagens diretamente do Elementor. Para que um link acompanhe a imagem, adicione um Campo URL, e verifique preços para o que cada plano inclui.


