

Table of Contents
Elementor has no timeline widget of its own, in the free version or in Pro. To put a timeline on an Elementor page you add one from an addon. This guide uses the Timeline widget in the free Master Addons plugin, which covers vertical layouts, horizontal carousels, and timelines that build themselves from your blog posts.
Every screenshot below comes from Elementor 4.2.4 with Master Addons 3.2. Custom timelines, both layouts and the whole Style tab are free. Post Timeline needs Pro, and it is labelled where it comes up.
If you would rather watch, this video covers the same steps in under five minutes.
Can you make a timeline in Elementor without a plugin?
Yes, for a simple one-sided timeline. Elementor’s containers can do it in four steps:
- Add a parent container, set its direction to Column and its gap to 0. This holds the whole timeline.
- For each entry, add an inner container. Under Style → Border, set a solid border on the left side only, 2px wide, and add left padding so the text clears it. Stacked together, those borders become the line.
- Put a Heading for the date and a Text Editor for the description inside each entry.
- Add an Icon widget for the dot. Under Advanced → Layout, set Position to Absolute and nudge it with the offsets until it sits on the border.
That gives you a left-aligned timeline with no addon. You do not get the alternating left-and-right layout, a horizontal version, or cards that animate in on scroll. Alternating needs custom CSS, plus your own responsive rules, because a two-sided layout has to collapse to one column on phones.
It also gets slow to maintain. Every new milestone is another container to build and another dot to position by hand. A widget keeps the line, the markers, the alternation and the breakpoints as settings, so adding an entry is one click.
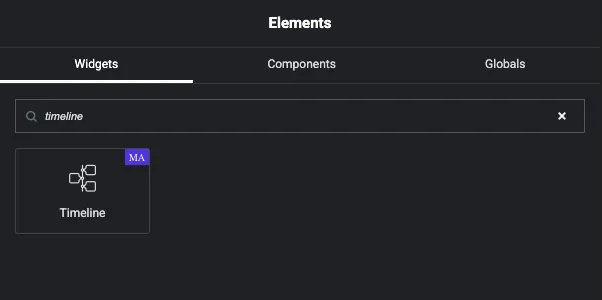
Search the widget panel for “timeline” on a stock Elementor install and exactly one result comes back, the Master Addons widget.
Install the plugin
From the WordPress dashboard go to Plugins → Add Plugin, search for Master Addons for Elementor, then install and activate. Open any page with Elementor and search the widget panel for timeline.
If nothing comes up after activating, check Master Addons → Widgets Library and make sure Timeline is switched on. Widgets can be disabled individually to keep unused code off the front end, which is worth doing anyway if you care about Elementor page speed.
How to add a timeline in Elementor, step by step
Step 1: Drag the widget onto the page
Edit a page with Elementor, search for Timeline, and drag it into a container. It arrives with three sample entries already filled in, so you can see what each field does before you change anything.
Step 2: Choose the timeline type
In the Content tab, open the Timeline section. The first dropdown is Timeline Type.
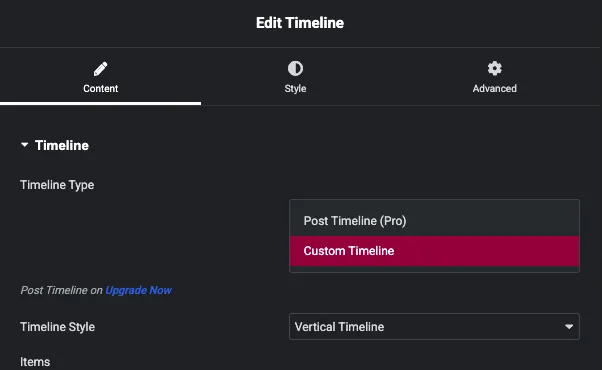
Custom Timeline is the free one. You type each entry yourself, which is what you want for a company history, a product roadmap or an event schedule, where the content is fixed and editorial.
Post Timeline is a Master Addons Pro feature. It reads your WordPress posts and builds the timeline from them, so publishing a post adds an entry on its own. There is a section on it further down.
Step 3: Choose vertical or horizontal
The second dropdown is Timeline Style.
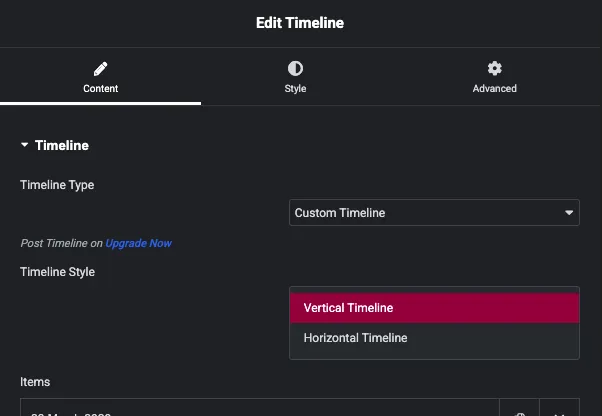
Vertical runs down the page with cards alternating left and right of a central line. Horizontal lays the entries out side by side as a carousel with arrows. Both are free, and you can switch between them at any point without losing your entries.
One limit worth knowing now: Timeline Style only appears for Custom Timelines. Post Timelines are vertical only, and the dropdown disappears when you switch the type.
Step 4: Edit your entries
Under Items, each entry is a repeater row. Click one to open it.
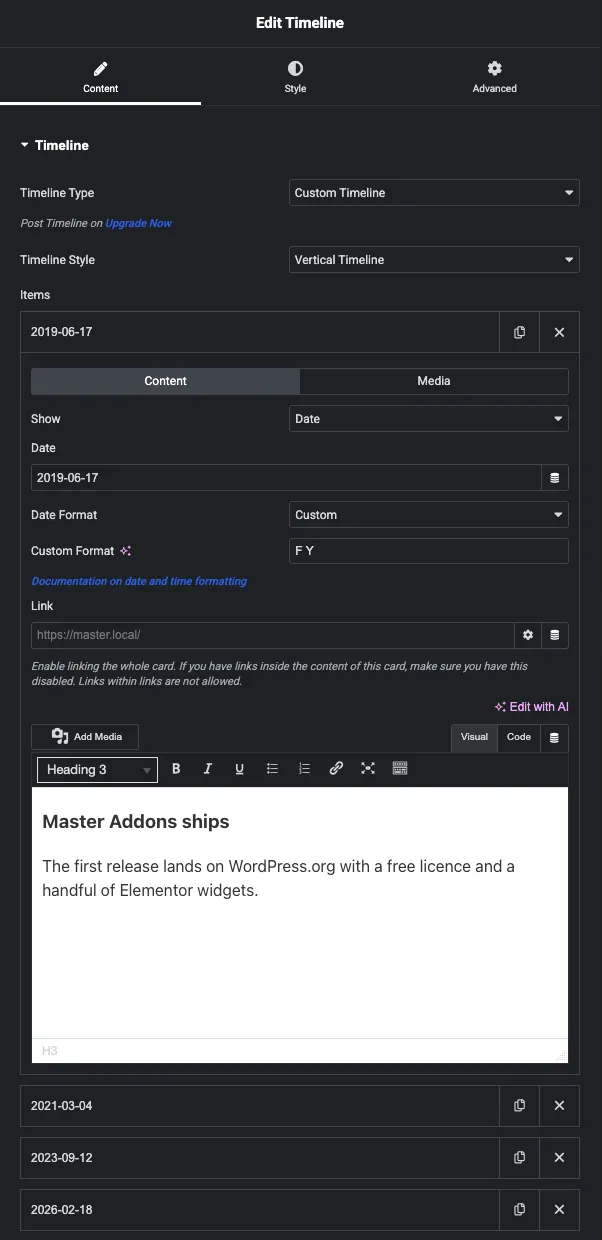
Each row has a Content tab and a Media tab. The fields that matter:
- Show: Date or Custom Label. Date gives you a date picker; Custom Label lets you write anything, which is how you get “Q3 2026” or “Founded” on the line instead of a calendar date.
- Date Format: presets plus Custom. Custom takes a PHP date string, so
F Yprints “June 2019” and keeps a milestone timeline from looking like a changelog. - Link: makes the whole card clickable. Leave it off if the card’s text already contains a link, because a link inside a link is invalid HTML and browsers will drop one of them.
- The content box is a full editor. There is no separate title field, so the entry’s heading goes in here as a Heading 3.
- The Media tab adds an image to the card and sets its resolution.
Add Item creates a new row, the copy icon duplicates one, and rows drag to reorder.
Step 5: Publish and look at it
Four entries, dates formatted as month and year, flag icons on the markers, all of it on the free plugin.
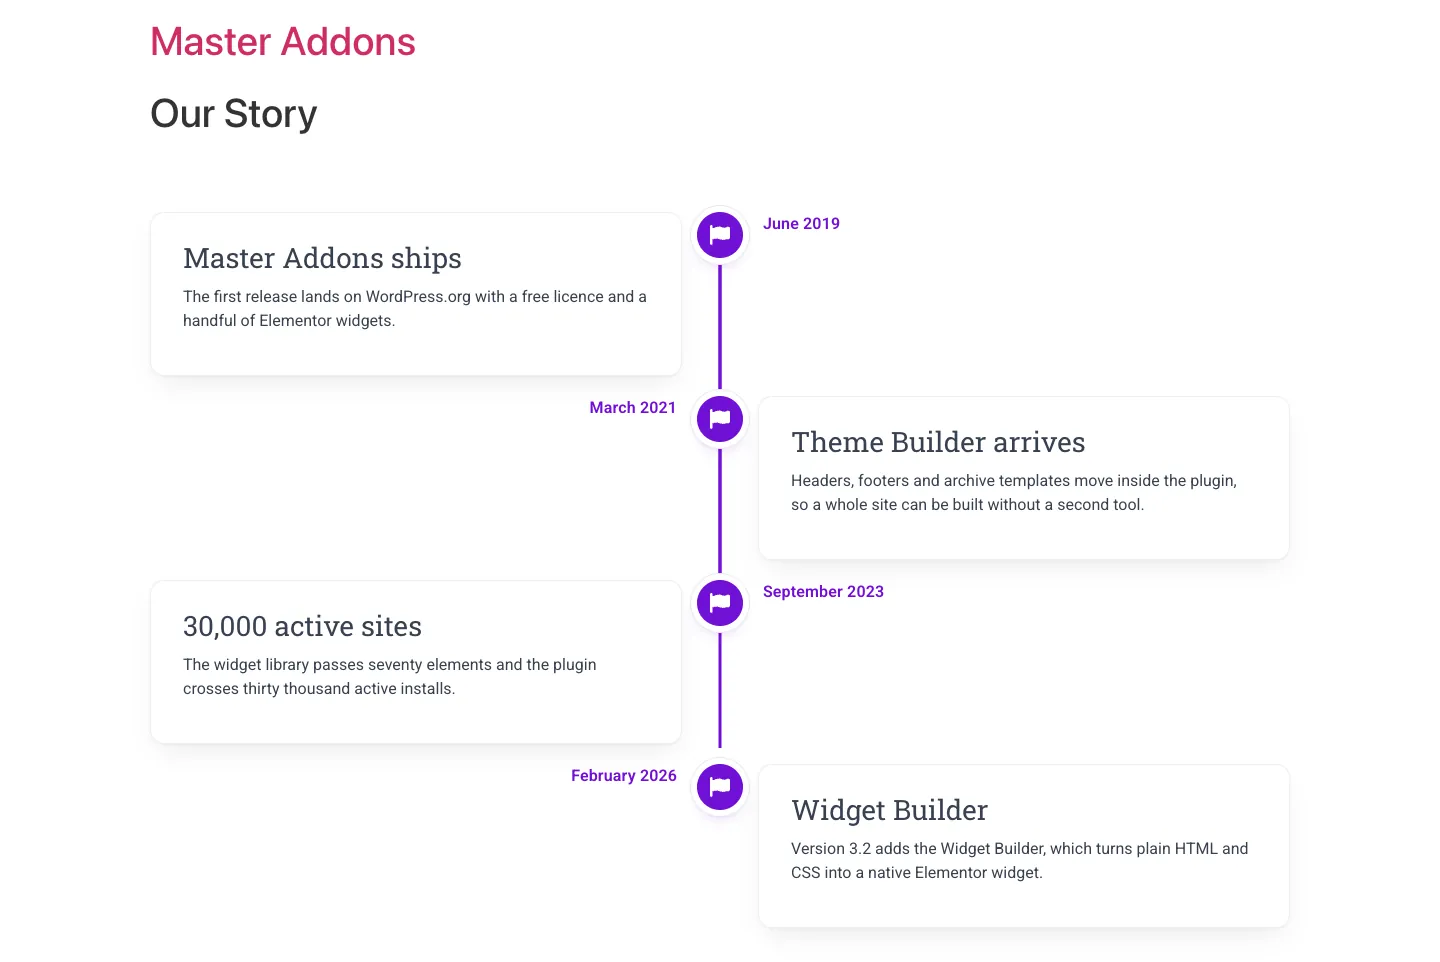
The cards alternate sides and the dates sit opposite each one without you positioning anything.
Why the cards look blank until you scroll
Timeline cards start hidden and animate in when they scroll into view, and the point nearest your scroll position takes a focused state, which you style separately in the Points section.
So a timeline placed below the fold looks empty in a screenshot tool, in a PDF export, or in a page-speed audit that never scrolls. Scroll the page and the entries appear.
Making a horizontal timeline in Elementor
Set Timeline Style to Horizontal Timeline and the layout rotates: entries sit side by side, points sit above the cards on a horizontal line, and arrows scroll through them.
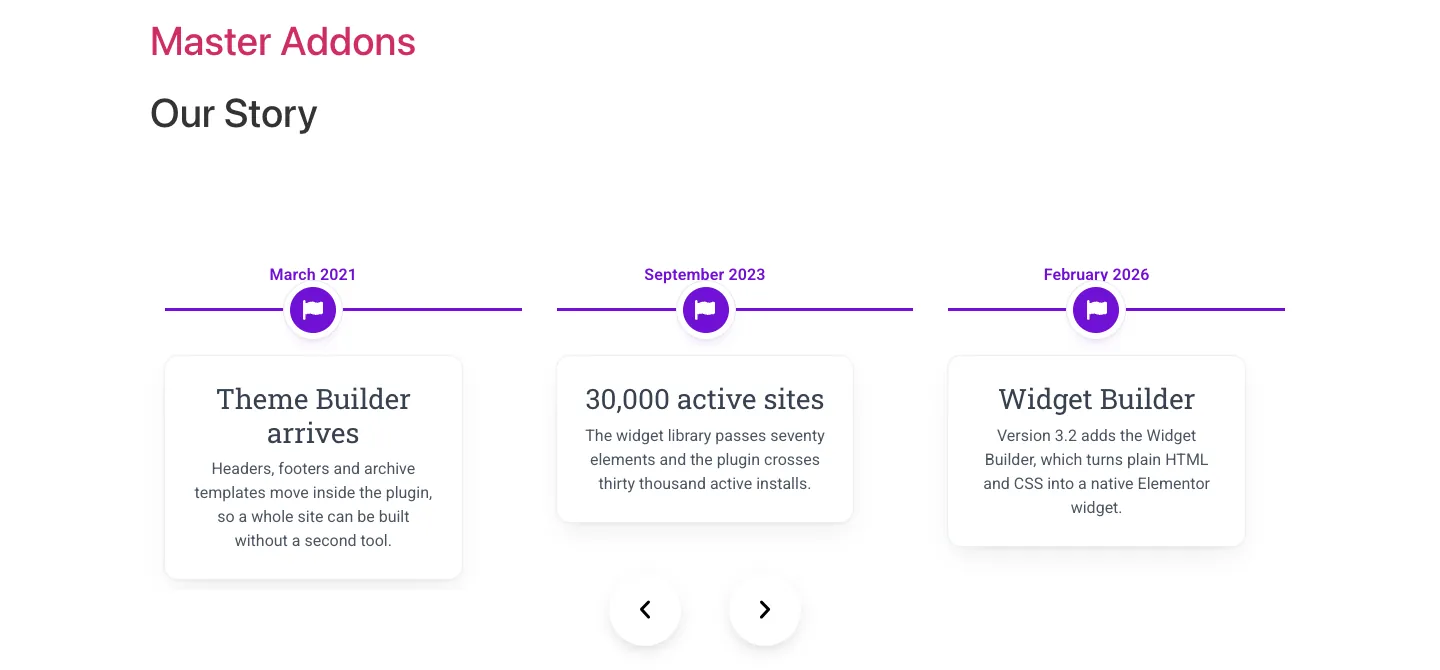
Arrows are configured in the Style tab under Navigation. Two controls, easy to mix up:
- Placement is inside or outside the carousel.
- Position is where they sit, from top-left through bottom-right.
Setting Position to a value that belongs to Placement drops the arrows into the top-left corner, on top of your first entry. Bottom-centre with outside placement is the safe pairing, and it is what the screenshot uses.
Horizontal suits four to six strong milestones above the fold, like a product launch sequence on a landing page. Past six entries the reader is clicking an arrow repeatedly to see content they cannot scan, and vertical wins. Vertical is also the safer bet on phones, where top-to-bottom reading is what people expect. Whichever you pick, check it against your responsive breakpoints before you ship, because the two layouts collapse differently.
Styling the line, the points and the cards
The Style tab has eleven sections: Carousel Items, Layout, Images, Posts, Cards, Arrow, Dates, Line, Points, Navigation and Patterns.
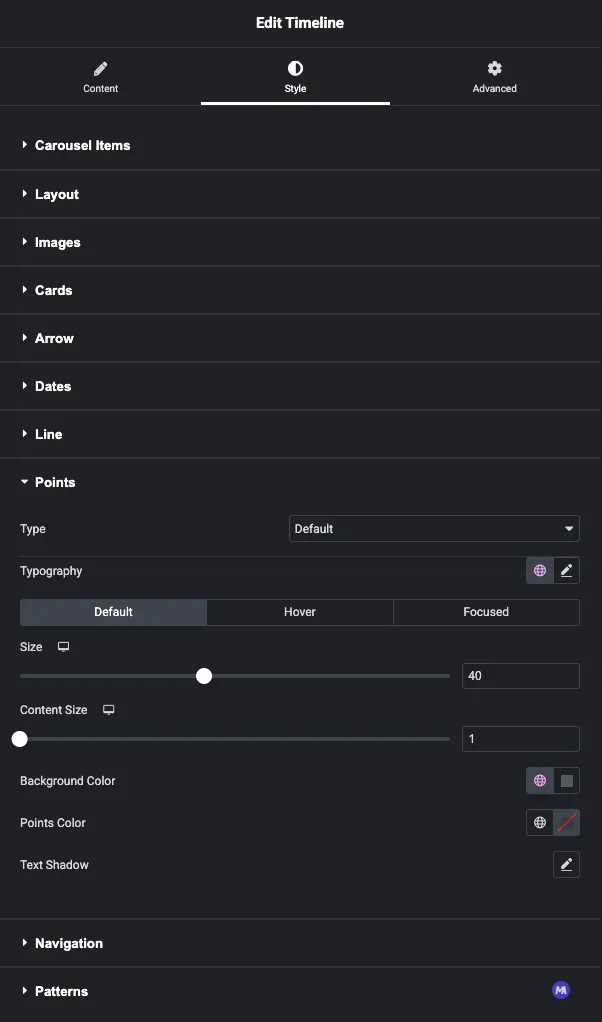
Line sets the central line’s colour and thickness. Cards handles background, border, shadow and padding. Dates and the typography controls match the entry text to your font system.
Points is the section worth spending time in. Its Type control picks what sits on each marker, and it has three state tabs: Default, Hover and Focused. Focused applies to the entry nearest the reader’s scroll position, so leaving it unstyled is what makes a timeline read as a flat list while the reader scrolls past it. Style all three.
Set Type to Icons and the marker takes an icon, which is what the screenshots here use. Check it on the front end straight away: if the marker renders as an empty circle, the icon has not loaded, and switching Type back to Default gives you a plain coloured dot that always works.
Building a timeline from your blog posts
Switch Timeline Type to Post Timeline and the panel changes completely. Instead of typing entries you describe which posts to pull, and the widget builds the timeline from them.
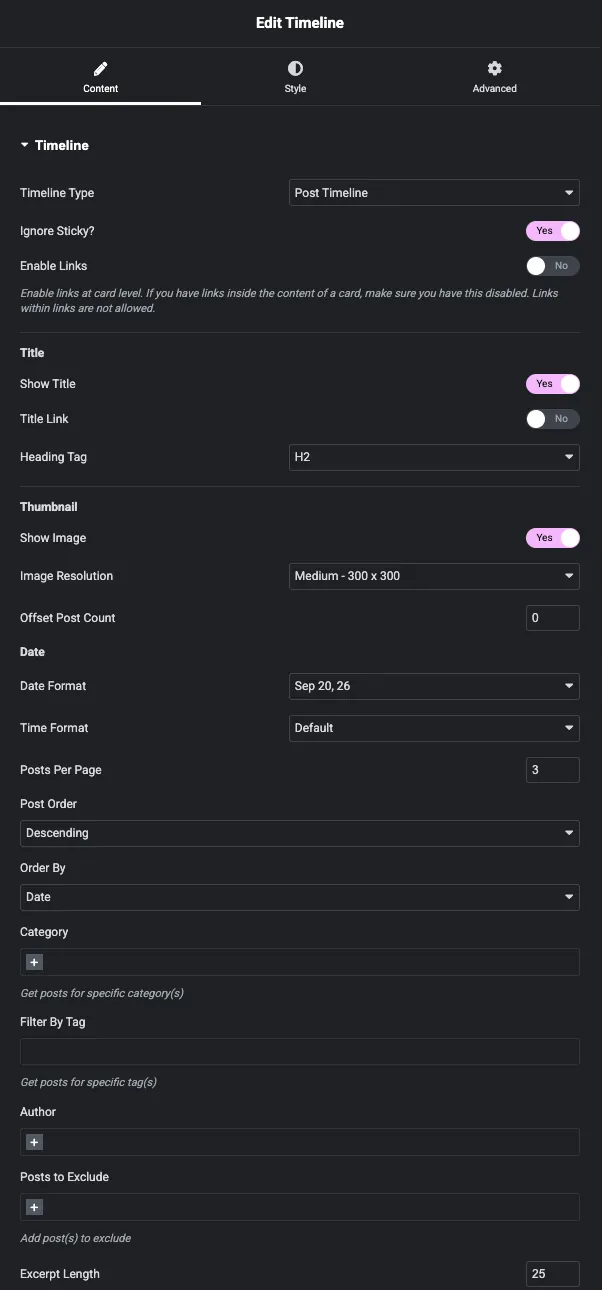
The controls worth setting:
- Show Title, Title Link and Heading Tag. Set the heading tag to H2 or H3 so post titles sit under the page’s H1 in the heading order. This is the same heading-order rule that matters when you build a blog page in Elementor.
- Show Image and Image Resolution put the featured image on the card.
- Date Format and Time Format. The default prints the time next to the date, which reads oddly on a milestone timeline. Set Time Format to none, or use a custom date format.
- Posts Per Page, Offset Post Count, Post Order and Order By.
- Category, Filter By Tag, Author and Posts to Exclude narrow the query, so one timeline can be “everything in News” and another a hand-picked set.
- Enable Links makes the whole card clickable. Same warning as the custom version: turn it off if the card content has its own links.
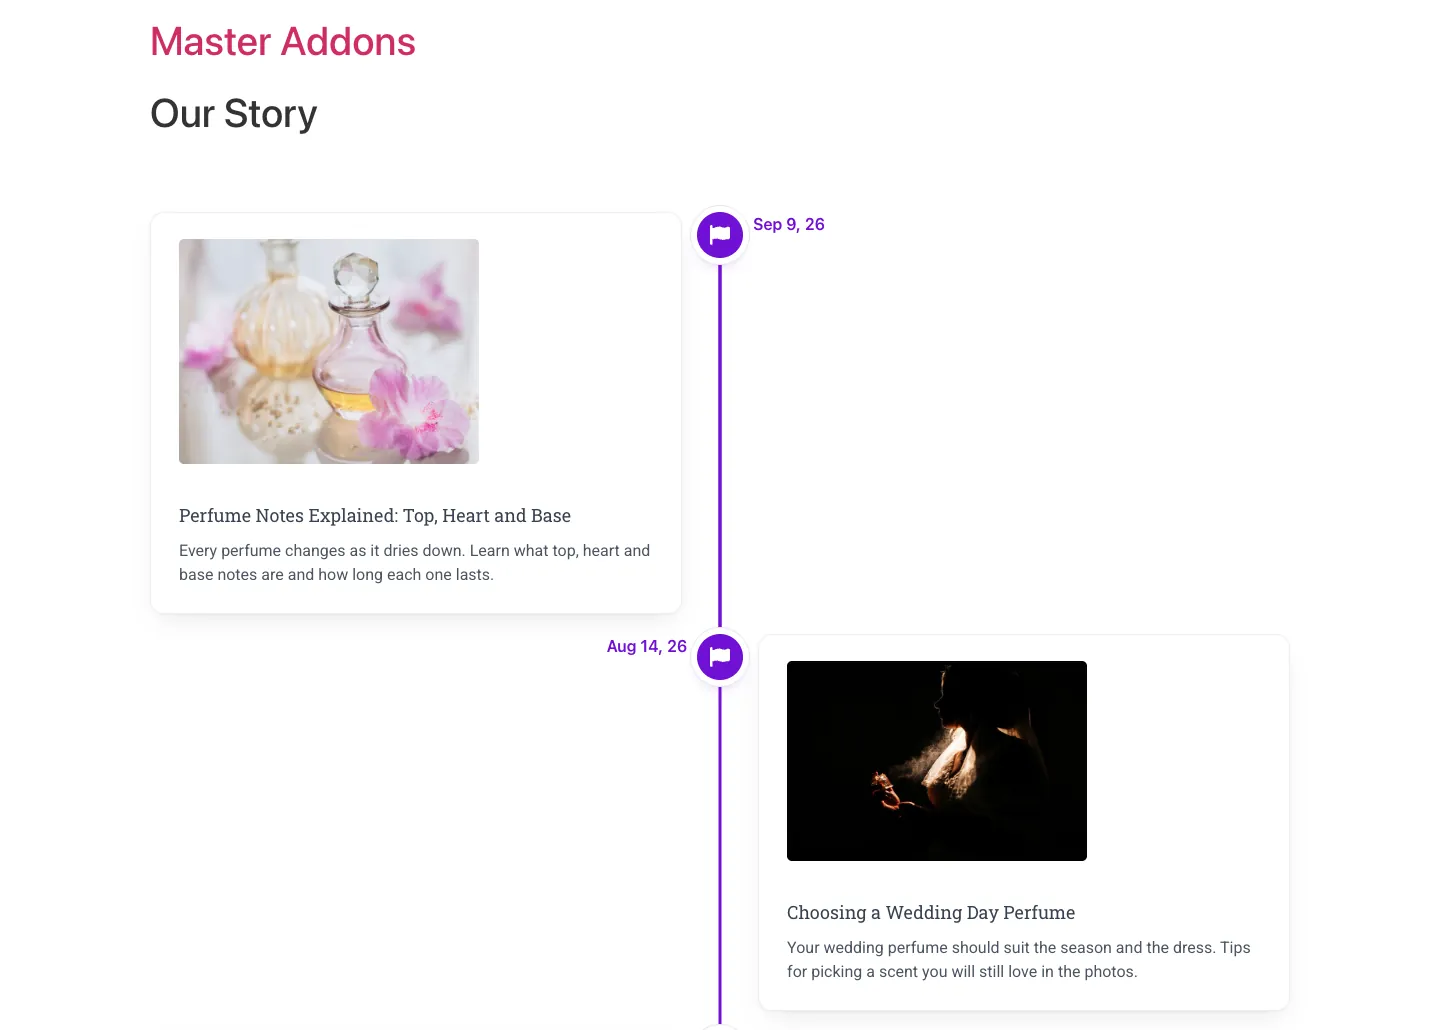
Because it reads posts directly, this version drops neatly into a Theme Builder archive or single template, and it updates itself when you publish. Post Timeline is part of Master Addons Pro.
Custom or post timeline: which one
| Custom Timeline | Post Timeline | |
|---|---|---|
| Plan | Free | Master Addons Pro |
| Where the content comes from | Typed into the widget | Your WordPress posts |
| Vertical layout | Yes | Yes |
| Horizontal layout | Yes | No, vertical only |
| Updates on its own | No | Yes, on publish |
| Query filters | n/a | Category, tag, author, exclude, offset |
| Best for | Company history, roadmaps, event schedules, biographies | News archives, release notes, case studies, changelogs |
If publishing a post should add an entry, use Post Timeline. If the entries are a story you wrote once, use Custom.
Where a timeline is worth using
- About pages. A vertical company history, with a Counter Up row above it for the headline numbers.
- Product pages. A horizontal roadmap of shipped features and what is next. Four to six entries, no more.
- Release notes. A post timeline filtered to one category, next to a Changelog widget.
- Portfolios and case studies. Dated entries with featured images, which is where the Media tab pays off.
- Event and course schedules. Custom labels instead of dates, so the line reads “Day 1, Day 2, Day 3”.
Seven things that make a timeline read better
- Hold each card to two or three sentences. A timeline is a scanning format and full paragraphs defeat it.
- Use custom labels for milestones. “2019” beats “Jun 17, 19” when the exact day does not matter.
- Keep one heading level inside the cards. The content box has no title field, so set every entry’s heading to the same tag instead of mixing H2 and H4.
- Switch to vertical past six entries, because horizontal scrolling gets tedious fast.
- Style the Focused state. It is the one that tells the reader where they are.
- Check your markers on the front end after choosing an icon. An empty circle means the icon did not load, and Default dots are the safe fallback.
- Check it on a phone. The alternating layout collapses to one column, and long custom labels are the first thing to wrap badly.
Frequently asked questions
Does Elementor have a timeline widget?
No. Neither free Elementor nor Elementor Pro includes a timeline element. You add one with an addon. The Master Addons Timeline widget is free and covers vertical and horizontal layouts.
Is the Elementor timeline widget free?
Yes. Custom timelines, both vertical and horizontal styles, and the whole Style tab are in the free Master Addons plugin. Only Post Timeline, which builds the timeline from your WordPress posts, needs Master Addons Pro.
How do I create a timeline in Elementor without a plugin?
Stack containers in a column, give each one a left border to form the line, and place an Icon widget on the border with Position set to Absolute for the dot. That covers a simple one-sided timeline. Alternating sides, a horizontal layout and scroll animation need custom CSS or a timeline widget.
Can I make a horizontal timeline in Elementor?
Yes. Set Timeline Style to Horizontal Timeline in the widget’s Content tab. Entries lay out side by side with points above the cards and arrows to scroll. It is free, and it applies to custom timelines only.
What is the difference between a custom timeline and a post timeline?
A custom timeline holds entries you type, which suits fixed content like a company history. A post timeline reads your WordPress posts, so publishing a post adds an entry automatically. Custom is free; post timelines are a Pro feature.
Why is my Elementor timeline showing empty cards?
The entries animate in when they scroll into view, so a timeline below the fold looks blank until you scroll to it. Check on the front end by scrolling rather than judging from a screenshot tool or a preview that never scrolls.
Can I use icons instead of dots on the timeline points?
Yes. The Points section has a Type control offering dots, icons, images, numbers and letters. Pick Icons, choose your icon, then set its colour and background under the Default state tab. Always check the result on the front end, and fall back to Default dots if a marker renders empty.
Will the timeline work on mobile?
Yes, and the two layouts behave differently. Vertical collapses to a single column and reads naturally. Horizontal stays a carousel, so preview it at your mobile breakpoint and check that long labels are not wrapping.
Can a timeline pull posts from one category only?
Yes, with Post Timeline. Set the Category control in the Content tab, and add Filter By Tag, Author or Posts to Exclude to narrow it further.
Related reading
- Elementor Timeline widget, the feature page with every control listed
- Timeline widget documentation
- How to create a blog page with Elementor
- SEO practices for Elementor pages
- Master Addons on WordPress.org
