

You found a template kit on Envato Elements, downloaded the ZIP, and now you’re staring at your WordPress dashboard wondering where it goes. It’s a fair question. Envato retired its official Envato Elements WordPress plugin, so the old import path many tutorials still describe no longer exists. Our Envato Elements plugin alternative post compares what you can use now.
The good news: you can import any Envato Elements template kit with the Template Kits feature in Master Addons, and it handles the whole job. Upload the ZIP, import every page, build the header and footer, and publish. No extra import plugin needed.
This guide walks through the full process on a real kit (a SaaS kit called Klyro), including the three steps most tutorials skip: assigning the header and footer, switching every page to the Elementor Full Width layout, and disabling Elementor’s default colors so the kit’s design actually shows up.
What You Need Before Importing
- WordPress with the free Elementor plugin installed
- Master Addons for Elementor (free version works; see the installation guide if you haven’t set it up yet)
- A template kit ZIP downloaded from Envato Elements or ThemeForest
One thing to check before you start: when you download a kit from Envato Elements, do not unzip it. The importer expects the original ZIP file. Safari users should turn off “Open safe files after downloading” in Safari’s settings, or the browser unzips the kit for you and breaks the upload.
A lightweight theme like Hello Elementor works best underneath a template kit, since the kit replaces almost everything the theme would normally render. If you’re still picking one, here’s a comparison of the best lightweight WordPress themes for Elementor.
Step 1: Open Template Kits in Master Addons
From your WordPress dashboard, go to Master Addons → Template Kits. You’ll see the kit library: 30+ ready-made website kits you can import with one click, plus an upload option for kits from outside sources like Envato Elements.
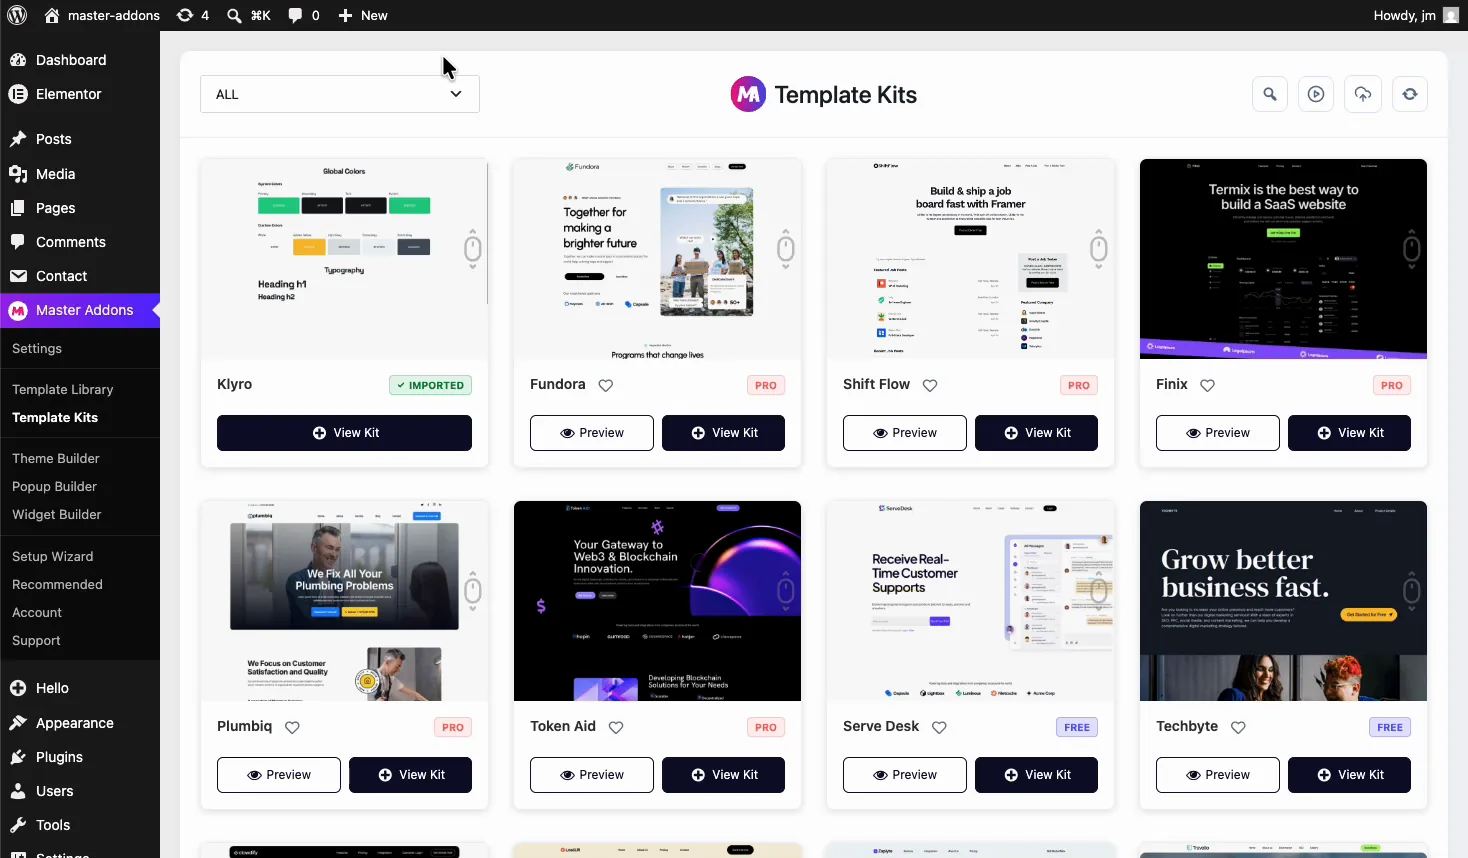
The library kits are handy if you haven’t committed to a design yet. But since you already have an Envato kit, look at the icon row in the top-right corner and click the upload icon.
Step 2: Upload the Envato Elements Kit ZIP
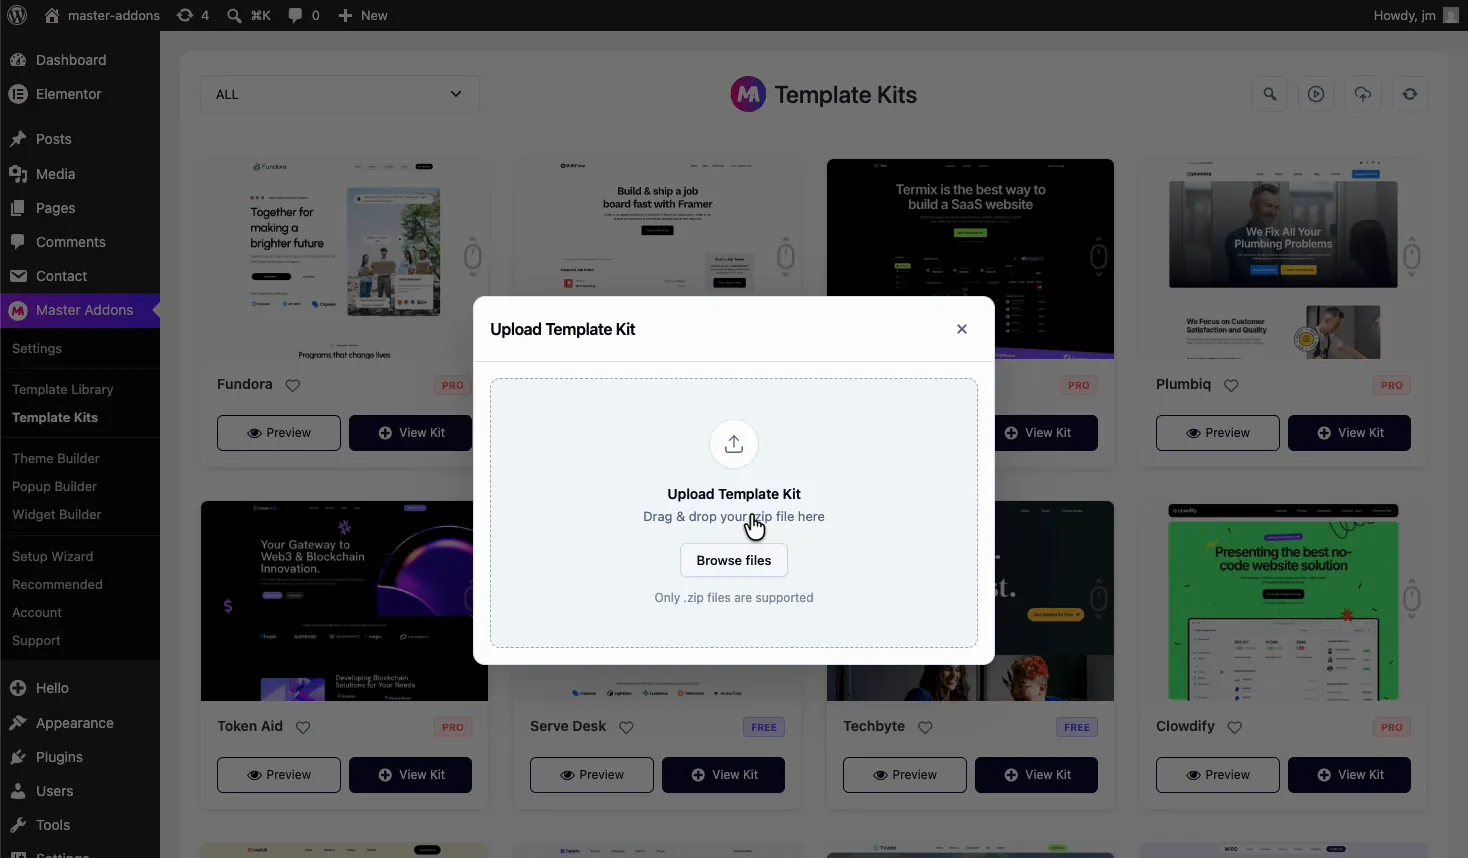
Clicking the upload icon opens the Upload Template Kit window. Drag your kit ZIP into the box or click Browse files and pick it from your downloads folder. Only .zip files are accepted, which is exactly what Envato gives you.
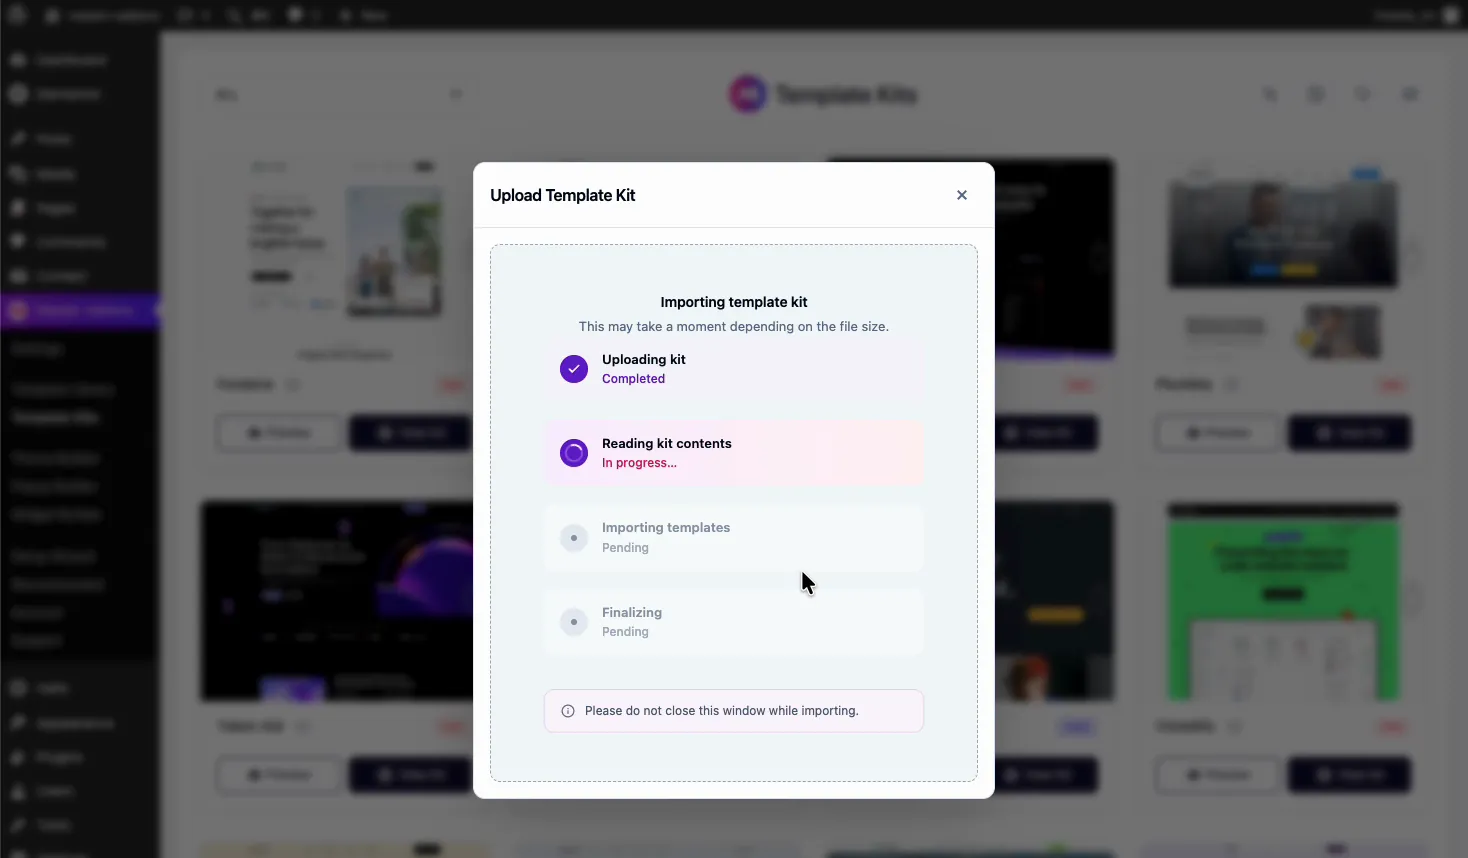
Master Addons uploads the file, then reads the kit and registers every template inside it. A progress window shows each stage. Keep the tab open until it finishes, since closing it mid-import can leave you with half a kit.
Step 3: Import the Kit Templates
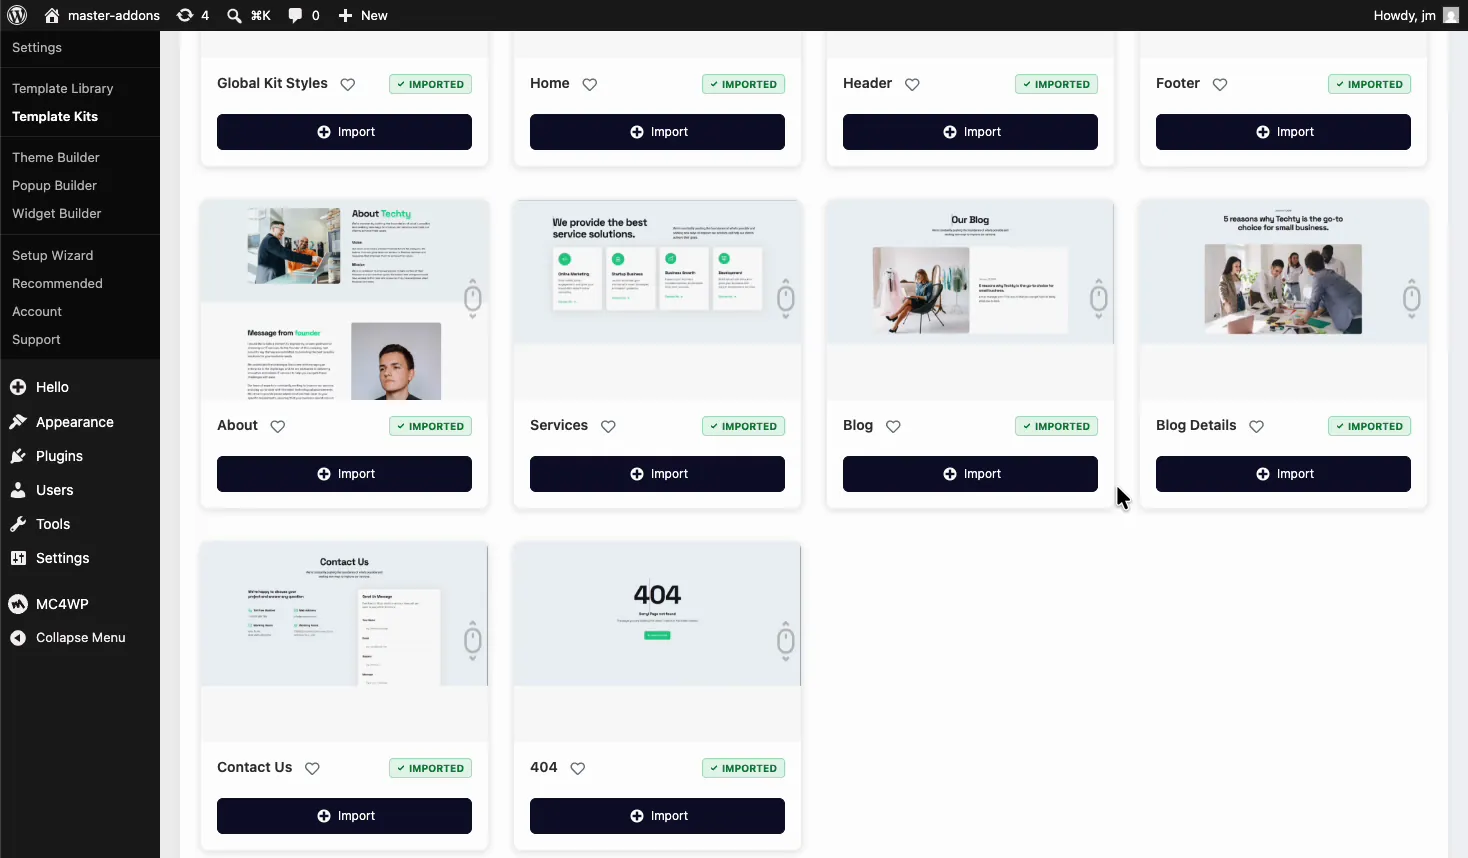
Once the kit is read, you’ll see everything it contains: Global Kit Styles, Home, Header, Footer, About, Services, Blog, Blog Details, Contact Us, and a 404 page in our Klyro example. Each template has its own Import button.
Two tips here:
- Import Global Kit Styles first. That template carries the kit’s colors, fonts, and site settings. Importing it first means every page that follows inherits the right styling.
- Then import the rest. Master Addons queues them up and processes each template with its images, one at a time.
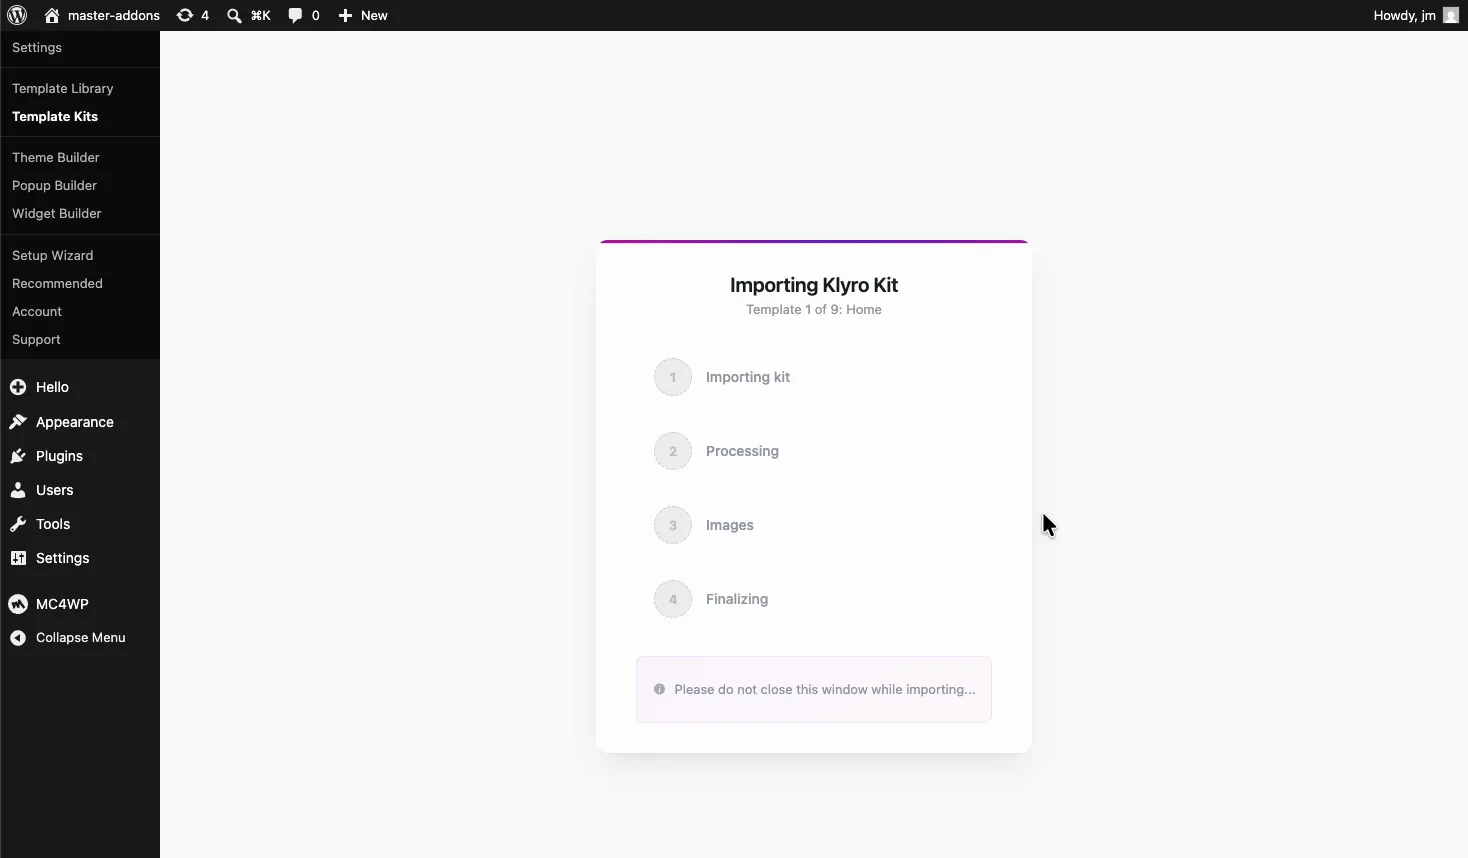
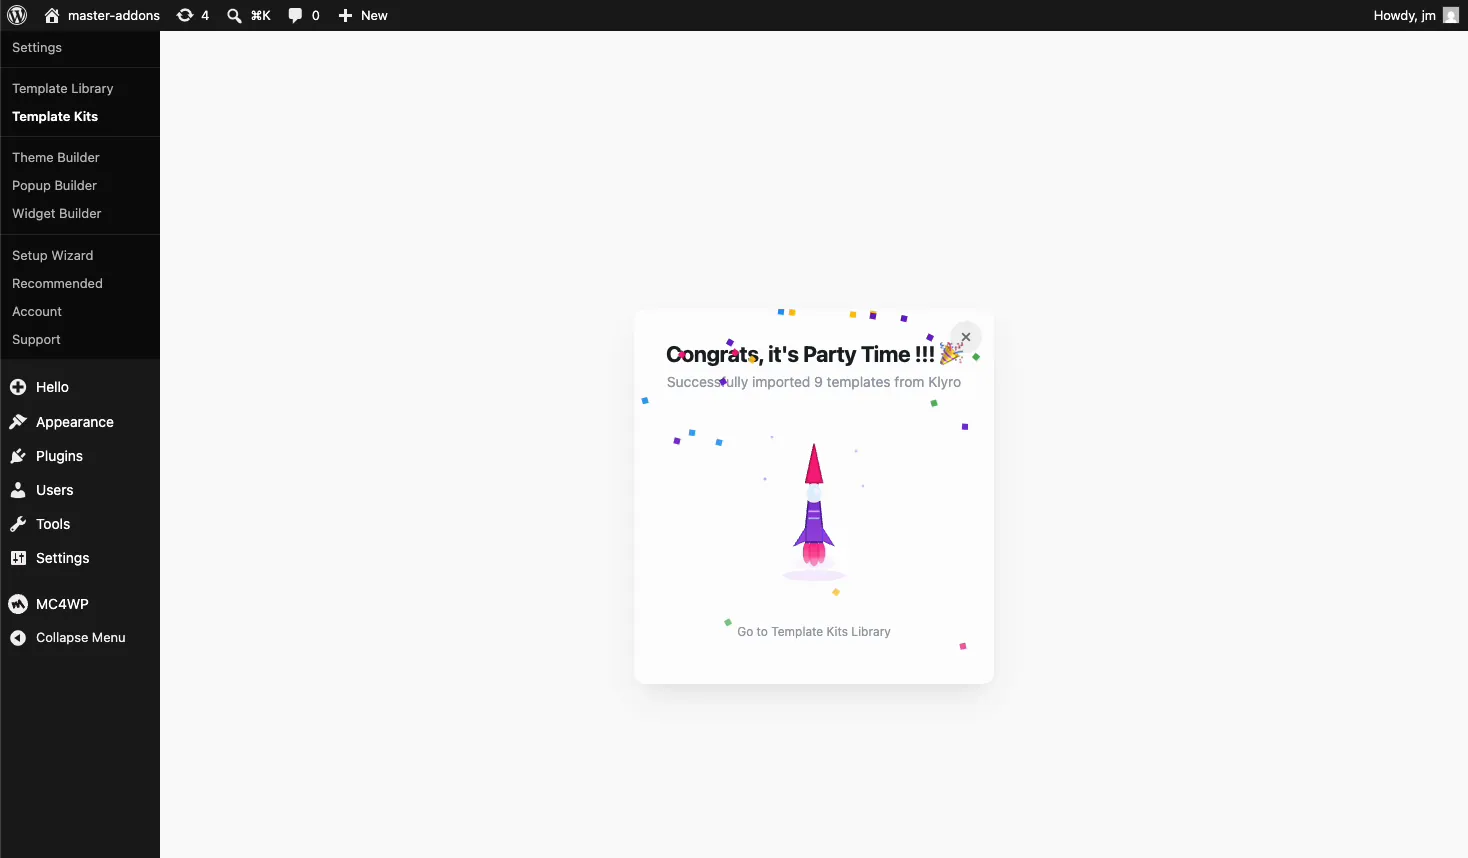
When the run finishes, you get a confirmation screen with the total count. In this case, 9 templates from the Klyro kit landed on the site.
Check Pages in your dashboard and you’ll find the imported pages waiting: Klyro – Home, Klyro – Blog, Klyro – 404, and so on. There’s even an MA Imported filter at the top of the Pages screen so you can see exactly what the kit added. If you only need a single page rather than a whole kit, the process for that is covered in our guide on how to import an Elementor template. The pages themselves are in the Elementor page templates library.
Step 4: Add the Header and Footer with Theme Builder
Here’s where most imports go sideways. The kit’s header and footer arrive as saved templates, but nothing displays them on your site yet. Your theme’s default header still shows. To fix that, you build them as theme parts using the Master Addons Theme Builder.
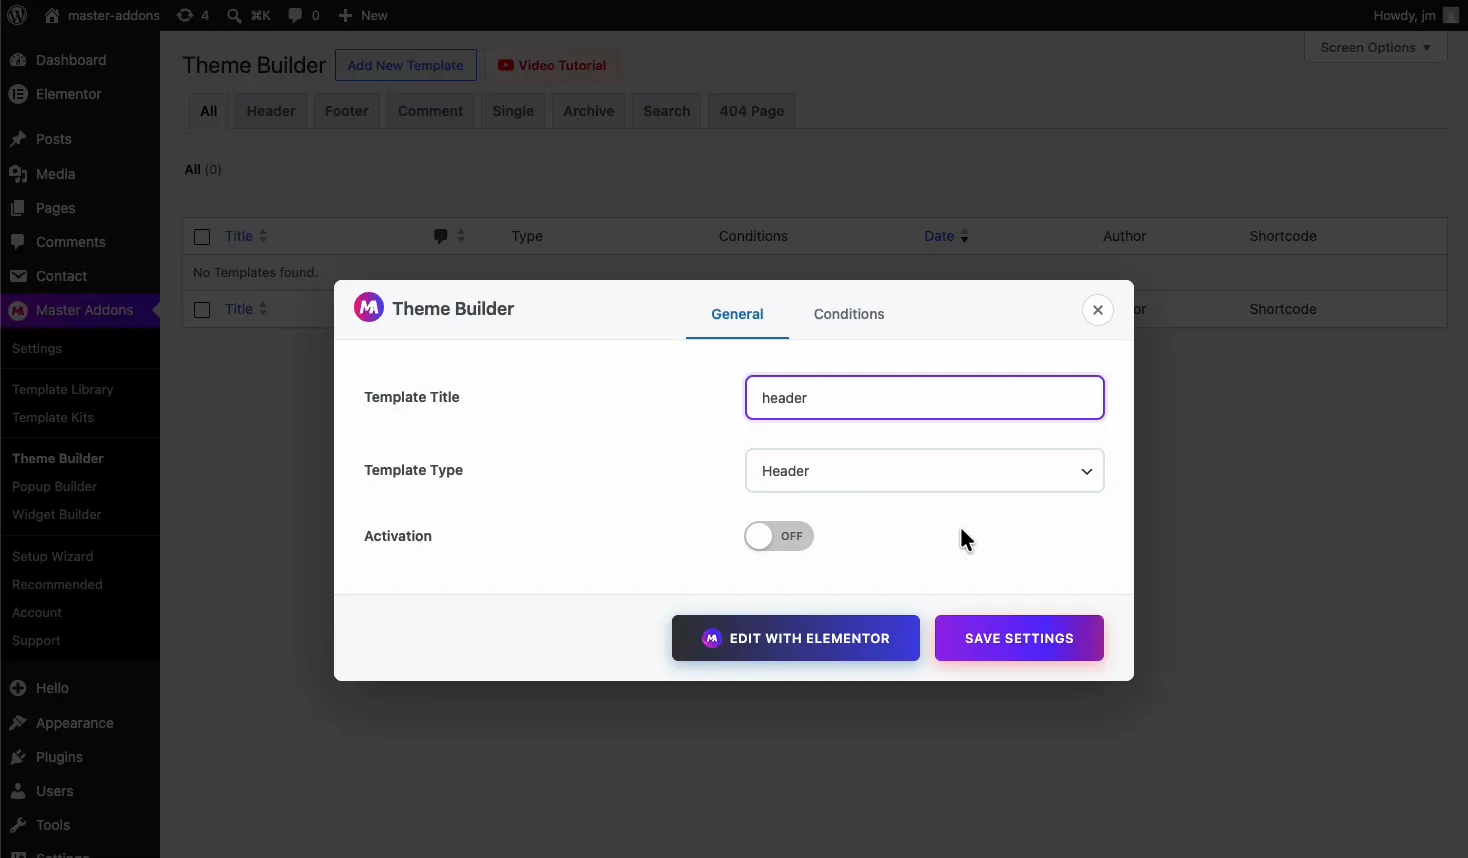
Go to Master Addons → Theme Builder and click Add New Template. In the popup, name it “header” (or anything you’ll recognize later), set the Template Type to Header, and click Edit with Elementor.
Inside the Elementor editor, open the template library (the folder icon in the canvas), switch to the Templates tab, and find the Header section that came with your kit. Click Insert and the kit’s header drops onto the canvas, menu and all.
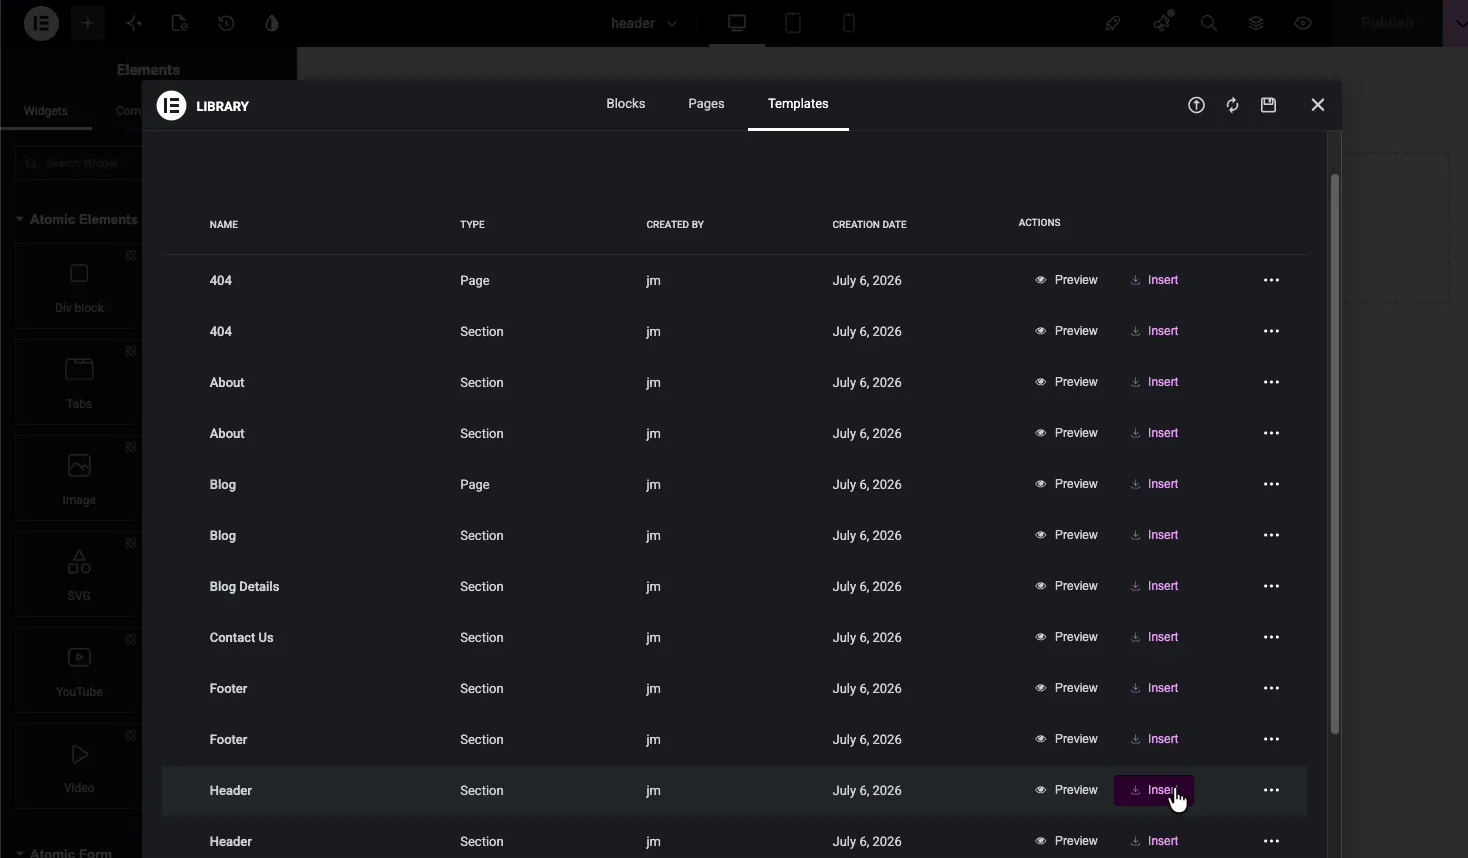
Publish the template, then repeat the same steps for the footer: new template, type Footer, insert the kit’s Footer section from the library, publish.
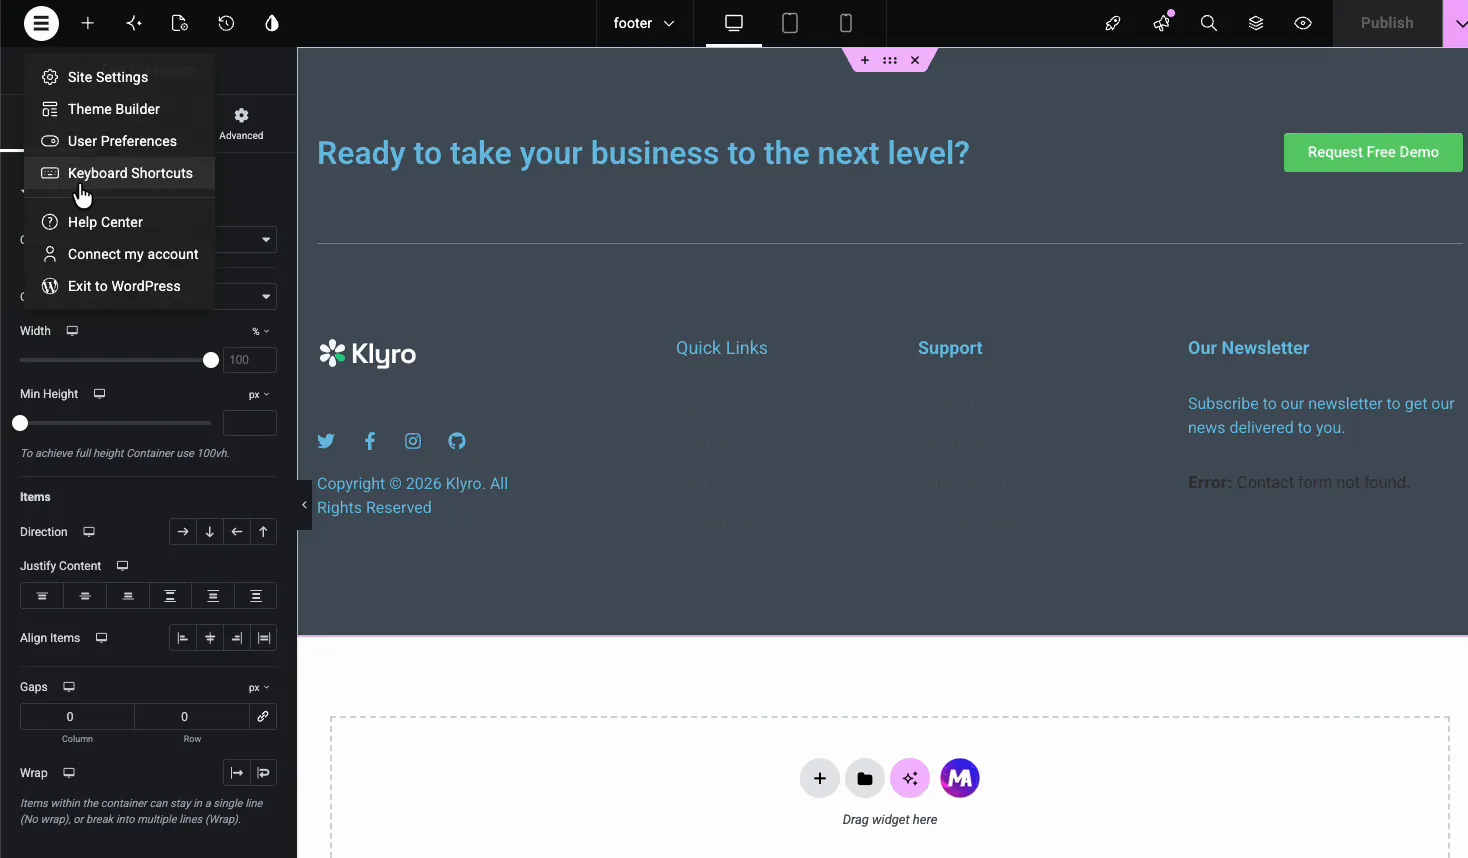
In each template’s settings you’ll also find a Conditions tab and an Activation toggle. Set the condition to Entire Site and switch activation on, and your kit’s header and footer now render on every page. The header documentation covers conditions in more detail, and if you want the header to stay pinned while scrolling, see how to create a sticky header in Elementor. The same Theme Builder also handles footer editing in WordPress with Elementor whenever you need to change it later.
Step 5: Set Every Page to Elementor Full Width
Open one of your imported pages on the front end and you might notice two problems: your theme’s old header sits above the kit’s header, and the content is squeezed into the theme’s content column. Both come from the same cause. The pages are still using the theme’s default page layout.
The fix takes thirty seconds with a bulk edit:
- Go to Pages → All Pages
- Tick the checkbox at the top of the list to select all pages
- Choose Edit from the Bulk actions dropdown and click Apply
- In the Template dropdown, pick Elementor Full Width
- Click Update
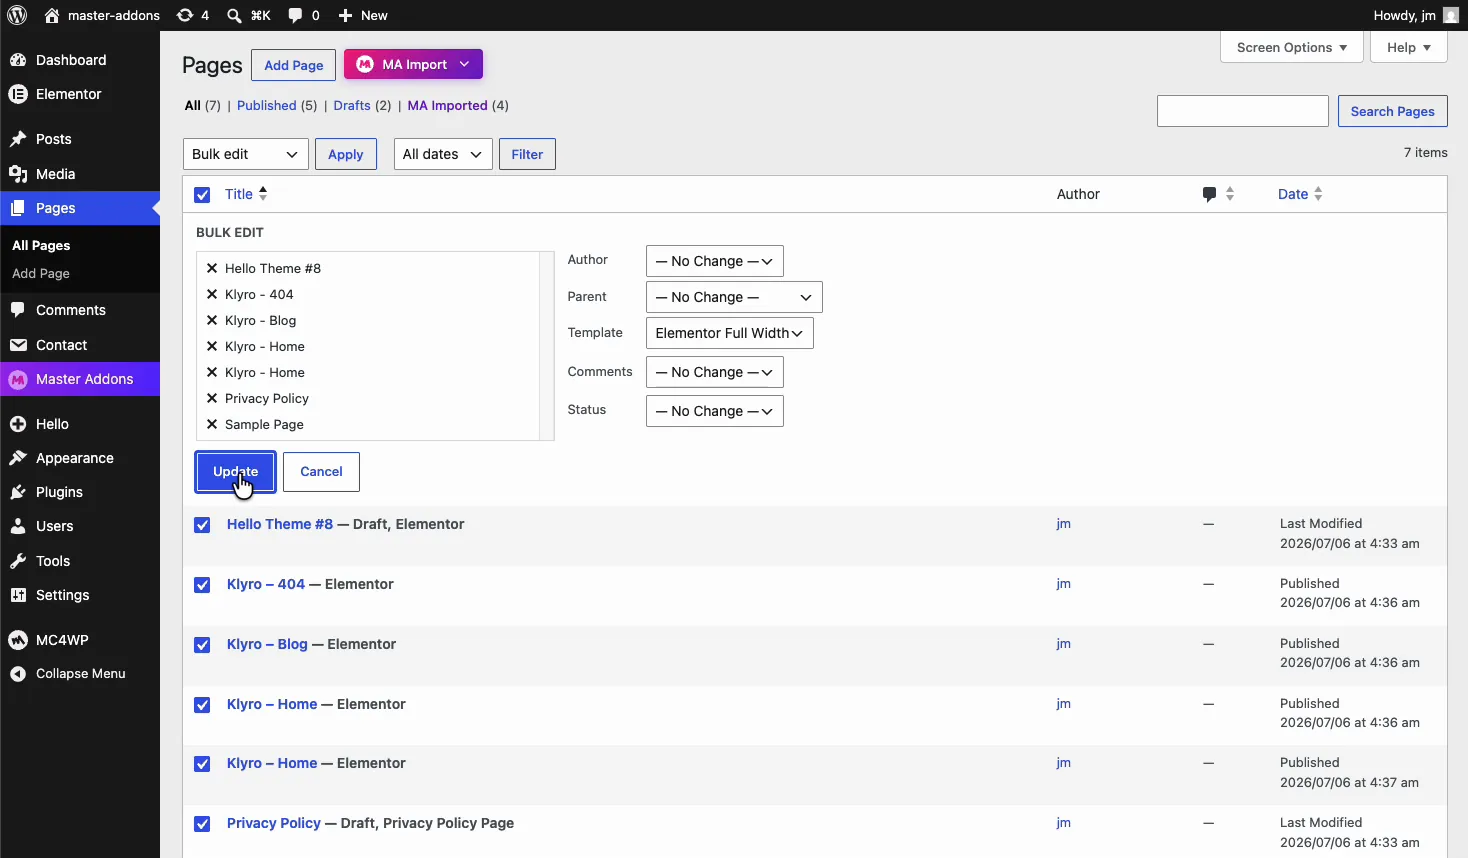
Elementor Full Width removes the theme’s sidebar and content wrapper but keeps rendering theme hooks, which is what lets your new Theme Builder header and footer display. One bulk update and every imported page uses the right layout.
Step 6: Disable Elementor’s Default Colors and Fonts
This is the step almost everyone misses, and it’s why imported kits often look slightly off: wrong link colors, wrong heading fonts, buttons that don’t match the demo. Elementor applies its own default colors and fonts on top of your content, and they override the kit’s global styles.
Turn them off:
- Go to Elementor → Settings in your dashboard
- On the General tab, tick Disable Default Colors
- Tick Disable Default Fonts
- Save changes
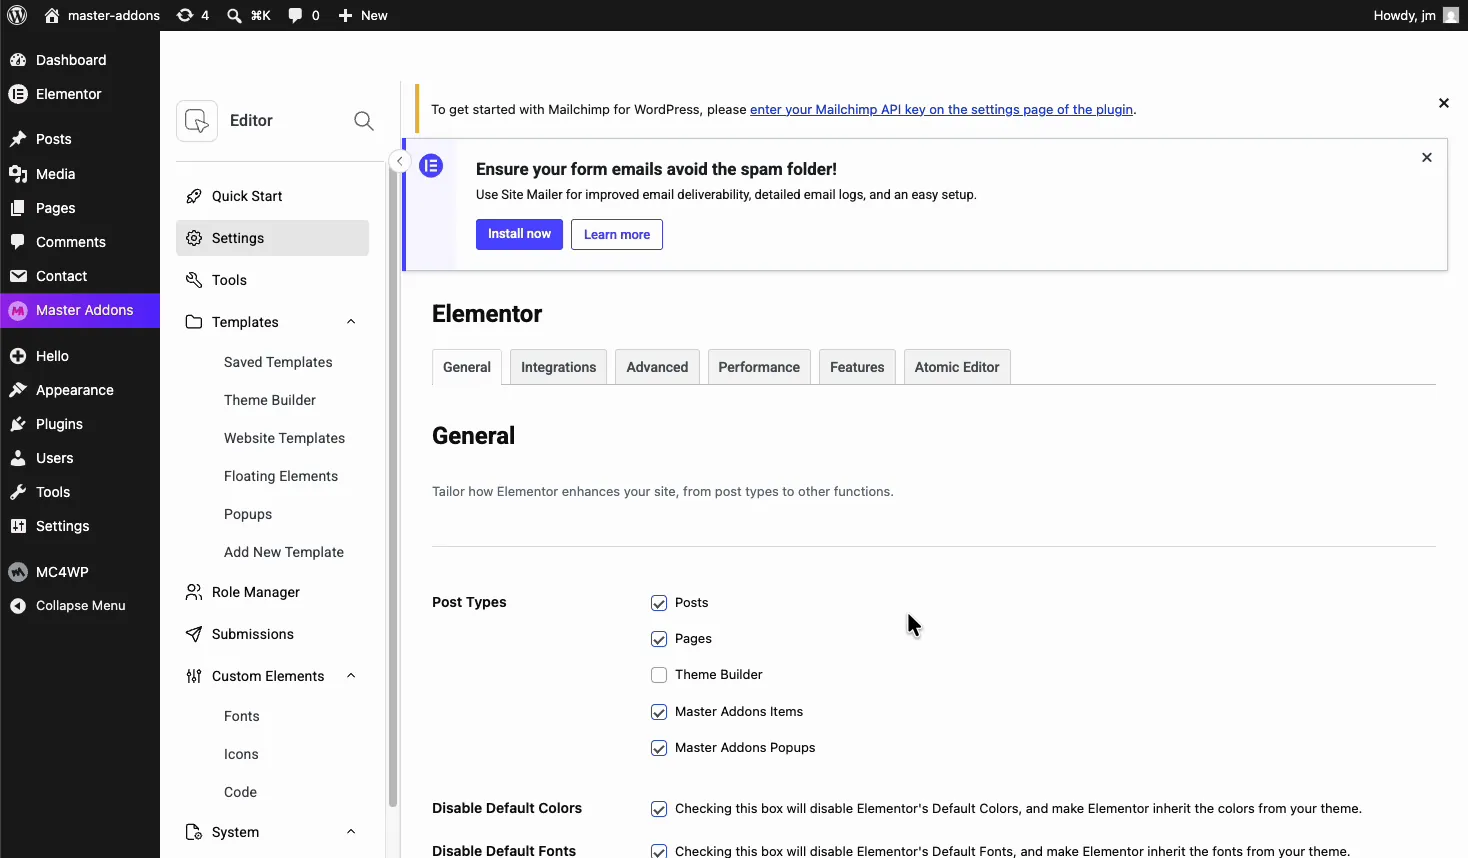
With both boxes checked, Elementor inherits colors and typography from the kit’s Global Kit Styles instead of forcing its own. Reload a page after saving and you’ll see it snap to the design from the Envato demo.
Step 7: Set Your Homepage and Preview
Last touches. Go to Settings → Reading, set “Your homepage displays” to a static page, and pick the kit’s Home page. Then open your site.

Header at the top, footer at the bottom, full-width hero, correct fonts and colors. From here it’s normal Elementor editing: swap the demo text and images for your own, wire up the contact form, and adjust anything the kit got wrong for your brand. Master Addons’ 80+ widgets and extensions are available in the editor whenever the kit’s built-in elements aren’t enough.
Why Use Master Addons Instead of the Template Kit Import Plugin?
Envato’s own help docs now point users to a standalone import plugin, since the official Envato Elements plugin was discontinued. That plugin imports templates and stops there. You still need something else for the header and footer, which usually means buying Elementor Pro for its theme builder.
| Task | Template Kit Import plugin | Master Addons |
|---|---|---|
| Import Envato kit ZIP | Yes | Yes |
| Pre-built kit library | No | 30+ kits included |
| Header/footer builder | No (needs Elementor Pro) | Yes, built in |
| 404, archive, single templates | No | Yes, via Theme Builder |
| Extra widgets for customizing the kit | No | 80+ widgets and extensions |
Since kits lean heavily on images, it’s also worth running your imported media through an optimizer. Big demo images are the most common reason a fresh kit feels slow; our guide on how to speed up Elementor websites covers the quick wins. The Theme Builder and Template Kits upload are available in Master Addons Free, and the Pro version unlocks the full kit library and premium widgets if you want them.
Troubleshooting: Imported Kit Doesn’t Look Like the Demo
- Wrong colors or fonts: you skipped Step 6. Disable Elementor’s default colors and fonts, then reload the page.
- Theme header showing above the kit header: the page is still on the theme’s default layout. Set it to Elementor Full Width (Step 5) and make sure your Theme Builder header is activated with a site-wide condition.
- Content stuck in a narrow column: same fix. Elementor Full Width, not the theme’s default template.
- Missing images: re-run the import for that template. Slow hosts sometimes time out on image downloads mid-import.
- Styles applied but layout broken: import Global Kit Styles first, then re-import the affected page so it inherits the kit settings.
Frequently Asked Questions
Can I import Envato Elements template kits without the Envato plugin?
Yes. The official Envato Elements WordPress plugin was discontinued, but any kit ZIP downloaded from Envato Elements or ThemeForest can be uploaded through Master Addons under Master Addons → Template Kits. It imports every template, image, and global style in the kit.
Do I need Elementor Pro to use an Envato template kit?
Usually no. Most kits are built for free Elementor. Master Addons adds the header and footer builder that Pro would otherwise provide. Check the kit’s requirements on its Envato page, since a few kits use Elementor Pro widgets like Forms.
Why does my imported template kit look different from the demo?
Two common causes: Elementor’s default colors and fonts overriding the kit’s global styles, and pages using the theme’s layout instead of Elementor Full Width. Disable default colors and fonts in Elementor’s settings and switch every imported page to the Full Width template.
How do I get the header and footer from a template kit to show on my site?
Create a Header template in Master Addons Theme Builder, insert the kit’s header section from the Elementor library, and publish it with a site-wide display condition. Repeat with a Footer template. Both then appear on every page automatically.
Are Master Addons template kits free?
The upload feature and several kits in the library are free. Pro kits require a Master Addons Pro license, which also unlocks the premium widgets, and comes with a 14-day money-back guarantee.
Wrapping Up
Importing an Envato Elements template kit comes down to seven steps: upload the ZIP in Master Addons Template Kits, import Global Kit Styles first, import the pages, build the header and footer in Theme Builder, bulk-set pages to Elementor Full Width, disable Elementor’s default colors and fonts, and set your homepage. The whole run takes about ten minutes, and most of that is watching progress bars.
Grab a kit you like, and if you get stuck anywhere, the template kit import documentation and the pre-built kits guide cover every screen in detail.
Related reading: Best Elementor themes to pair with template kits, and how to create a blog page with Elementor once your kit is live.
