

Key Takeaways
- Elementor’s free Image Gallery widget has no filter bar. The control list is images, columns, gap, caption, link and lightbox.
- Two routes give you category tabs: Elementor’s Gallery widget, which is on the Pro list, or an addon widget on a free Elementor install.
- With the Master Addons Filterable Image Gallery the category comes from a Filter Label you type on each item, so one image can sit in several categories.
- Show Filter Nav and Show “All” Filter Tab are both on by default, and the All tab text is editable.
- When tabs do not appear, the cause is almost always an empty Filter Label, Show Filter Nav switched off, or a page cache serving the old markup.
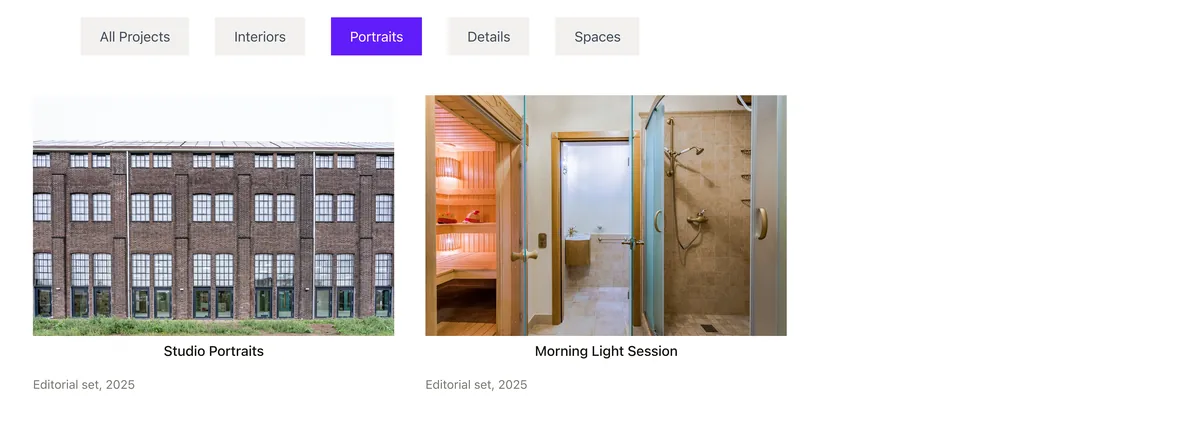
A filterable gallery is a grid with a row of category buttons above it. Click Portraits and the portraits stay while everything else drops out of view. It is the layout portfolios, product catalogues and photo sets reach for, because scrolling past forty images to find one type of work is nobody’s idea of a good time.
Elementor can do this, but not in the free Image Gallery widget. This guide covers both routes: what Elementor itself offers, and how to build the same thing on a free Elementor install with an addon.
Table of Contents
What Elementor gives you out of the box
Open the widget panel on a free Elementor install, search for gallery, and you get the Image Gallery widget. Its control list is Add Images, Image Resolution, Columns, Caption, Link, Lightbox, Order By and a Spacing slider in the Style tab. Columns runs from 1 to 10 and starts at 4, Caption offers the attachment caption or nothing, and Link sends the image to the media file, the attachment page or nowhere. That gives you a grid with a lightbox. There is no filter bar, no masonry and no per-image title.
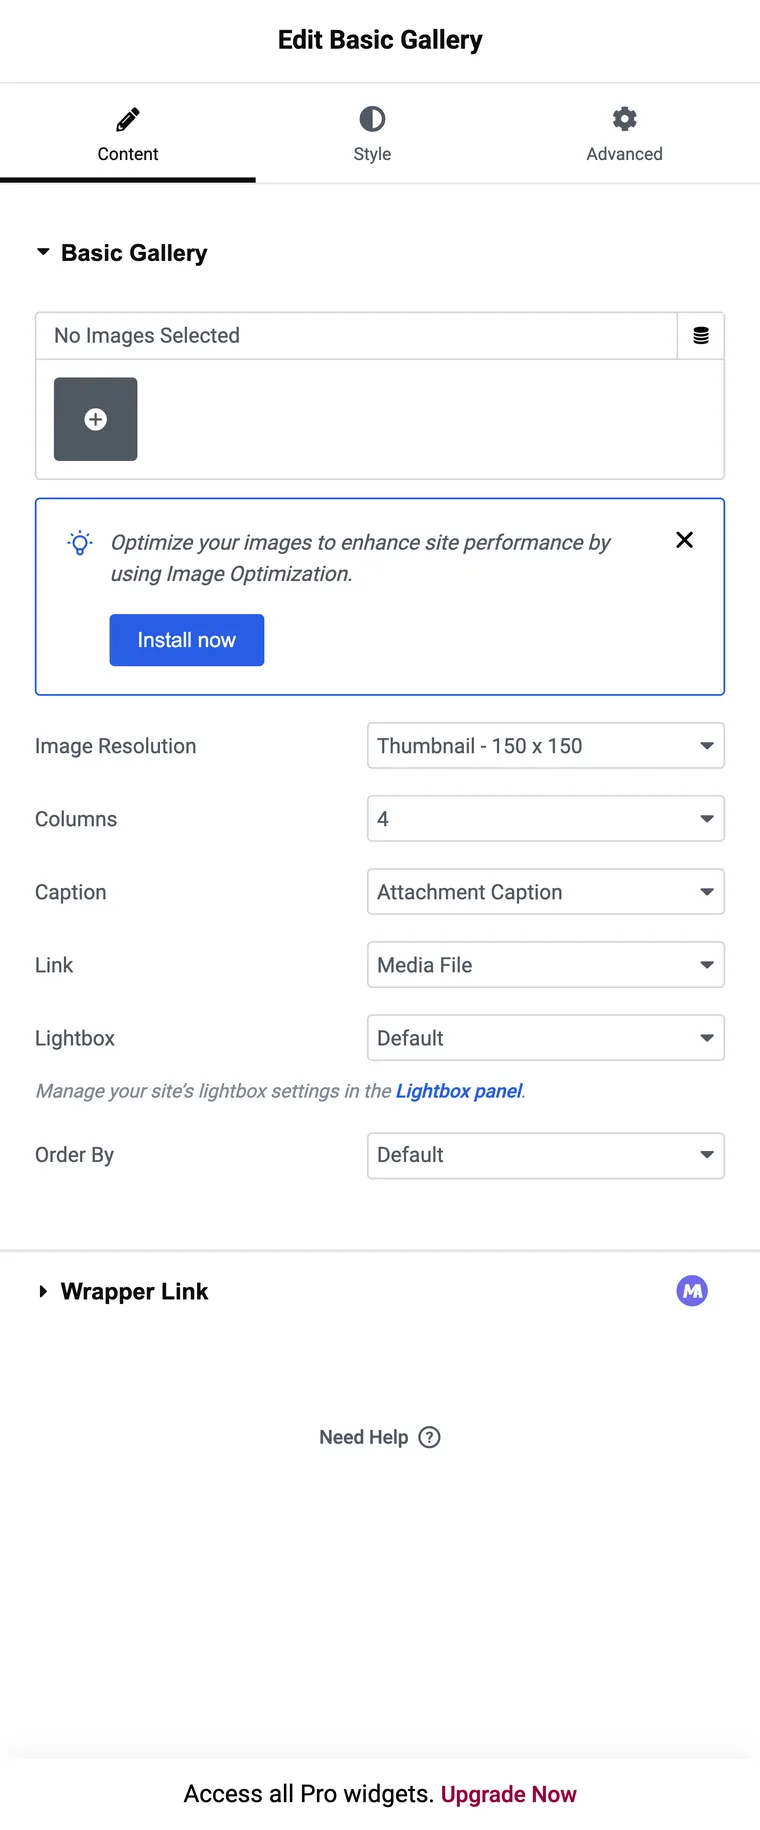
Elementor has a second gallery widget, called Gallery, and that one is Pro. It holds the layout options and the filter bar. A filter bar from Elementor itself means a Pro licence.
Route 1: the Elementor Gallery widget (Pro)
If you already pay for Elementor Pro, start here, because it is one fewer plugin. The Gallery widget holds several galleries inside one widget and gives each a name, and those names become the filter bar.
- Drag the Gallery widget onto the page.
- Switch Type from Single to Multiple. Single is the default, and it has no filter bar.
- Add one gallery per category in the Galleries repeater and fill in the Title field, because that text becomes the tab.
- Pick a Layout: Grid, Justified or Masonry. Grid and Masonry use the Columns control, which starts at 4 on desktop, 2 on tablet and 1 on mobile. Justified uses Row Height instead.
- Leave the “All” Filter switch on, and rename it in “All” Filter Label if “All” is too vague.
The trade-off is how the categories are stored. Each image belongs to the gallery you dropped it into, so an image that belongs in two categories has to be added twice. The addon route below handles that with a text field instead.
Route 2: the Master Addons widget, step by step
This route works on a free Elementor install. Install Master Addons, make sure the Filterable Image Gallery widget is enabled in the plugin’s widget list, then follow these steps.
Step 1: add the widget and your images
Search for Filterable Image Gallery in the Elementor panel and drag it in. Images are added one item at a time in the Gallery Contents repeater rather than in a single media picker, which is what makes the per-item fields possible.
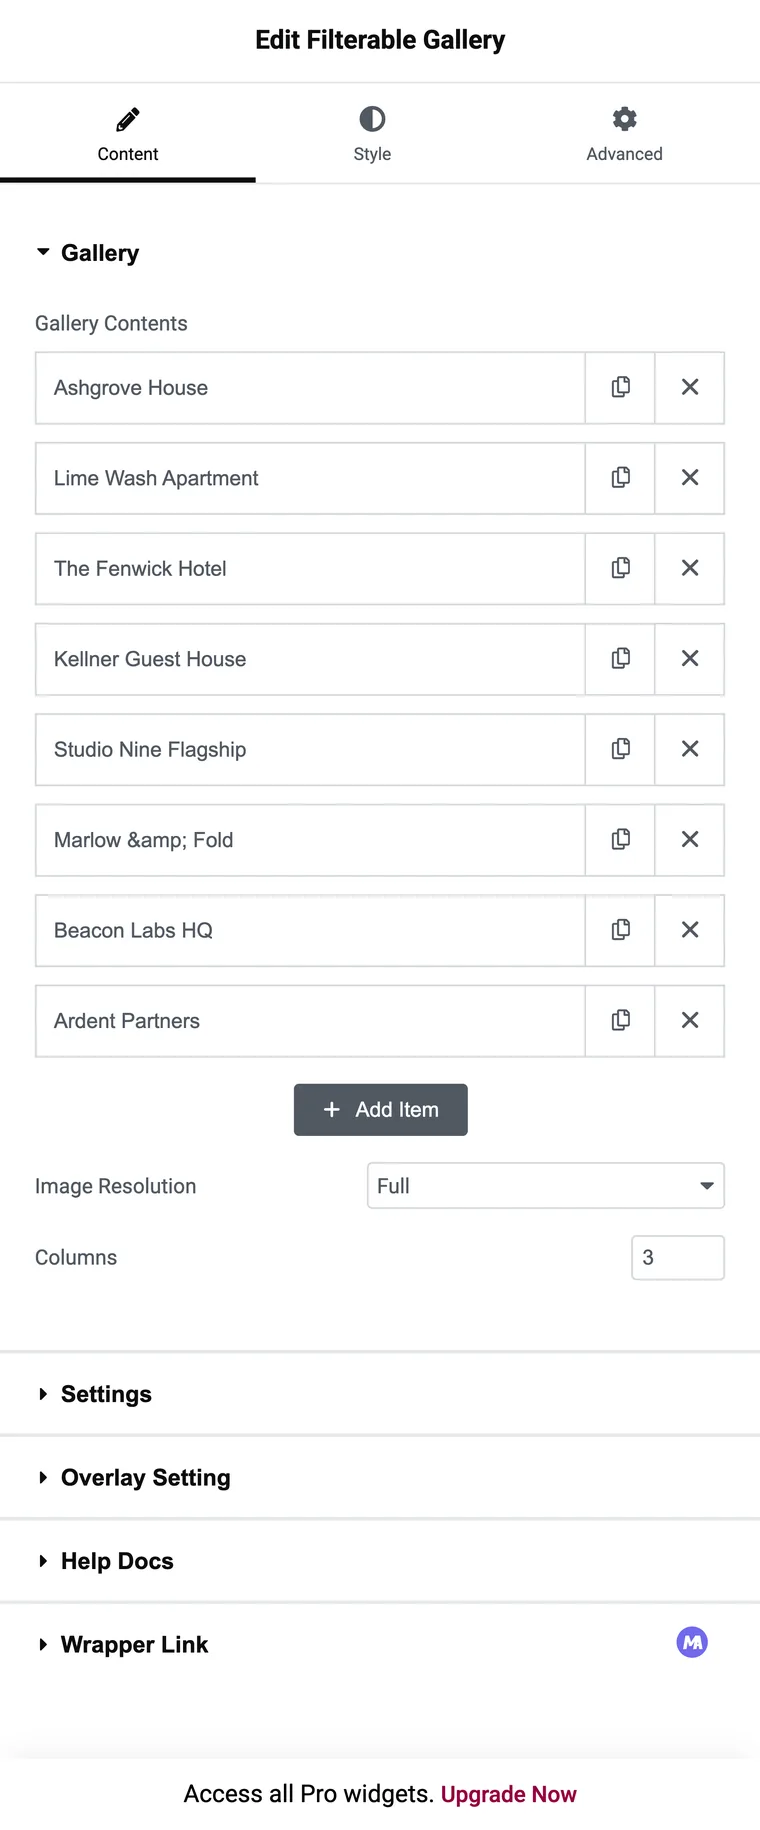
Columns takes a number from 1 to 6 and the default is 3. One thing to know before you plan a layout: this control is not responsive, so the same column count applies on every screen size. The grid itself still reflows on narrow screens, but you cannot set four columns on desktop and two on tablet from the panel.
Step 2: give every item a Filter Label
Open a repeater row and you get the fields that build the card: the image, a title, a subtitle, a ribbon, the popup or link behaviour, two buttons with their own URLs, and the Filter Label.
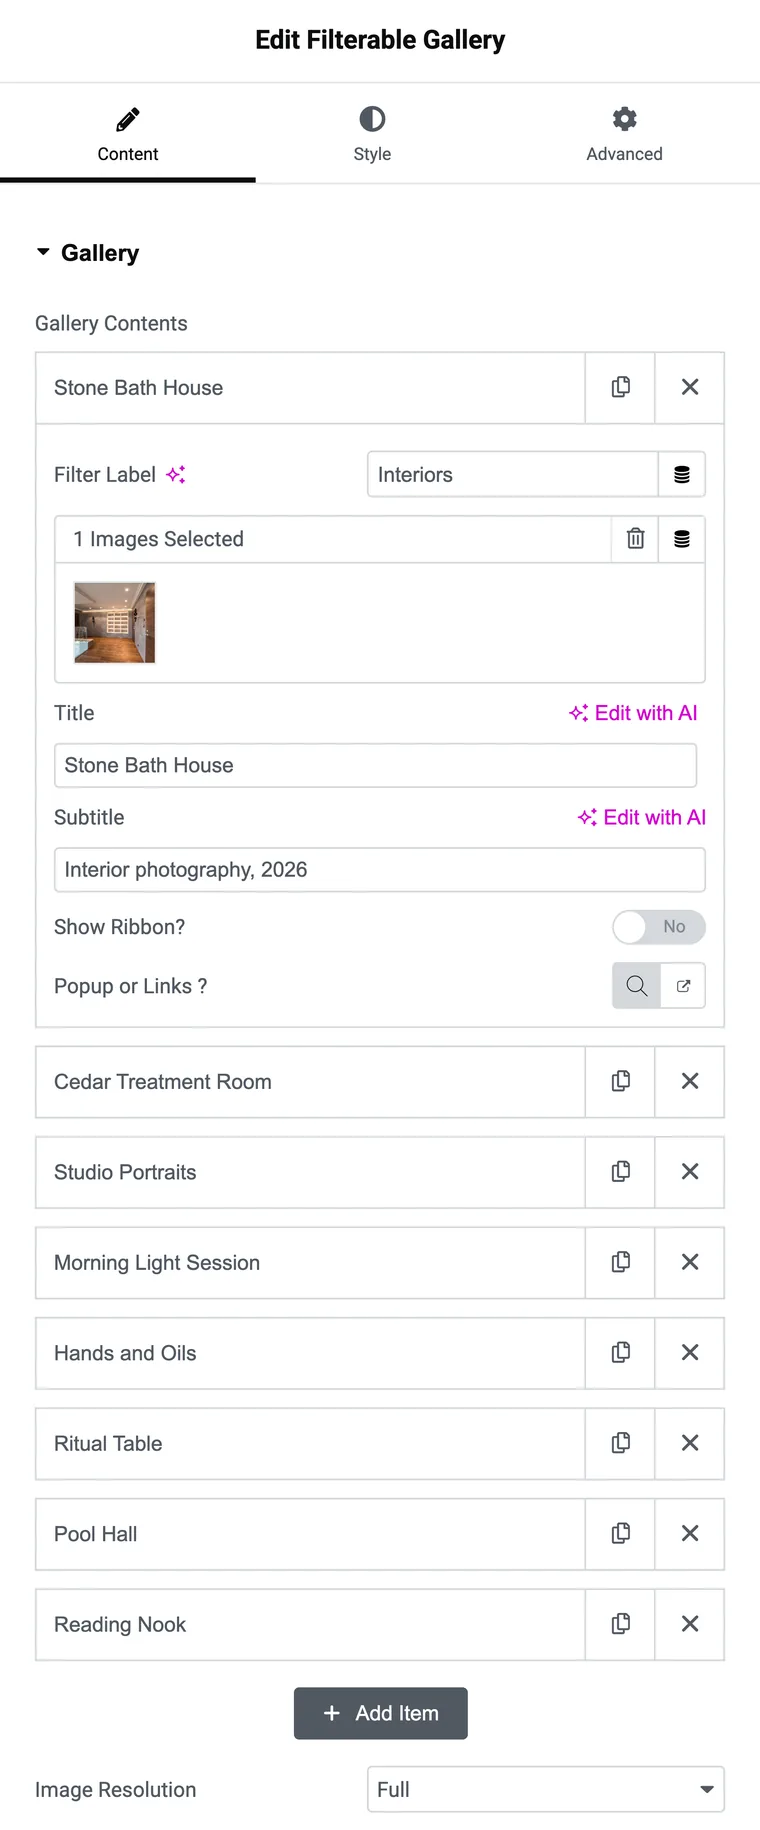
Type the category name exactly as you want it to read on the button, because the tab is built from this text. Separate several categories with commas when an item belongs in more than one, which is the part the Pro route cannot do without duplicating the image.
Step 3: turn the filter bar on and name the All tab
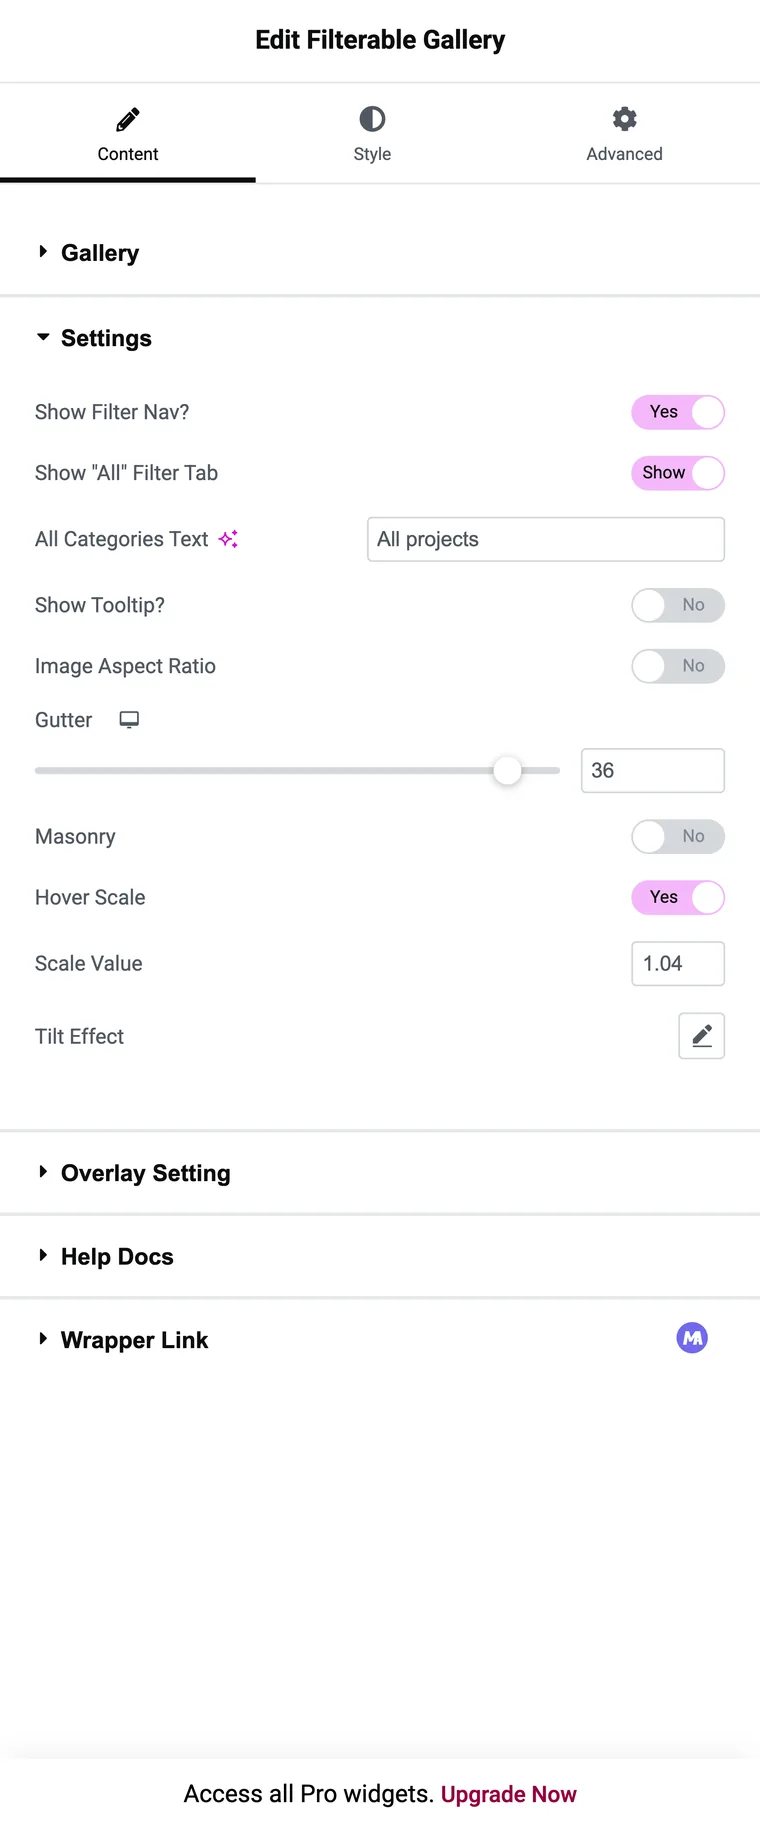
Open the Settings section. Show Filter Nav and Show “All” Filter Tab are both on by default, and All Categories Text sets what the first button says. “All projects”, “Shop all” and “Full menu” all read better than a bare “All”.
Step 4: check it on the front end
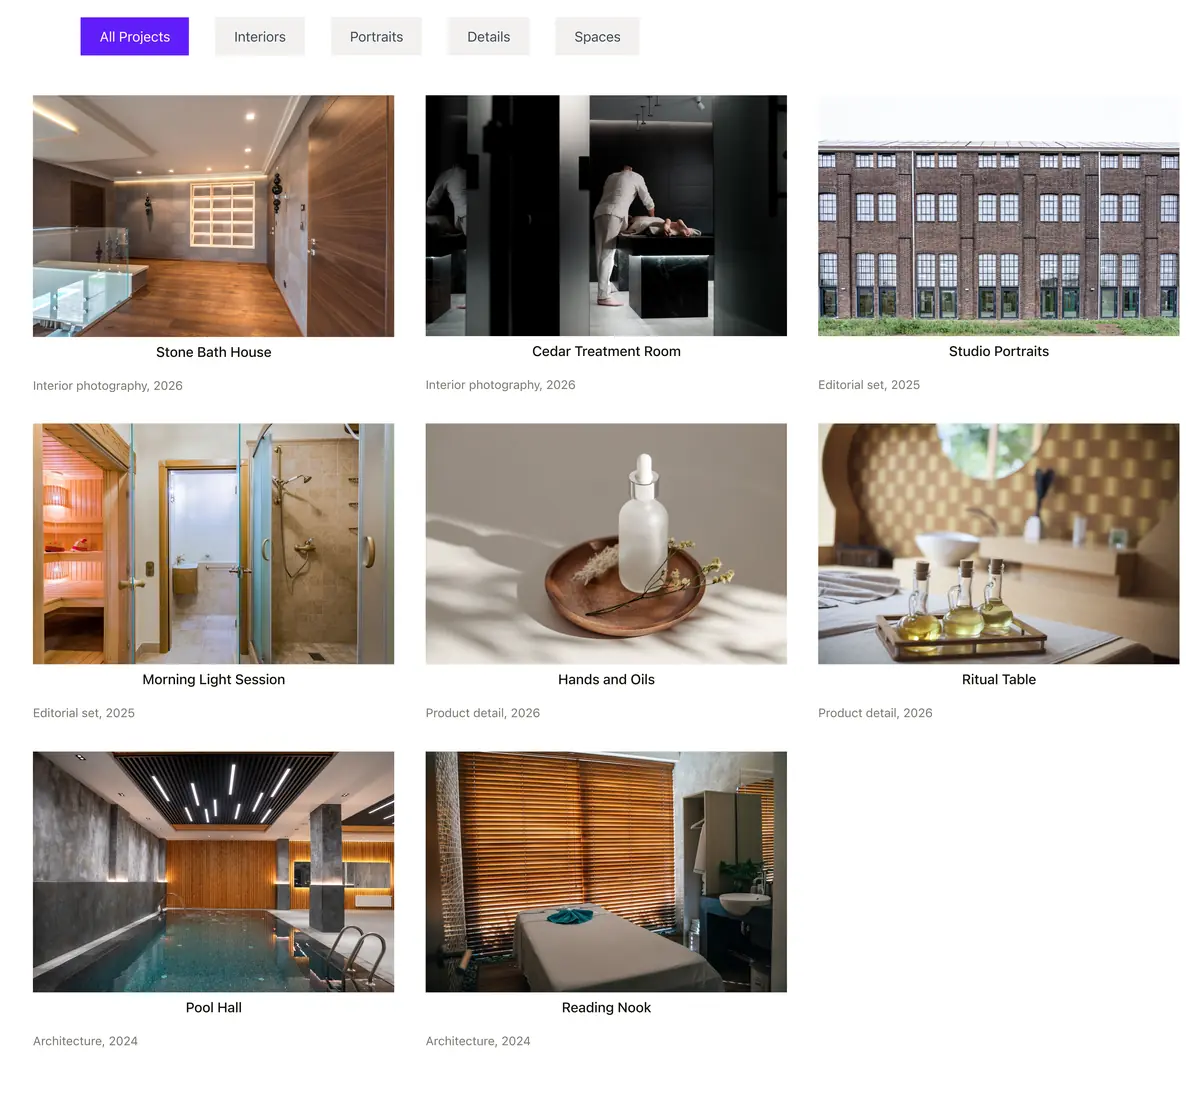
Save and view the page. The filter bar renders above the grid, the All tab is active, and clicking a category hides every item without that label.
The settings that change how the filter behaves
| Setting | Where | What it does |
|---|---|---|
| Filter Label | Each repeater item | Builds the tabs. Comma separate for several categories. |
| Show Filter Nav | Settings | Hides the whole bar when off, which is how you get a plain grid. |
| Show “All” Filter Tab | Settings | Drops the first tab if you want visitors to pick a category immediately. |
| All Categories Text | Settings | Renames the All tab. |
| Image Aspect Ratio | Settings | Crops every card to the same height. Off keeps each image’s own proportions. |
| Gutter | Settings | Space between cards. Responsive, 0 to 40px, 10 by default. |
| Columns | Content | 1 to 6, one value for every screen size. |
| Overlay Type | Overlay Setting | On hover, always, never, or hide on hover. |
| Popup or Links | Each repeater item | Opens the image in a lightbox, or sends the card to a URL. |
Two things the widget does not have, so you can plan around them: there is no load more button and no pagination, so every item loads with the page, and there is no search box. For a forty image portfolio that is fine on a decent host, but a two hundred image archive wants splitting across pages.
Filter tabs not showing? Check these four things
Four things cause this, and the first two account for most of it.
- An empty Filter Label. An item with no label never joins a category, and if no item has one there is nothing to build tabs from.
- Show Filter Nav switched off. It defaults to on, so this is usually somebody’s earlier edit.
- A cached page. Page caches and CDNs serve the markup from before you added the labels, so clear the cache and reload with a hard refresh.
- Labels that differ by one character. “Portraits” and “portraits ” with a trailing space are two categories, so you get two tabs holding half the set each.
If the tabs appear but clicking one does nothing, the filtering script has not run. That points at a JavaScript error from another plugin on the same page, or a script optimiser deferring the file. Switch off JS combining for that page and test again.
Frequently asked questions
Does Elementor have a filterable gallery?
Not in the free version. The free Image Gallery widget is a grid with a lightbox. Elementor’s Gallery widget, which can show several named galleries with a filter bar, is on its Pro list.
Can one image sit in two categories?
Yes, with the addon route. Put both category names in the Filter Label field, separated by a comma, and the item shows under both tabs.
Can I change what the All button says?
Yes. All Categories Text in the Settings section sets it, so you can use “All work”, “Shop all” or anything else that fits the page.
Does the gallery have load more or pagination?
No. Every item renders with the page. Keep sets to a size that loads comfortably, or split a large archive across several pages.
Will the gallery work on mobile?
Yes, the grid reflows and the filter buttons wrap. Remember that the Columns value applies to every screen size, so pick a number that still reads well on a phone.
Final thoughts
On Elementor Pro, the Gallery widget gets you there and you install nothing. On a free install, an addon widget does it, and the Filter Label field has the edge for anyone whose work falls into more than one category.
Whichever route you take, spend the time on the category names. Four clear categories cut the grid down to what the visitor came for; nine vague ones just move the problem into the filter bar.
Related reading
