

Índice
O Widget de comparação de imagens de complementos mestres permite que você solte um controle deslizante gratuito de antes e depois em qualquer página do Elementor, sem Elementor Pro e sem assinatura extra de plugins Você instala Master Addons, arrasta o widget para sua página, carrega duas imagens e os visitantes obtêm uma alça arrastável que limpa entre eles.
Este guia percorre todas as configurações: habilitando o widget, adicionando-o a uma página, a regra de dimensão que faz tropeçar quase todo mundo na primeira tentativa, orientação, proporção visível, tipo de alça, estilo e o que fazer quando o controle deslizante se comporta mal no celular Para obter mais ideias de design antes e depois, uma vez que a mecânica clicar, consulte o guia completo de apresentação antes do depois.
O que você precisará antes de começar
- WordPress com Elementor instalado e ativo A versão gratuita do Elementor é suficiente.
- Master Addons for Elementor instalado e ativo O plano gratuito cobre este widget Consulte o guia instalação se o plugin for novo para você.
- Duas imagens cortadas exatamente nas mesmas dimensões de pixel Mais sobre por que em um momento, isso importa mais do que as pessoas esperam.
Passo 1: Activar o Widget de Comparação de Imagens
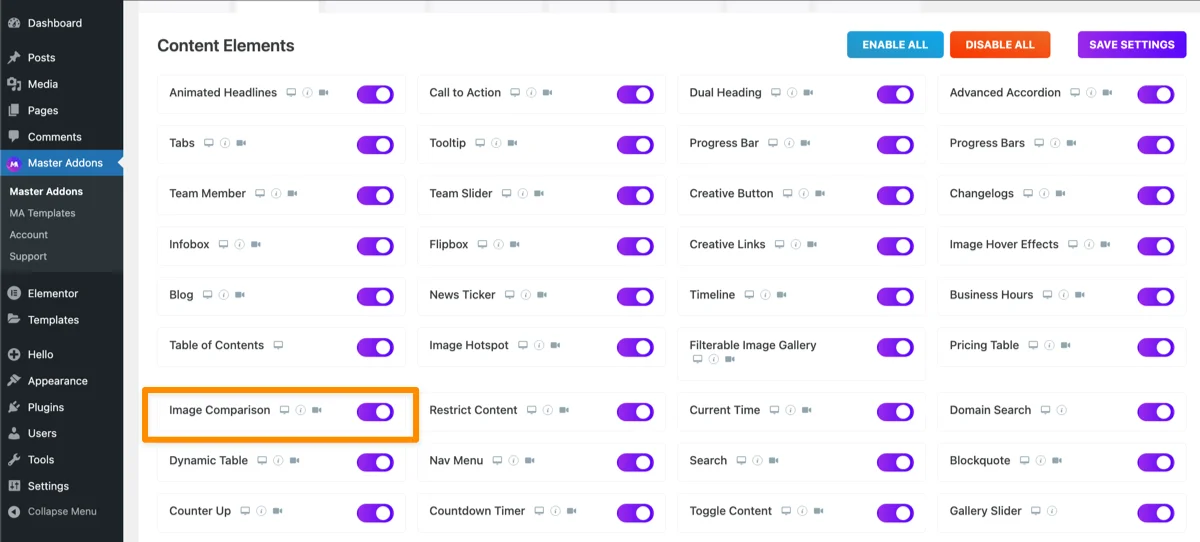
Os complementos mestres são fornecidos com dezenas de widgets e nem todos são carregados por padrão em todas as instalações. Ir para Complementos mestres → Widgets no seu painel WordPress e confirme Comparação Imagem está ligado Se não aparecer no painel Elementos da Elementor um momento depois, é quase sempre por isso.
Passo 2: Adicione o Widget à sua página
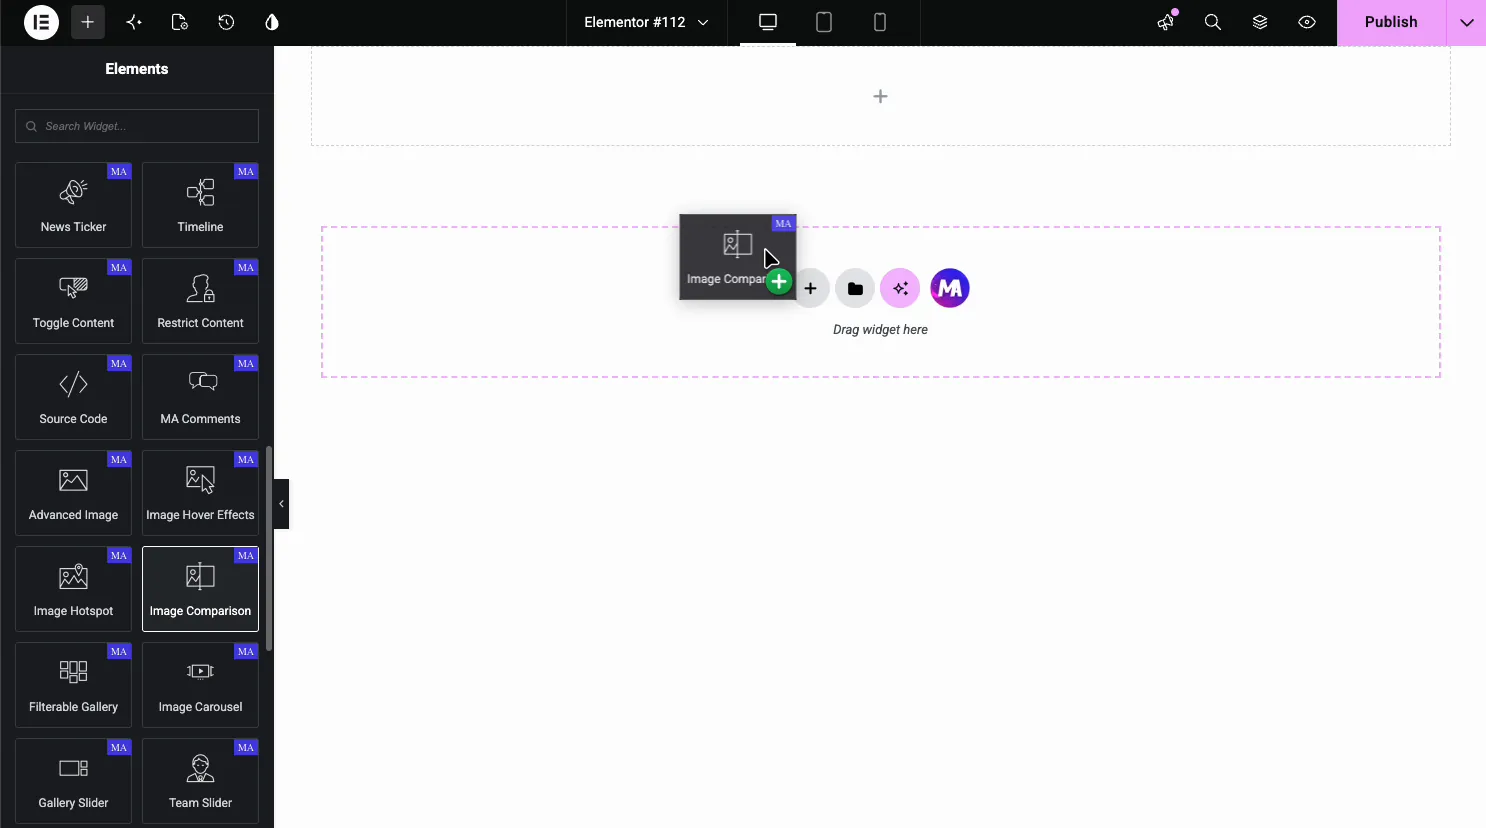
Abra uma página com o Elementor, pesquise Comparação de imagens no painel Elementos (procure o emblema MA roxo) e arraste-o para sua página Ele carrega com duas imagens de espaço reservado e um controle deslizante funcional, para que você possa ver o layout antes de tocar em uma única configuração.
Passo 3: Carregue suas imagens antes e depois
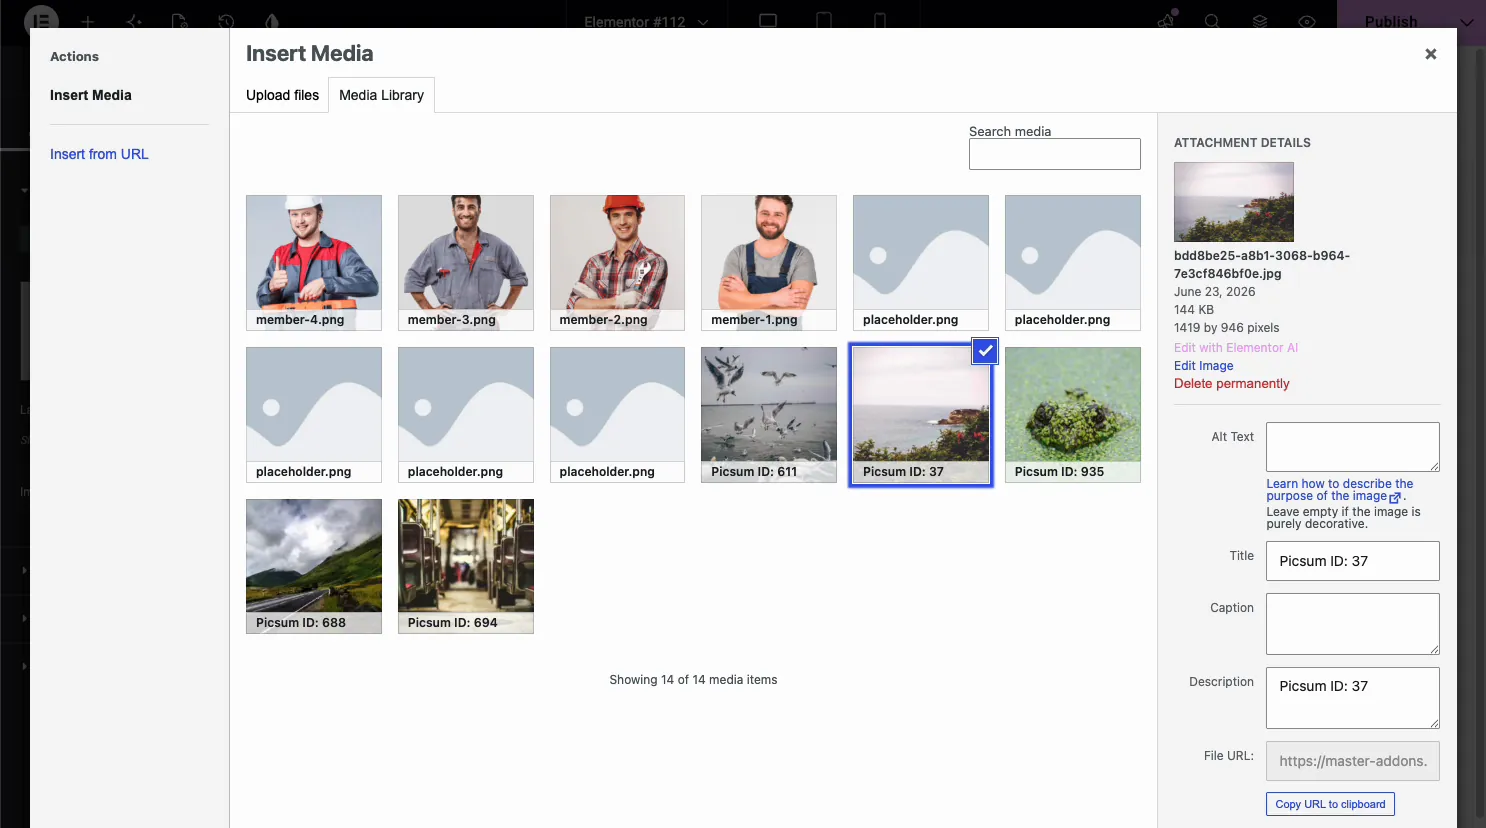
Abrir o Conteúdo tab, então o Imagens seção. Tem um Antes guia e um Depois guia, e cada um tem seu próprio campo Escolha uma imagem, campo Etiqueta e configuração de resolução de imagem Defina a foto anterior na guia Antes, mude para Depois e defina a segunda foto É fácil fazer upload de ambas as imagens para a mesma guia por engano, então verifique qual guia está ativa antes de escolher uma imagem.
Digite um rótulo curto em cada guia se quiser uma legenda de sobreposição, algo como “Before” e “After,” ou “Old Design” e “Redesign.”
A regra que levante todos: combinando dimensões de imagem
Ambas as imagens precisam ter exatamente as mesmas dimensões de pixel, mesma largura e mesma altura Se uma foto for 1600×1000 e a outra for 1200×800, o controle deslizante estica ou corta uma delas para caber, e a comparação parece distorcida ou desalinhada no momento em que alguém arrasta a alça.
Corrija isso cortando ambas as imagens em dimensões idênticas antes de fazer o upload, em qualquer editor que você normalmente usa ou com o próprio WordPress editor de imagens integrado após o upload. definir uma resolução de imagem fixa em ambas as guias do widget ajuda, mas não corrigirá uma proporção totalmente diferente entre as duas fotos de origem.
Passo 4: Defina a Orientação
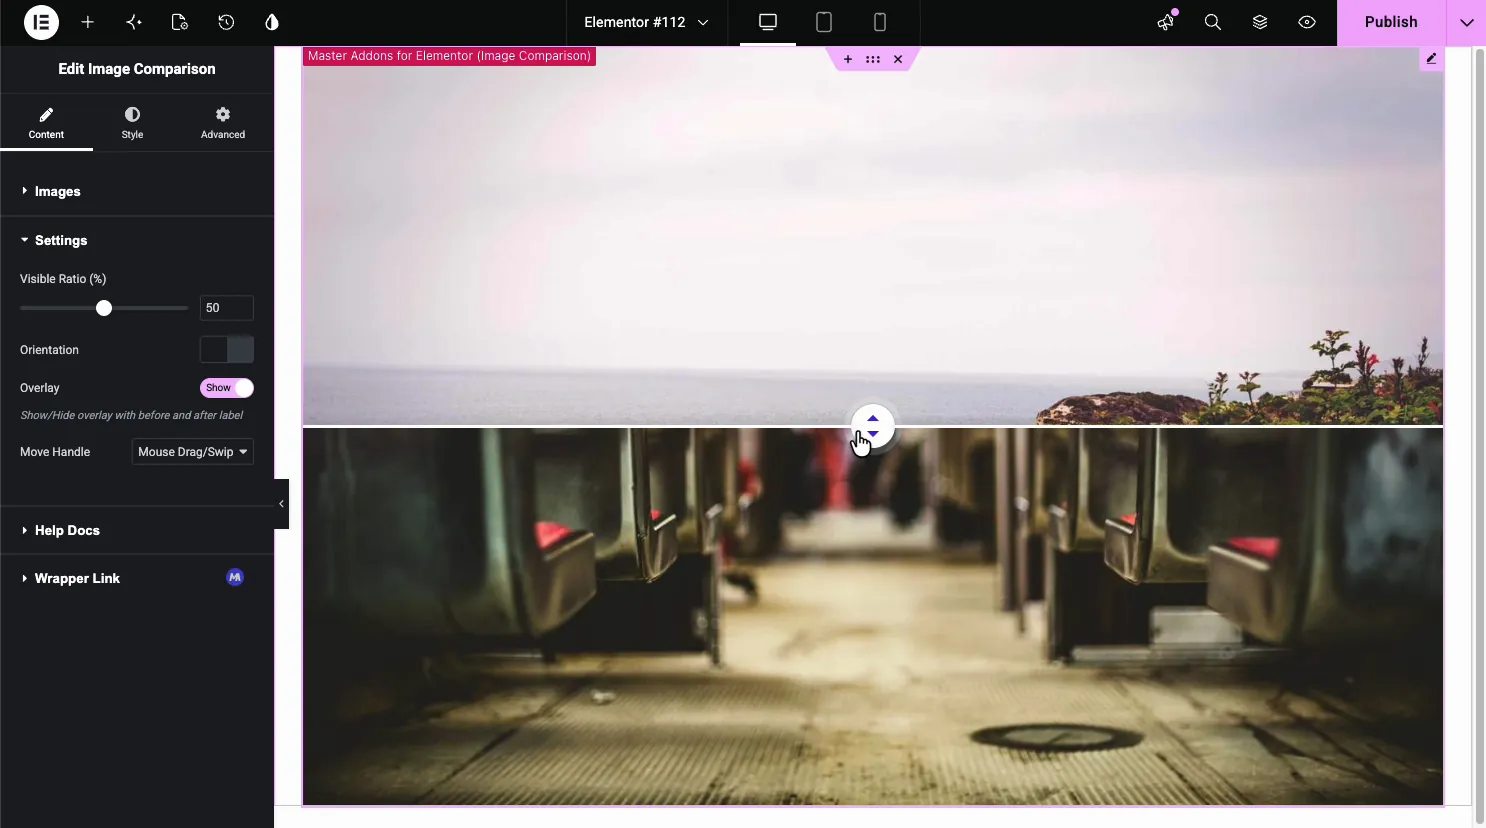
Na seção Configurações, o alternador Orientação alterna entre uma divisão vertical (limpeza esquerda-direita, o padrão) e uma divisão horizontal (limpeza superior-inferior).Vertical se adequa a fotos de paisagem ampla Horizontal geralmente lê melhor para imagens altas ou retrato, uma vez que uma estreita faixa esquerda-direita não mostra o suficiente de uma foto alta de uma só vez.
Passo 5: Defina a proporção visível e o tipo de alça
Visible Ratio define onde a alça fica quando a página carrega, como porcentagem Abra em torno de 50% para uma primeira impressão neutra, ou inicie-a mais perto de um lado se quiser que a imagem antes ou depois domine na carga.
Move Handle decide o que aciona o slide: arraste ou deslize, clique ou paire Arraste funciona bem na área de trabalho, onde os visitantes esperam agarrar e puxar O pairar parece liso em um mouse, mas pode falhar para usuários de toque que nunca pairam, então arraste/deslize ou clique é o padrão mais seguro se muito do seu tráfego for móvel.
Passo 6: Estilo o controle deslizante
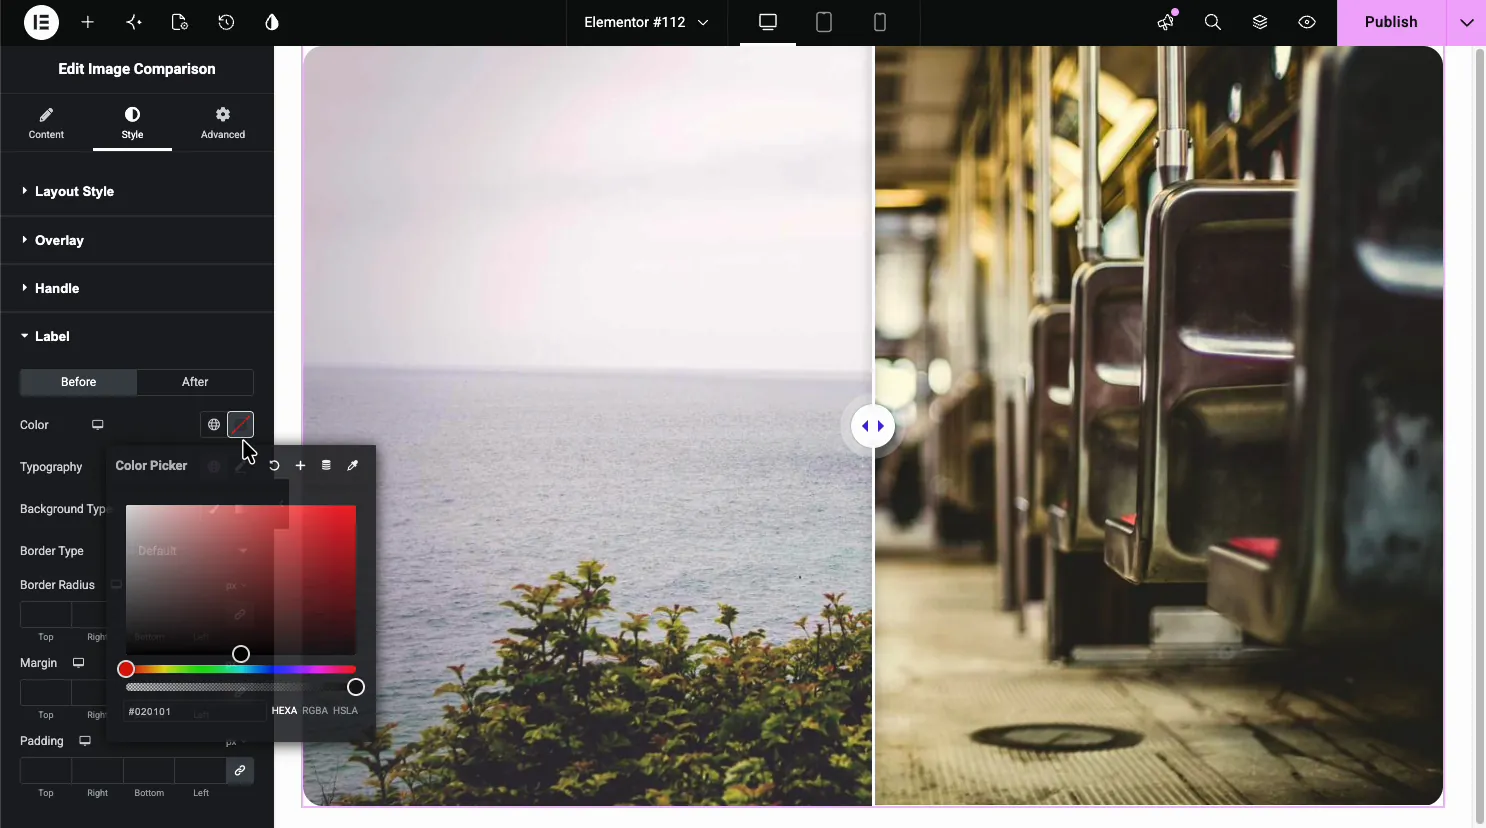
A guia Estilo cobre Estilo de layout (fronteira, raio, sombra de caixa em torno de todo o widget), Alça (cor, tamanho, ícone) e Etiqueta (cor por lado, tipografia, fundo e espaçamento para a sobreposição de legenda).Nada disso muda como o controle deslizante funciona, apenas como parece, por isso é seguro pular em uma primeira passagem e voltar quando a mecânica estiver correta.
Comportamento Móvel e Touch
Elementor é responsivo por padrão, então o widget redimensiona com a janela de visualização sem configuração extra O que realmente precisa de teste em um telefone é a configuração Mover Handle Arrastar e deslizar funcionam naturalmente com um dedo, e clicar funciona também O Hover não existe em uma tela sensível ao toque, então um controle deslizante definido para Hover simplesmente fica parado para visitantes móveis, mostrando apenas a Relação Visível inicial sem nenhuma maneira de movê-lo.
Guia do próprio Elementor sobre design responsivo abrange o básico do ponto de interrupção se você também precisar redimensionar o próprio widget para tablet ou celular, separado do comportamento do identificador.
Complementos mestres versus outras opções de comparação de elementadores
| Opção | Custo | Controle Orientação | Gatilhos Manuseio |
|---|---|---|---|
| Comparação de imagens de complementos mestres | Grátis | Horizontal e vertical | Arraste/deslize, clique, paire |
| Comparação de imagens de complementos essenciais | Nível gratuito disponível | Sim | Arrastar |
| Slider de comparação de imagens antes e depois (WordPress.org) | Plugin gratuito e independente | Limitado | Arrastar |
| Elementor Pro (nativo) | Sem widget integrado | Não aplicável | Não aplicável |
Elementor core, gratuito ou Pro, não tem widget de comparação de imagens nativas de sua própria rota Qualquer que seja a rota que você tomar, você está instalando um widget de terceiros de qualquer maneira, então a comparação honesta é entre esses widgets, não entre um plugin e “built-in Elementor.”
Solução de problemas Problemas comuns
- Widget ausente no painel Elementos: verifique novamente os complementos mestres → widgets e confirme se a comparação de imagens está habilitada.
- O controle deslizante parece esticado ou inclinado: as duas imagens não têm as mesmas dimensões de pixel; corte-os para combinar.
- A alça não se moverá em um telefone: A alça de movimento está definida como Hover; mude para Arrastar/Deslizar ou Clique.
- Os rótulos não estão mostrando: confirme se a alternância de sobreposição nas configurações está ativada e se um rótulo está digitado em ambas as guias.
Se você gosta dessa interação arrastar para revelar, o Widget de ponto de acesso de imagem e o Widget de efeitos de passagem de imagem use um padrão de hover e clique semelhante para anotar ou animar imagens.
Perguntas frequentes
Como fazer um controle deslizante de imagem no Elementor?
Instale um widget que o suporte, já que nem o free nem o Pro Elementor enviam um nativamente O plugin gratuito Master Addons adiciona um widget de Comparação de Imagens que você arrasta para a página, então você carrega duas imagens e define a orientação, a proporção e o identificador das seções Conteúdo e Configurações.
Como adiciono um controle deslizante de imagem no WordPress?
Instale o Elementor mais um plugin de widget como Master Addons e, em seguida, arraste o widget Comparação de Imagens para qualquer página Ele funciona dentro do editor Elementor, em vez de através de uma tela de configurações separada do WordPress, para que não haja um shortcode para lembrar.
Como fazer um controle deslizante de imagem antes e depois?
Carregue uma imagem antes e uma imagem depois de dimensões de pixel idênticas nas guias Antes e Depois do widget e, em seguida, escolha a orientação vertical ou horizontal O widget gera o divisor arrastável automaticamente, você não projeta essa parte sozinho.
Como mostrar antes e depois em um slide?
Um controle deslizante antes e depois empilha as duas imagens no mesmo quadro com um divisor entre elas, de modo que um slide substitui duas imagens estáticas Os visitantes arrastam ou tocam na alça para mover o divisor e revelar mais de uma imagem ou outra.
Como edito um controle deslizante no Elementor?
Selecione o widget Comparação de imagens na tela e suas configurações abertas no painel esquerdo A guia Conteúdo contém as imagens e rótulos, e as seções Configurações e Estilo abaixo controlam a proporção, o comportamento do identificador e o estilo visual. As alterações são visualizadas ao vivo na tela.
Como comparar se duas imagens são iguais?
O widget Comparação de imagens é construído para uma revelação visual, lado a lado, em vez de uma diferença de nível de pixel Se você precisar que as duas imagens sejam alinhadas de forma limpa, o que o widget requer para um resultado limpo, corte-as na mesma largura e altura antes de fazer o upload, em vez de depender do widget para detectar uma incompatibilidade.
Como fazer uma foto antes e depois?
Atire ou exporte a versão antes e depois com a mesma resolução e enquadramento, corte-os para corresponder se não estiverem alinhados e carregue ambos em um widget de comparação como Comparação de imagens de complementos mestres. A correspondência de enquadramento é mais importante do que combinar as configurações da câmera para um resultado convincente.
Leitura Relacionada
